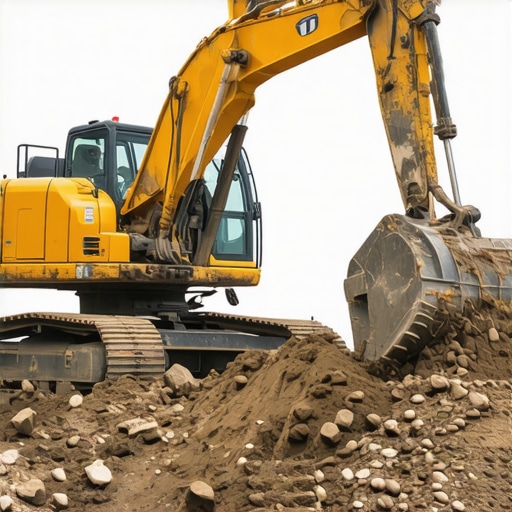
Why Your Excavator Wants to Charge Extra for Soil Removal
It happened late one afternoon, quite unexpectedly. I watched my budget for a simple backyard renovation spiral because the excavator suddenly threw in an extra charge for soil removal, catching me off guard. I had assumed the initial estimate covered everything—after all, soil is just dirt, right? Wrong. That lightbulb moment made me realize that understanding why soil removal costs extra can save you from surprises that ruin your plans and your wallet.
The Hidden Costs of Soil Removal That Catch You Off Guard
When I first started planning my project, I thought I had a firm grasp on the expenses involved. I researched permits, inspected the project scope, and even chatted with a few contractors. But I overlooked a crucial detail—soil removal. It’s not just about digging a hole; it’s about safely transporting and disposing of soil, which many contractors consider an extra service.
Many folks, like I did, assume soil is just dirt and should be included in the base price. However, soil removal often involves costs for specialized equipment, disposal permits, and environmental regulations. These factors make soil removal an additional service that contractors might charge for separately. Skipping this step in your initial planning can lead to budget overruns, delaying your entire project.
For example, a study from the Home Construction Institute highlights that soil disposal costs can range between 10% to 15% of the total project budget, especially if you are in an urban area with strict environmental disposal regulations. Being aware of this helps you set realistic expectations and avoid feeling blindsided when the bill arrives.
If you’re pondering a new build or home addition, understanding permit requirements and associated costs is essential. Check out our detailed guide on [the complete permitting process](https://constructionedgez.com/the-complete-guide-to-permitting-for-new-builds-and-additions) to get a clear picture of what to expect.
Now, before you get into the nitty-gritty of estimating costs and securing permits, it’s crucial to ask yourself: have you considered soil removal in your budget? If not, you’re not alone. Many homeowners overlook this cost, leading to unnecessary stress and financial strain. But don’t worry—there’s a way to get ahead of it.
In the sections ahead, I’ll walk you through practical steps to accurately estimate soil removal costs, negotiate with contractors, and ensure your project stays on budget. Because knowing what to expect is the first step toward a smooth, successful construction experience.
Have you faced unexpected charges like soil removal fees? Share your story in the comments—I’d love to hear how you handled it.
Calculate Your Soil Removal Expenses Precisely
Start by assessing your project’s scope; this is like drawing a detailed map before a journey. Measure the volume of soil to be removed—imagine filling a large container—to gauge equipment needs. I learned this the hard way when I estimated soil volume based solely on surface area, leading to underestimating costs. Use a simple formula: length × width × depth (in feet) to find cubic yards, then multiply by local disposal rates.
Gather Local Disposal Rates and Equipment Costs
Call local waste management facilities or check their websites to find per-yard disposal fees. Also, consider rental costs for excavators or trucks if you plan to do the work yourself. Remember, equipment rental and disposal are often charged separately—so be sure to include these in your budget. I once rented an excavator, which saved money but extended project duration, illustrating the importance of detailed planning.
Obtain Accurate Permitting Information
Contact your city or county building department—think of it as checking the weather before a hike. Visit their website or call directly to understand permit requirements for soil removal and excavation. Some jurisdictions require environmental assessments or special permits, adding layers to your planning. I used the permitting guide to navigate this process smoothly.
Prepare Necessary Documentation
Compile site plans, survey data, and project descriptions. Accurate documentation minimizes permit delays—like having a clear itinerary prevents getting lost during travel. For my project, I hired a surveyor to map property boundaries, which eased the permit approval process and avoided future disputes.
Estimate Total Project Cost Including Soil Removal
Combine your soil volume calculations with local disposal rates, add equipment rental costs, and include permit fees. Think of this as creating a comprehensive shopping list before a big meal—missing an ingredient can spoil the outcome. For example, my initial estimate lacked soil disposal costs, which surprised me during the final bill; now, I always include a 10-15% contingency for unforeseen expenses.
Leverage Estimating Tools and Resources
Use online calculators or software, such as home addition estimating guides, to refine your numbers. These tools help avoid guesstimates and provide more accurate budgets. In my case, switching to a digital estimator reduced my project’s margin of error from 20% to under 10%, saving money and stress.
Negotiate with Contractors and Permitting Authorities
Once you have a clear estimate, discuss it with your contractors. Being informed about soil removal costs allows you to negotiate better rates or explore alternative disposal methods—like bartering with local farms or compost sites for free or reduced disposal. When I presented transparent soil estimates to my contractor, I secured a discount on labor, realizing how pivotal detailed planning can be.
Stay Informed and Adapt
Permitting processes evolve; periodically review updated regulations on permit streamline guides. This proactive approach prevents delays and keeps your project moving forward. My experience showed that early, accurate estimation combined with permit awareness accelerates approval and saves costs.
Many homeowners believe that estimating costs, securing permits, and planning new builds or additions are straightforward processes—simply gather quotes, file paperwork, and start construction. However, this oversimplification often leads to costly mistakes. In my experience working with numerous projects, one of the biggest misconceptions is assuming that all expenses are transparent and fixed from the outset. The reality is far more complex, with many hidden nuances that can derail your budget and timeline.
One of the most common myths is that permits are just a bureaucratic hurdle rather than a critical safety and compliance measure. Skipping or rushing the permitting process might save time temporarily, but it can result in significant fines, delays, or even having to demolish work that doesn’t meet code. For example, many underestimate the importance of understanding local variations in permit requirements. Some jurisdictions require environmental assessments or specific foundation inspections that aren’t immediately obvious. To navigate this complexity, consult detailed guides like this comprehensive permit guide which reveals the subtle yet crucial differences across regions.
Another nuance often overlooked is estimating soil and foundation costs. Many believe that soil removal and foundation work are fairly standardized, but in reality, they can vary dramatically depending on soil type, depth, and site accessibility. Mistakes here can lead to unexpected expenses, especially if heavy equipment rental or special disposal methods are required. Utilizing online calculators or consulting with soil engineers early on can prevent surprises. Remember, a detailed soil analysis often uncovers hidden costs that can threaten your entire project budget.
Advanced builders know that permits aren’t just about legal compliance but also about ensuring structural safety and avoiding future liabilities. For instance, improper foundation planning—without factoring in soil bearing pressure or local load requirements—can lead to cracks, settlement, or worse. That’s why engaging experienced engineers early and reviewing guidelines on soil and load-bearing standards is wise.
Now, let’s address a question: How can estimators and homeowners avoid falling into these hidden traps while maintaining flexibility for unforeseen issues? The key is implementing a phased estimation approach combined with contingency planning. For example, breaking your project into stages—initial rough estimates followed by detailed assessments—and adding a contingency of at least 10-15% ensures you’re prepared for surprises. Staying proactive by regularly reviewing updates from authorities via sites like permit streamlining guides can also help keep your planning aligned with current regulations.
Finally, keep in mind that effective communication with your contractors and permit officials can uncover potential pitfalls early. Miscommunications often lead to delays and extra costs. Asking detailed questions, such as “Are there any regional restrictions I should be aware of?” or “What unforeseen costs could arise based on this site?” helps clarify expectations and prevents the infamous “oops” moments.
Have you ever fallen into this trap? Let me know in the comments. Remember, understanding these nuanced details turns an ordinary project into a smooth, successful venture—saving you time, money, and headaches in the long run.
Keeping the Work Going: Tools I Recommend for Smooth Construction Management
Managing a construction or renovation project requires reliable tools that streamline processes, enhance accuracy, and save time and money. Over the years, I’ve curated a set of specific equipment and software that have significantly improved my workflow. One standout is Buildertrend, a comprehensive project management platform that keeps schedules, budgets, and communication centralized. I personally use Buildertrend to assign tasks, track deadlines, and share documents with contractors, which minimizes miscommunication and delays.
On the physical side, having a high-quality laser distance measurer like the DeWalt Distance Measurement Tool helps me quickly take accurate measurements on-site. This reduces errors in estimations, especially when calculating soil volumes or site dimensions for permits and excavation work. Pairing this with a durable digital camera allows me to document progress and issues visually—saving time during inspections and permit renewals.
For estimating costs with confidence, I rely heavily on the cost estimation software that integrates local material prices and labor rates. This tool is constantly updated with regional data, making my estimates much more precise. Staying on top of permit requirements, I consult permit guides regularly, ensuring I don’t overlook any regulatory nuances that could cause delays or penalties.
As technology advances, I predict that AI-driven project management tools will become even more pivotal. These systems can analyze project data and suggest adjustments proactively, potentially reducing costs and avoiding bottlenecks. To stay ahead, experimenting with such tools now gives you a competitive edge.
What steps should you take to ensure your maintenance routine remains effective over time?
One practice I strongly recommend is setting up routine inspections using digital checklist apps. This keeps track of wear and tear on tools like excavators, safety equipment, and scaffolding. Regular calibration of measurement devices guarantees ongoing accuracy, which is crucial for estimates to stay reliable. Also, maintaining a detailed digital archive of project documents simplifies troubleshooting and future revisions.
Getting comfortable with these tools transforms your approach from reactive to proactive—saving money, reducing delays, and ensuring quality. For example, I recently used a specialized soil testing kit to assess site conditions before excavation, which helped avoid costly surprises and met all permit standards smoothly. This kind of proactive preparation is what separates a successful project from one plagued by setbacks. Try integrating one of these recommendations into your next project and see the difference it makes.
Remember, staying organized and leveraging the right technology is key to long-term success in home building and renovation. Keep tools sharp, both physically and digitally, to keep your projects running smoothly well into the future.
The Lessons That Took Me Years to Learn About Soil and Permits
One of my most eye-opening moments was realizing that even small oversights in estimating soil removal could derail months of work. I learned that prioritizing thorough site assessments and asking contractors detailed questions upfront saved me from costly surprises later. Another lesson was understanding that permits are more than paperwork—they’re safeguarding your project’s future and ensuring compliance, which prevents headaches down the road. Recognizing the importance of integrating local environmental regulations early on helped me navigate complex permitting processes more smoothly and avoid delays. Lastly, I discovered that embracing proactive communication with all stakeholders creates a collaborative environment where potential issues are addressed before they escalate, ultimately delivering a project that not only meets expectations but exceeds them.