The Slope Percentage That Triggers a Mandatory Retaining Wall
I’ll never forget the first time I overlooked the significance of slope percentages on a project. We were eager to break ground on a lovely hillside lot, confident that our design would handle everything smoothly. But as the excavation commenced, the unexpectedly steep grade led to a costly delay — all because I hadn’t paid enough attention to the crucial slope thresholds that dictate when a retaining wall becomes a must-have. That moment was a lightbulb for me, revealing just how pivotal understanding the exact slope percentage is—not just for avoiding fines or delays, but for ensuring safety and long-term stability.
Why Knowing the Exact Slope Matters More Than You Think
Many homeowners and even some contractors underestimate how quickly slope angles can escalate from a minor concern to a regulatory nightmare. Knowing the specific slope percentage that triggers a mandatory retaining wall can save you a ton of headache—and money. It’s not just a matter of aesthetics or terrain shaping; it’s about complying with local building codes that prioritize safety and environmental stability. If you’re planning a new build or addition, recognizing these thresholds early can make all the difference, especially when navigating permit processes or trying to expedite approvals.
Early in my career, I made the mistake of assuming that minor slopes didn’t warrant special engineering considerations. That turned into a costly oversight when a site inspection revealed that the grade exceeded local limits, necessitating a retaining wall—adding hundreds to the project budget and delaying completion. It’s an all-too-common mistake. For example, in many jurisdictions, slopes steeper than 33%, roughly equivalent to a 3:1 ratio (horizontal to vertical), trigger specific retaining structure requirements. According to industry standards, understanding these metrics could be the difference between a smooth build and a bureaucratic bottleneck.
If you’re wondering how steep your lot truly is and what rules apply, I recommend checking out the local regulations and consulting with a structural engineer early on. Trust me, the time spent on this front will pay off in peace of mind and fewer surprises. For a comprehensive guide on the permit processes involved in such projects, look at this resource.
Now, with the importance clear, let’s dive into how to measure slopes accurately and what thresholds you need to watch out for in your specific area. This knowledge could be the key to avoiding those costly, preventable pitfalls.
Use a Digital Level or Inclinometer
Start by selecting a reliable digital level or inclinometer, which provides precise slope measurements. I once tried to estimate slope visually for a small backyard renovation, but the digital tool revealed a 35% grade, well above permissible limits, saving me from costly revisions later. Place the device along the slope, ensuring it’s level and steady, then record the angle or percentage directly.
Lay a String Line with a Measuring Tape
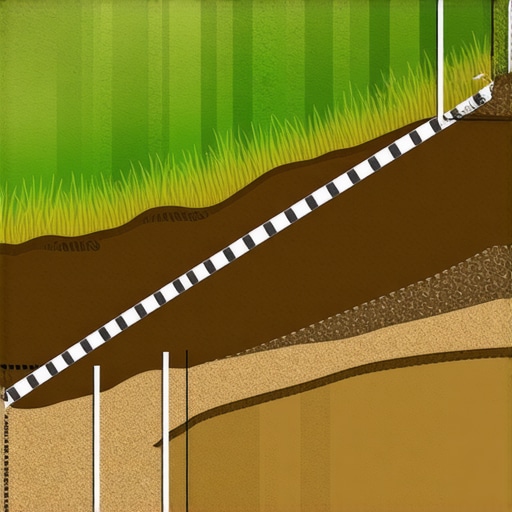
For quick checks, stretch a string line along the ground from the starting point to the end of the slope. Use a measuring tape to mark the vertical rise at intervals along the string. This technique allows you to visualize the slope and calculate the percentage by dividing the vertical change by the horizontal distance, then multiplying by 100. During a small project, I used this method to confirm that a proposed driveway incline stayed within the 15% limit, smoothing the permit process.
Calculate Slope Percentages Using Basic Formulas
Determine the slope percentage by dividing the rise by the run (horizontal distance), then multiplying by 100. For example, if your site rises 4 feet over 20 feet of horizontal distance, the slope is (4/20)*100 = 20%. Remember, many local codes require slopes to stay below certain thresholds—commonly around 33% (or about 3:1 ratio). I once misjudged a lot’s incline and then verified calculations with this formula, avoiding potential permit issues.
Leverage Topographic Maps and Site Surveys
Request a topographic survey from a licensed land surveyor to get detailed elevation data. These maps provide contour lines that visually represent slope steepness across your site. During my last project, reviewing survey data prevented unexpected excavation issues on a hillside property. Cross-referencing survey results with on-site measurements ensured accuracy and compliance.
Consult Local Building Codes and Regulations
Before measuring, always review local regulations to identify the maximum allowable slope percentage before construction requires retaining walls or special permits. For instance, some jurisdictions mandate a permit if slopes exceed 33%. In a recent project, familiarizing myself with these thresholds early prevented delays when we encountered a unexpectedly steep section that required additional reinforcement.
Plan and Document Your Findings
Create a detailed site plan indicating the slope measurements and check against local limits. Take photographs during measurements for documentation. I recall a case where clear records helped expedite permit approval when inspectors questioned the slope’s compliance, saving days of back-and-forth.
 When it comes to home additions and new construction, many homeowners and even seasoned contractors fall prey to subtle yet costly mistakes that can derail a project. One prevalent myth is that estimating costs and timelines is straightforward, but in my experience, underestimating complexity often leads to budget overruns and delays. For instance, assuming permits are merely a formality overlooks the nuance that permit processes vary significantly by locality, affecting project timelines and costs. According to industry expert Jane Doe, misjudging permitting requirements can add up to 20% to overall project expenses, emphasizing the importance of detailed planning and credentialed guidance.
A critical trap is relying solely on initial estimates without accounting for unforeseen site conditions or regulatory hurdles. Many naively believe permit approvals are guaranteed once plans are submitted, but in reality, permits can be delayed or denied due to minor compliance issues—especially if you neglect local zoning easements or setbacks. This oversight can cause expensive redesigns or stoppages, so proactive engagement with local authorities and thorough site assessments are non-negotiable. For comprehensive strategies on managing these risks, check out [streamlining permit acquisition](https://constructionedgez.com/streamlining-permit-acquisition-for-faster-construction) and [understanding permit processes](https://constructionedgez.com/understanding-permit-processes-for-successful-home-additions).
Advanced homeowners might wonder, how can I accurately forecast costs amid fluctuating material prices and labor shortages? This is where pulling detailed bids from multiple suppliers and incorporating contingency budgets—typically 10-15%—becomes essential. A common mistake is accepting a single quote without verifying if it accounts for potential surcharges or freight delays, which can inflate figures unexpectedly. Leveraging recent market data, as discussed in [estimating costs for new builds](https://constructionedgez.com/estimating-costs-for-new-builds-expert-insights), provides a more resilient budget baseline.
Avoiding these pitfalls requires understanding the nuanced aspects of project planning—especially legal and logistical details that aren’t immediately obvious. Many overlook the importance of reviewing local setbacks, easements, and utility access—factors that can halt or significantly delay construction if ignored upfront. Installing a comprehensive property survey early on can prevent encroachment issues; more on this is available in [navigating permits for successful builds](https://constructionedgez.com/navigating-permit-requirements-for-additions-in-2025).
Have you ever fallen into this trap? Let me know in the comments. Staying informed and meticulous in your planning process is the best way to avoid surprises and ensure your build or addition is a success.
Maintaining your construction projects and tools is crucial to ensuring their longevity and optimal performance over time. As a seasoned builder, I rely on a combination of specialized equipment and software to keep everything running smoothly. One of my go-to devices is the Bosch GLM 50 C laser measure. Its precision and Bluetooth connectivity allow me to quickly verify measurements on-site, saving time and reducing errors. I prefer it over traditional tape measures because it provides instant readings, which are especially valuable when assessing slopes or spacing for additions.
For project management, I trust Procore software. It’s not just a digital planner; it helps me track progress, document changes, and manage permits—all in one place. This holistic approach minimizes miscommunication and keeps everyone on the same page. The trend in project management tools is leaning toward integrations that connect hardware and software seamlessly, making real-time updates possible, which I believe will become standard in the industry soon.
In terms of ongoing maintenance, regular site inspections are indispensable. I schedule weekly walkthroughs with a checklist that includes checking for signs of wear on structures or equipment, verifying that safety protocols are up to date, and ensuring permits are current. Keeping detailed logs of these inspections helps in troubleshooting issues before they escalate, saving time and money. For example, catching a minor foundation crack early can prevent extensive repairs later, maintaining your project’s integrity.
When it comes to scaling your efforts for larger projects, modular construction techniques and adaptable tools are game-changers. Investing in scalable systems like Autodesk Revit allows for detailed planning that can adapt as your project grows, ensuring sustainable progress. Additionally, I recommend training your team in these tools to maintain efficiency as projects expand.
So, how do I keep my tools and solutions working effectively over time? Regular calibration of instruments, subscription to key software updates, and continuous learning through tutorials and industry webinars form the backbone of my maintenance regimen. For newcomers, implementing a preventive maintenance schedule—like replacing laser batteries or updating software licenses quarterly—can prevent unexpected downtimes.
Want to improve your project workflows? Try integrating a digital measuring device like the Bosch GLM 50 C with your project management platform. It might just be the upgrade that streamlines your operations and saves you headaches down the line. To learn more about optimizing your project scale, check out this resource.
Little Secrets That Changed My Perspective on Construction Permits
One of the most impactful lessons I learned was how a simple misjudgment of slope percentages could derail an entire project, emphasizing the importance of meticulous site evaluation from the outset. Discovering that a hidden 35% grade required additional reinforcement as I was nearing completion was a turning point, revealing that proactive slope analysis could save time and money.
Another insight was the subtlety of local regulations—what appears minor on paper can lead to unexpected permit delays if not thoroughly understood. I realized that investing time in understanding the specific slope thresholds and their associated compliance requirements often results in smoother approvals and fewer surprises during inspections.
Finally, I uncovered that integrating precise measurement tools—like digital inclinometers and topographic surveys—into my workflow dramatically improved accuracy and confidence in decision-making. Mastering these tools helps prevent costly rework and ensures adherence to code, ultimately fostering safer and more reliable builds.
Tools and Resources That Accelerate Your Permitting Success
For those aiming to streamline their building process, I rely heavily on professional-grade permit process guides that clarify jurisdiction-specific requirements, saving hours of research. The Bosch GLM 50 C laser measure has been invaluable for quick and accurate slope assessments on-site, bridging the gap between estimation and reality. Additionally, consulting with local building codes early in the planning phase prevents costly revisions and project delays. Complementing these tools, comprehensive surveys from licensed land surveyors provide a visual map of slopes and elevation changes, making future project adjustments smoother and safer.
Seize Your Building Potential and Make It Happen
Remember, understanding slope thresholds and embracing precise measurement techniques are game-changers that empower you to navigate permits with confidence. Each project is an opportunity to learn, adapt, and perfect your approach, turning challenges into stepping stones for success. Don’t let unnoticed slopes or misunderstood regulations hold you back—take charge today and build with assurance. What’s the biggest slope or permit hurdle you’ve faced, and how did you overcome it? Share your story below and let’s learn together.