Why Your Driveway Grade Might Violate Local Drainage Rules
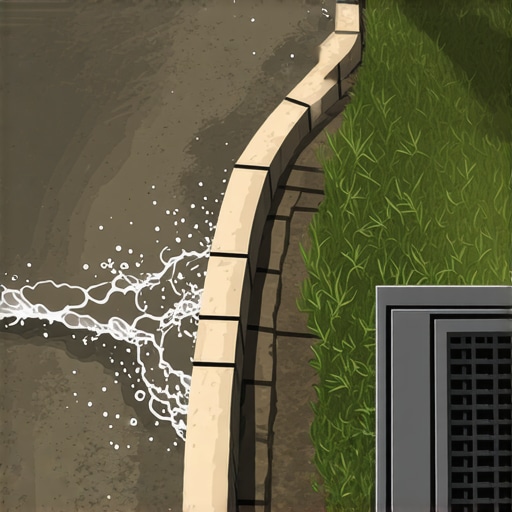
I remember the exact moment I realized my driveway was causing more trouble than I thought. I had just finished pouring a fresh layer of asphalt after a weekend of hard work, only to discover a few days later that water was pooling at the edges, creeping into my garage, and potentially violating local drainage codes. That lightbulb moment made me question whether I had overlooked critical regulations during my build.
Why Your Driveway Grade Matters More Than You Think
One of the most overlooked aspects of constructing or modifying a driveway is its slope or grade. It might seem like a minor detail, but it can have significant consequences, from water damage to hefty fines. When the driveway isn’t graded correctly, stormwater might flow towards your foundation or into neighboring properties, creating a headache for everyone involved.
Research shows that poorly graded surfaces are among the leading causes of property water damage and runoff issues. According to the EPA, improper drainage can lead to increased water pollution and erosion, costing homeowners and municipalities thousands of dollars annually. Therefore, understanding and complying with local drainage rules is not just about following laws—it’s about protecting your investment and neighborhood.
Have You Ever Faced This Problem? Maybe You’re Unknowingly at Risk
Like many folks I’ve talked to, I underestimated the importance of proper driveway grading early on. I didn’t realize that a simple slope away from the house, adhering to local standards, could prevent so many future problems. Not having correct permits or understanding of drainage rules can lead to dangerous rainwater pooling, foundation issues, or even legal trouble.
In my initial project, I made the mistake of assuming that the existing slope was sufficient. Turns out, I skipped a crucial step—checking the precise specifications outlined in local codes. That oversight could have cost me heavily, both financially and structurally.
If you’re about to build a new driveway or modify an existing one, it’s essential to get this right from the start. Errors here are common but avoidable with proper planning and knowledge. For thorough guidance, you might want to explore resources like [Understanding Permit Processes for New Building Projects](https://constructionedgez.com/understanding-permit-processes-for-new-building-projects) or [Top Estimating Strategies for Accurate Project Budgets](https://constructionedgez.com/top-estimating-strategies-for-accurate-project-budgets).
Now, let’s dive into how to ensure your driveway meets all drainage and grading standards—saving you headaches and ensuring your property remains safe and compliant.
Precisely Measure Your Property’s Slope
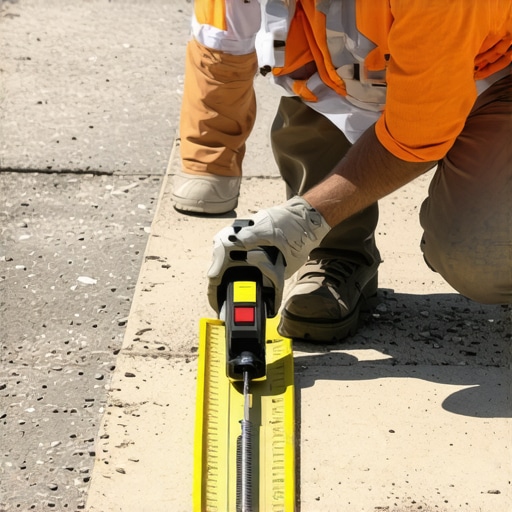
Begin by using a long level or a laser level to assess the existing slope of your driveway. I once used a 10-foot level and a wooden straightedge to gauge the current grade; it may seem old-fashioned but provided the accuracy I needed. Ensure the slope directs water away from your foundation, ideally a minimum of 2% grade, meaning 2 feet of drop over 100 feet of distance. Regularly check your measurements from various points to confirm consistency.
Consult Local Drainage and Grading Regulations
Before making any adjustments, review your local building codes and drainage rules. Many municipalities require specific slopes and drainage solutions—skipping this step can lead to costly fines or legal issues. Visit the town’s planning department website or contact them directly at this link. I once thought I could take shortcuts, but an hour on their site clarified my slope requirements and saved me from potential compliance headaches.
Design an Effective Slope Plan
Create a detailed plan outlining the new slope, considering existing landscaping and drainage paths. Think of this as plotting the water’s journey away from your house—like designing a gentle slide rather than a steep drop. Use stakes and string to visualize the planned grade, ensuring a consistent slope. When I laid out my plan, I realized that my driveway was too flat near the garage, causing pooling; raising that section a few inches helped redirect water properly.
Adjust the Gravel and Subgrade
Remove existing material in areas needing a higher slope. Compact the subgrade thoroughly using a tamper or compactor—this step is critical to prevent future settling. For large adjustments, add gravel in layers of 2-3 inches, each compacted before adding the next. I observed that failing to compact properly led to uneven surfaces a year later, emphasizing the importance of this step. Ensure the final subgrade is uniformly sloped according to your plan, checking frequently with a level or transit.
Apply and Compact Your Surface Material
Overlay the prepared subgrade with asphalt, concrete, or pavers, following manufacturer specifications. Use screeds or straightedges to smooth and set the surface, maintaining your designed slope. During my project, I used a straightedge to guide the asphalt pour, preventing dips or flat spots that could trap water. Heavy compaction after surface installation is essential to avoid future shifts or cracks.
Test Your Drainage System
After completing surface adjustments, conduct a water test by running a hose along the driveway to observe runoff patterns. Ensure water flows away from foundation and towards designated drainage points. I once poured a hose run along my driveway and was relieved to see water shedding properly; this simple test confirmed my efforts succeeded. Adjustments may be necessary if water pools or levels aren’t as intended.
For seamless coordination and to ensure full compliance, consider reviewing permit processes related to driveway modifications at this resource or consulting with local officials. Proper grading is an investment that protects your property and saves money in the long run, so take your time with each step to get it right.
 When it comes to new builds and home additions, many assume that following the basic permit application steps guarantees a smooth process. However, seasoned contractors and experienced homeowners know that there are nuanced pitfalls that can trip up even the most diligent project planners. Let’s delve into some advanced insights that can help you avoid costly errors and get your project on track.
Why Relying Solely on Permits Can Be Deceptive
Many believe obtaining the necessary permits is the final hurdle before starting construction, but in reality, permits are just the tip of the iceberg. The actual process of securing approval often involves hidden requirements like soil tests, engineering reports, or specific setbacks, which aren’t always clearly outlined in initial permit descriptions. Overlooking these can lead to project delays, fines, or even the need to tear down work already completed. For example, a common mistake is assuming a standard permit covers all structural components, but local codes might demand an engineer’s certification for load-bearing modifications—ignoring this can ignite costly inspector disputes.
To navigate this subtly complex landscape, review the detailed permit requirements and consult official guidelines, like those found at this resource. Engaging with the permitting authority early and discussing specific project nuances helps reveal these hidden obligations and ensures you’re not caught off guard.
How Overestimating or Underestimating Costs Derails Projects
Estimating accurately is essential, yet it’s a common trap to rely on rough figures or outdated averages. While many use third-party calculators or generic quotes, these often fail to account for site-specific factors like soil condition, accessibility, or regional price fluctuations. For instance, underestimating foundation complexity due to unforeseen soil issues can inflate costs by thousands, delaying your timeline and stretching your budget thin.
Advanced estimators dive deep into project specifics, including detailed material quality, labor rates, and contingency allowances—usually about 10-15% of the total budget. For expert-level strategies, check out this comprehensive guide. Employing a detailed, itemized approach reduces surprises and gives you leverage during negotiations with contractors. Remember, a minor miscalculation early on can snowball into major hurdles later.
Can Technical Knowledge Improve Your Building Outcomes?
A frequent myth is that detailed technical knowledge isn’t necessary for homeowners. In truth, understanding specific building principles, like load calculations or drainage requirements, empowers you to ask the right questions and spot red flags. For example, neglecting drainage slope details may lead to water pooling and foundation issues—problems that could have been prevented with a careful review of local standards.
To sharpen your expertise, explore resources such as permit fast-tracking tips and consult with local building officials at this contact page. This knowledge allows you to participate actively in planning and troubleshooting, rather than passively accepting contractor estimates or permits that might overlook critical nuances.
Have you ever fallen into this trap? Let me know in the comments. Navigating the complex world of permits and project budgeting requires vigilance and a willingness to dig beneath surface assumptions. By understanding these hidden nuances, you can safeguard your investment and streamline your building experience.Maintaining your construction projects over time requires more than just initial planning; it demands the right tools, consistent upkeep, and strategic approaches to ensure durability and compliance. One of the most reliable practices I incorporate is investing in high-quality laser levels. Unlike traditional bubble levels, laser levels provide precise, level reference lines over long distances, which is crucial when monitoring ongoing settlement or settling of surfaces. For example, during driveway or foundation maintenance, a laser level helps detect minute shifts, preventing costly repairs later. I personally prefer the Bosch GLL 3-50, because of its accuracy and user-friendly interface, which I use weekly to check grading slopes and verify excavation quality. Prediction for future trends indicates a rise in smart, IoT-enabled tools that automatically monitor structural integrity and send alerts, reducing manual inspections. How do I keep these tools working effectively over time? Regular calibration is key. For laser levels, I ensure to calibrate according to the manufacturer’s schedule—usually every six months—and keep batteries well-maintained to avoid inaccuracies. For software tools, I stay updated with the latest firmware and backups of project data; cloud-based project management software like Procore simplifies long-term tracking of permit compliance and project modifications. When it comes to long-term results, creating maintenance checklists tied to your initial building plans helps catch issues early. I document any adjustments with photos and measurements, storing them digitally for easy reference during future inspections or scaling projects. Speaking of scaling, tools like modular surveying kits allow you to expand your measurements’ scope without significant additional investment, enabling proactive management as projects grow. Make sure to incorporate routine inspections into your schedule, especially after major weather events that can impact grading or drainage. Regular maintenance not only prolongs the lifespan of your structures but also ensures you stay compliant with evolving local regulations. Visiting resources like [Understanding Permit Processes for Seamless Home Additions](https://constructionedgez.com/understanding-permit-processes-for-seamless-home-additions) can help you align your ongoing inspection routines with permit requirements, avoiding costly rework. By adopting these tools and habits, you set a foundation for successful project management that endures the test of time. Don’t hesitate to try implementing laser level calibrations next week, and see how early detection of minor shifts can save you substantial repair costs over the years.Throughout my construction journey, one lesson stands out: meticulous attention to driveway grading and permit compliance can save you from significant headaches and expenses. I once underestimated the power of proper slope and neglected to verify local drainage rules, leading to costly water pooling and potential fines. These experiences taught me that deep personal knowledge and thorough planning are invaluable—nothing beats understanding your property’s nuances and the specific regulations that apply. By sharing these insights, I hope to empower you to avoid common pitfalls and develop a detailed, compliant approach from the outset.