Why Your Flooring Quote Is Higher Than the Square Footage
I remember the day I first received a flooring estimate that made me do a double take. The price per square foot seemed reasonable, but when I looked at the final number, it was significantly higher than I expected. It felt like I was being charged for a luxury upgrade I didn’t ask for. That lightbulb moment made me realize there’s more to a quote than just the square footage of your space.
Unpacking the Hidden Factors Behind Higher Flooring Quotes
As homeowners, we often focus on the size of our space when getting estimates. But in reality, several hidden factors can cause the final quote to be much higher than the simple square footage suggests. These include subfloor conditions, the choice of materials, the complexity of the job, and even the location of your property.
For instance, if your subfloor isn’t level or requires additional repairs, that can add to your costs. Similarly, opting for high-end hardwoods or intricate patterns can significantly increase the price. Even the layout—such as multiple rooms, tight corners, or unusual shapes—can make a installation more labor-intensive and expensive.
From my early days of estimating, I made the mistake of assuming that price per square foot was the whole story. I didn’t account for these additional variables, which often trip up first-timers. It wasn’t until I learned to ask about these specifics that I could better predict the actual costs.
Did you know that according to a 2023 report from the National Wood Flooring Association, hidden costs like subfloor preparation can add up to 20% to your project’s budget? That’s a staggering figure, highlighting the importance of understanding what’s behind the quotes you receive.
So, if your recent flooring quote feels way out of line with your expectations, you’re not alone—and there’s good news. By recognizing the factors that influence pricing, you can avoid surprises and get a more accurate estimate. Ready to learn the insider tips that will help you tame your flooring budget? Let’s dive into the practical steps for getting it right.
Get Precise Measurements and Clarify Details
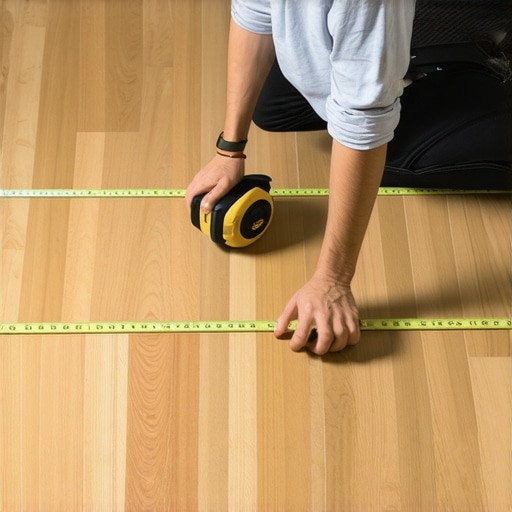
Start by measuring each room meticulously, including variations in shape and size. Use a tape measure or a laser device for accuracy. When requesting estimates, specify the exact type of flooring material and finish you want. This reduces guesswork and helps contractors provide a more precise quote.
Break Down the Project Into Specific Components
Divide your project into distinct parts: materials, subfloor preparation, installation labor, and finishing. For example, if your subfloor isn’t level, discuss the cost of repairs separately. This approach makes it easier to spot hidden charges and compare bids effectively.
Inspect Subfloor Conditions Early
Before signing an estimate, have a professional assess your subfloor. If repairs or leveling are needed, get a separate quote. Think of it like checking the foundation of a house before buying furniture—knowing the underlying support prevents costly surprises later.
Request Itemized Bids and Clarify Assumptions
Always ask for detailed, itemized estimates. Confirm whether the price includes additional costs like moving furniture, removal of old flooring, or special pattern installation. Clarify assumptions—such as whether the contractor needs to purchase special adhesives or underlayment—to avoid unexpected charges.
Understand Material Options and Their Impact
Material choice significantly influences cost. For instance, selecting engineered hardwood versus solid hardwood can affect price and installation complexity. Ask for samples and pricing options, and verify if the bid accounts for delivery delays or custom orders.
Account for Complex Layouts and Unique Spaces
Irregular room shapes, small spaces, or multiple levels increase labor time. Communicate these details upfront. When I faced a custom corner pattern in my living room, I clarified the extra labor involved—ensuring the quote accurately reflected the added complexity, much like planning for a puzzle that needs extra pieces.
Inquire About Hidden or Extra Costs
Watch for potential hidden fees, such as subfloor repairs, transition strips, or cleanup. Some contractors add charges for moving appliances or accepting specific payment methods. Always ask, “Are there any costs not included in this quote?” as part of your negotiation.
Compare Multiple Bids with Confidence
Gather at least three detailed estimates. Analyze what each includes and excludes. Use a comparison checklist to identify discrepancies. Remember, the cheapest bid might cut corners, while the most expensive may overstate costs. Focus on the value offered, not just price.
Leverage Tech for Accurate Measurements
If you’re comfortable, use smartphone apps or laser measure tools to double-check room sizes. This DIY step helps ensure contractors’ measurements align with yours, avoiding price inflations based on incorrect data.
Maintain Open Communication and Documentation
Keep all correspondence in writing. Confirm the scope, materials, and timeline in emails or signed agreements. If scope changes occur, get new estimates before proceeding. Think of it as keeping receipts for a purchase—clarity now prevents disputes later.
Many homeowners and even some contractors believe that getting an accurate estimate for new builds, permits, and additions is simply a matter of calculating square footage and obtaining a few quotes. However, this oversimplification can be perilous. One common misconception is relying solely on initial bids without understanding the nuanced factors that influence costs and timelines. For example, a bid might look competitive but hide complex permit requirements or unseen structural challenges that could derail your project, causing delays and budget overruns.
A particularly sneaky trap is assuming that permits are a straightforward, flat fee process. In reality, permit costs and approval times vary dramatically based on local regulations, environmental considerations, and your specific project’s scope. For instance, some jurisdictions impose additional inspections or special zoning restrictions that can exponentially increase costs if overlooked. You can learn more about the permit process and how to navigate it effectively in this comprehensive guide.
Another advanced mistake is neglecting to factor in the complexities of your home’s existing structure or site conditions. For example, inadequate site assessments or underestimating the impact of soil conditions can result in unexpected foundation costs or delays. According to a study by the American Society of Civil Engineers, nearly 30% of construction delays stem from unforeseen site conditions or permit issues, emphasizing the importance of thorough pre-construction evaluations.
A crucial question for seasoned builders and homeowners alike is: How can you proactively identify hidden hurdles before they explode your budget? The answer lies in detailed, expert-level planning—such as hiring structural engineers early, requesting comprehensive inspections, and verifying local permit requirements thoroughly. For more advanced strategies, visit this resource that delves into mastering the permit process and estimating for additions.
Don’t let common myths and oversights undermine your project. Recognize that beneath the surface, many factors affect your build’s success—factoring in site-specific challenges, understanding permit intricacies, and avoiding simplistic assumptions will save you money and frustration. Have you ever fallen into this trap? Let me know in the comments and share your experiences with hidden project costs.
Maintaining a new build, permit compliance, and eventual expansions requires more than initial planning. It involves leveraging the right tools, establishing reliable routines, and understanding long-term impacts. One of my go-to strategies is adopting integrated project management software like Procore, which streamlines communication, document sharing, and task tracking across all project phases, ensuring nothing slips through the cracks.
In my experience, using laser measuring tools such as the Leica Disto series has been invaluable for quick, accurate site measurements, especially during additions or modifications. This accuracy helps avoid costly rework and keeps estimates aligned with actual site conditions. Additionally, maintaining detailed logs using cloud-based platforms like Smartsheet allows me to track progress, changes, and responsibilities over months or years, fostering clarity and accountability.
Predicting where Construction tech is headed, I see a significant move toward AI-powered project scheduling and risk assessment tools that will automatically flag potential issues before they become expensive problems. Staying ahead means adopting these advances early and integrating them into your workflow.
How do I maintain compliance and quality assurance over time?
Regularly scheduled inspections, digital checklists, and continuous education are key. I rely on mobile apps like Fieldwire to facilitate on-the-spot quality checks and to keep everyone on the same page. Coupling this with ongoing education about new codes or permit regulations—like the updates found in this resource—ensures that your project remains compliant through its lifecycle. To truly excel, I recommend setting up routine audits of your records and processes every quarter, a practice that keeps your entire team sharp and your project on the right path.
Finally, don’t overlook the power of mastering permit management with software like Buildertrend. The more integrated your approach, the smoother your project flow, from initial build to long-term adjustments. Try establishing a digital calendar that tracks permit renewals, inspections, and maintenance reminders—these small steps make a big difference in avoiding delays and penalties.
Remember, consistent maintenance and smart tools are your best allies in keeping your project on track long after the initial build. For more advanced tips on estimating and managing permits, check out our comprehensive guide.”

The Hardest Lesson I Learned About New Build Estimating
One of my most profound realizations was that initial bids often hide complexities, leading to budget surprises. A quote that seems straightforward can conceal hidden costs like permit fees or unforeseen site conditions, so always look beyond the surface.
3 Myths About Permitting That Held Me Back
I used to believe permits were just a bureaucratic hurdle, but I discovered they directly impact project timelines and costs. Skipping detailed permit research can cause delays and extra fees, so investing time here saves money later.
What Experts Won’t Tell You About Cost-Effective Renovations
Many professionals avoid discussing the importance of thorough site assessments, which can reveal hidden issues like soil instability or structural challenges. Addressing these early prevents costly modifications during construction.
Curated Resources for Smarter Building and Estimating
- Construction Edge’s Step-by-Step Guides: These offer detailed insights into estimating and permitting processes, essential for avoiding surprises. I trust them because they incorporate real-world scenarios.
- Procore Project Management Software: This platform streamlines communication and document sharing, helping me stay organized throughout complex projects.
- Local Permit Authority Websites: Staying updated with local regulations ensures compliance and prevents delays. I review these regularly for changes that could affect my projects.
- BuildingSmart Estimation Approach: A methodology emphasizing accuracy and transparency that I’ve adopted to improve bid reliability.
Your Next Step Toward Confidence and Success
Embarking on a new build or renovation is a journey filled with learning. The key is to stay curious, ask detailed questions, and use trusted tools and resources to inform your decisions. By honing these skills, you’ll not only save money but also enjoy peace of mind during your project’s lifecycle. What’s the biggest lesson you’ve learned when estimating costs or managing permits? Drop your experiences below and let’s grow together!