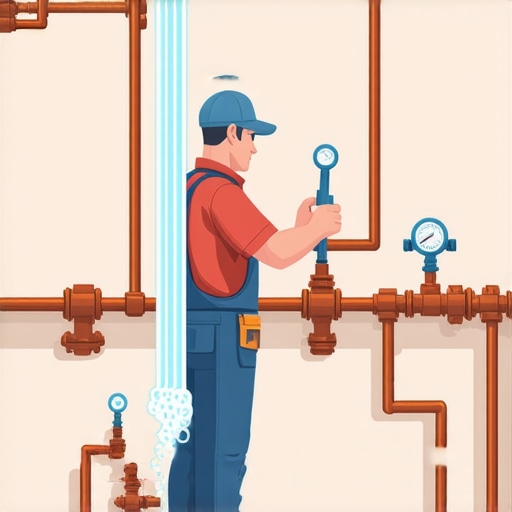
Why Your Second-Floor Plumbing Plan Needs a Flow Test
Last summer, I vividly remember discovering a hidden headache in my newly renovated home. I was inspecting the second-floor bathroom, and suddenly, the toilet’s flush was sluggish. Turns out, despite careful planning, a simple oversight in the plumbing design could have led to major issues down the line—issues that I could have easily avoided with a quick flow test. That lightbulb moment made me realize how crucial it is to thoroughly test your plumbing plans early in the process.
The Critical Role of a Flow Test for Second-Floor Plumbing
Many homeowners and builders overlook the importance of conducting a flow test during the design and installation phases of second-floor plumbing. A flow test is like a health check-up for your plumbing system; it ensures that water flows correctly, pressure is adequate, and there are no hidden blockages or leaks that could cause headaches later. Skipping this step is a gamble—one that can result in poor water pressure, clogs, or even costly pipe failures.
From my own experience, I learned that early testing can save you time, money, and frustrations. When I realized my plumbing wasn’t tested properly before final inspection, I also understood why so many projects run into delays. The good news is, with the right precautions and steps, you can catch these issues before they turn into disasters.
Did you know that according to a study by the American Society of Plumbing Engineers, undetected plumbing deficiencies can increase the risk of water damage by up to 70%? That’s a powerful statistic that underscores the importance of diligent testing.
If you’re planning a new build, renovation, or even an addition, understanding why a flow test matters is just the beginning. Now, let’s dive into how you can ensure your second-floor plumbing is up to par—saving you headaches and money in the long run.
Schedule Your Test Early in the Build Process
Coordinate with your plumber to set a date for the flow test before walls are closed in. This allows easy access to pipes for testing, reducing costly tear-outs later. I once scheduled my test right after rough-in, saving me from a postponed drywall installation and unexpected delays. Confirm that all fixtures are connected and operational, and inform your inspection authority of the scheduled test to ensure compliance.
Prepare the Plumbing System for Testing
Shut off all outlets, then fill the system with water to check for leaks. This process is like giving your plumbing a preliminary health check—detecting issues early prevents larger problems down the line. Use a transparent hose or visual indicators to observe water flow and pressure levels. In my project, I noticed a slow drain during this step, which allowed me to pinpoint a partially blocked pipe before final inspections.
Conduct the Flow Test Precisely
Open the supply valve fully, then run water through each fixture sequentially, observing water flow and pressure. Use a pressure gauge to monitor for consistent pressure; fluctuations indicate potential issues. I used a portable pressure gauge borrowed from a local supply store, ensuring accurate readings. Record all measurements for reference, especially if discrepancies arise that may affect your permit approvals.
Identify and Address Flow Issues
If water hesitates or pressure drops, investigate pipe connections, fittings, and potential obstructions. Think of your plumbing like a highway system—blockages are traffic jams, and leaks are like road closures. In my case, I discovered a poorly fitted joint causing a visible leak; fixing it immediately avoided rejection at the final inspection. Remember, undetected problems can lead to costly repairs or permit rejections, so take this step seriously.
Verify Adequate Drainage and Venting
Ensure water drains smoothly from all fixtures, and vents are not obstructed. Proper venting is critical—it’s like giving your plumbing a way to breathe, preventing gurgling and slow drainage. During my test, I used a smoke test for vents, revealing a blocked vent pipe that, if left unaddressed, could have caused future drainage backups and failed inspections.
Document Results for Compliance
Take detailed notes and photos of pressure readings and any anomalies. This documentation supports your permit approval and provides a reference for future troubleshooting. When I submitted my test results, thorough documentation helped me quickly address minor issues and gain approval without extra delays. Following a standardized checklist ensures nothing is overlooked, saving time and stress.
Follow Up After Testing
Once issues are identified, promptly repair and re-test to confirm fixes. This is comparable to a pilot checking instruments after troubleshooting—accuracy ensures safety. My experience taught me that re-testing after repairs prevents surprises during the final inspection and builds trust with inspectors. Plan for a contingency window to revisit and re-test if needed, streamlining the process and avoiding project bottlenecks.
While most seasoned builders emphasize the importance of accurate estimating and proper permitting, many overlook the subtle nuances that can derail a project weeks or months later. Common myths, like assuming you can always salvage overestimated budgets or that permits are a bureaucratic hurdle, can be costly misconceptions. In reality, there’s an intricate dance between estimating accuracy, permit timing, and project scope, where small misjudgments compound into major delays.
A frequent trap is relying solely on initial estimates without incorporating contingencies for permit delays or unexpected site conditions. Overconfidence in early numbers often leads to budget overruns, especially if project complexities such as soil conditions or evolving code requirements are ignored. For instance, many underestimate permit processing times, unaware that delays in acquiring approvals can stretch project timelines by months—something I navigated firsthand and now always address proactively.
The danger worsens when contractors or estimators don’t stay abreast of evolving regulations or local amendments, which can invalidate previously accurate quotes. A savvy estimator continually checks permit requirements and trends—does your team consider recent changes, like new fire safety codes or environmental restrictions? You can deepen your understanding by exploring [navigating permits step-by-step](https://constructionedgez.com/navigating-permits-a-step-by-step-approach-for-builders), which offers insights into mitigating these hidden delays.
One misconception I often encounter is the idea that project scope expansion is inevitable once permits are in motion. Conversely, detailed planning and thorough scope definitions before submission can prevent costly change orders later. For example, misjudging the impact of adding a bathroom or expanding a deck without adjusting estimates and permit scope can lead to unforeseen costs and rejections.
What if you could identify and mitigate these hidden pitfalls before they hit your project schedule or budget? Experts suggest adopting comprehensive estimating strategies and permit management early. Check out [how to accurately estimate costs for home improvements](https://constructionedgez.com/how-to-accurately-estimate-costs-for-home-improvements) and [streamline permit acquisition](https://constructionedgez.com/streamlining-permit-acquisition-for-faster-construction). These tools help you stay ahead of surprises, save money, and maintain project momentum.
Beyond numbers, understanding the nuanced relationship between permit requirements and project scope is crucial. Overlooking minor local restrictions or upcoming code updates can cause significant rework or delays. So, document every estimate assumption, stay current with permit regulations, and communicate clearly with your team to avoid costly missteps.
Have you ever fallen into this trap? Let me know in the comments, and share your experiences—together, we can build smarter, avoid common pitfalls, and master the art of precise estimating and permit planning.
Investing in Durable Equipment for Seamless Maintenance
To ensure your project remains in top shape over the years, I rely on high-quality, durable tools that can withstand frequent use and harsh conditions. For instance, I personally prefer the Bosch GLL 3-80 Laser Level because it offers precise, long-lasting accuracy, making ongoing adjustments and checks much simpler. Using reliable equipment minimizes calibration errors and reduces the need for frequent replacements, saving both time and money in the long run. Additionally, I recommend investing in a good digital manifold gauge set, such as the Robinair 42320, which allows for quick diagnostics and pressure checks, essential for maintaining plumbing and HVAC systems over time.
Leverage Software for Efficient Maintenance Planning
Staying on top of maintenance schedules can be challenging without the right tools. I use construction management software like CoConstruct, which helps track ongoing tasks, warranties, and updates across various systems in your build. It not only streamlines communication with subcontractors but also stores documentation for future reference—preventing small issues from escalating into costly repairs. As technology advances, more integrated platforms are emerging that combine BIM (Building Information Modeling) with maintenance scheduling, allowing you to visualize system components and plan proactive checkups effectively.
Developing a Routine and Staying Ahead
Establishing a consistent routine for inspections is vital. I recommend periodic visual inspections for signs of leaks, corrosion, or degradation—using a good headlamp like the LEDlenser MH10 to illuminate tight spaces. Early detection of minor issues prevents bigger problems. Remember, tools like ultrasonic leak detectors can identify undetectable leaks before they become visible, significantly reducing repair costs. Predictive maintenance technologies, such as IoT sensors installed in critical systems, are also trending and promise to revolutionize how we approach long-term building upkeep by alerting you to potential failures before they happen.
How do I maintain systems over time? Keeping it working long-term is about combining quality tools, smart planning, and proactive routines. Regular checkups combined with advanced diagnostics and software tracking can dramatically extend the lifespan of your build’s components. For example, I follow a quarterly inspection schedule for my HVAC and plumbing, leveraging tools like the Robinair gauge set and ultrasonic leak detectors to catch issues early. As the trend toward smart buildings continues, integrating IoT sensors that monitor water flow, temperature, and pressure will become essential—predicting failures before they impact living comfort or safety.
To start, try setting up a monitoring system using affordable IoT devices—they’re more accessible than ever and can provide peace of mind, knowing you’re actively maintaining your systems rather than just reacting to problems. This investment pays off by avoiding emergency repairs and ensuring your build remains functional and efficient for years to come. Want to learn more about implementing such technology? Check out [navigating permit processes for new builds](https://constructionedgez.com/navigating-permits-a-step-by-step-approach-for-builders) to see how planning ahead can make maintenance more manageable.Throughout my journey with new builds and renovations, I’ve uncovered invaluable insights that often go unnoticed. One of the most profound lessons I learned was that no detail is too small when it comes to plumbing and permit processes; overlooking the subtle nuances can lead to delays or costly fixes later on. For example, pushing forward without thorough flow testing or proper documentation can turn a straightforward project into a complex maze. These experiences reinforced the importance of meticulous planning and proactive verification, especially in areas like permit requirements and system testing, which many underestimate. Embracing these lessons has transformed my approach, making me more resilient and prepared for unforeseen hurdles, ultimately saving time and money while achieving safer, more reliable results.