The chimney height rule that catches fireplace additions off guard
It happened to me just a few months ago during my latest home upgrade. I was all set to add a cozy fireplace, excited about the improvement, only to hit an unexpected wall: the tricky chimney height regulation. One moment I was planning my dream setup, and the next, I was scrambling to understand a seemingly simple rule that turned out to be anything but straightforward.
That’s when I realized that many homeowners and even seasoned builders overestimate how easy it is to navigate these rules, especially the one about chimney height. Trust me, I learned this lesson the hard way, making a costly mistake early in my project—underestimating the importance of getting the chimney height right meant delays and extra expenses that could have been avoided.
Why The Chimney Height Rule Is a Hidden Quirk Homeowners Overlook
If you’re planning a fireplace addition, you’ve probably looked into permits, materials, and costs. But have you paid enough attention to the specific regulations about chimney height? That’s often the overlooked detail that trips up many, even experienced contractors. The rule isn’t just a technicality—it’s a critical factor that impacts your project’s approval process and safety compliance.
Many people assume that fitting the firebox and venting pipe according to standard dimensions is sufficient. Yet, local building codes set specific height requirements for chimneys to ensure proper draft and prevent smoke from affecting neighboring properties. Fail to meet these, and your project could face costly rework, delays, or even legal issues.
Early in my project, I made the mistake of relying solely on rough estimates I found online, ignoring the detailed regulations in my jurisdiction. That led to a frustrating review process and a scramble to elevate the chimney after the permit was almost approved. Research and proper planning are essential. For a comprehensive understanding, I strongly recommend reviewing [navigating permits for new builds and additions](https://constructionedgez.com/navigating-permits-a-step-by-step-approach-for-builders), which covers key permit insights.
Have you faced similar challenges with building code quirks? If so, you’re not alone. Many homeowners discover that what seems like a simple addition quickly becomes complicated due to local rules—especially about chimney heights. Recognizing this early could save you from surprises down the line.
In the upcoming sections, I’ll guide you through the critical steps to ensure your chimney height meets all regulations. This way, you’ll avoid costly reworks and keep your project moving smoothly. Ready to make sure your fireplace addition is compliant from the start? Let’s dive into the practical steps you need to take.
Start with Precise Measurements
Remember my early miscalculation? I learned quickly that inaccurate measurements lead to costly rework. To avoid this, use a laser distance meter or a sturdy measuring tape to determine your chimney’s current height and the desired final height based on local codes. Document these measurements meticulously for reference during permit applications.
Review Local Building Codes Thoroughly
Every jurisdiction has specific requirements, like minimum heights above the roofline or setback distances from property lines. Do not rely on generic guides; instead, consult your local building department’s website or contact an inspector directly. This step is crucial because violating these rules can result in project delays or fines.
Verify Permitted Heights Early
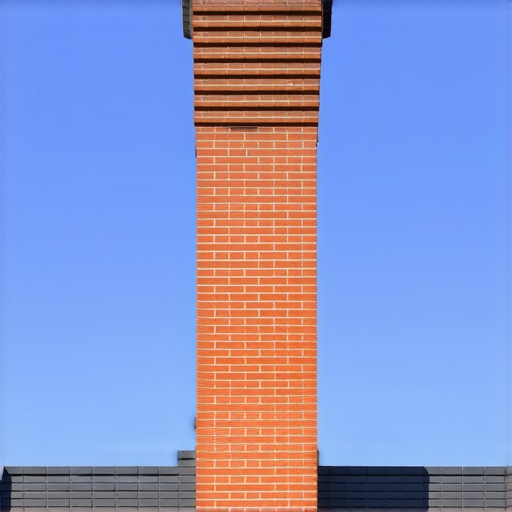
In my case, I found that some areas require the chimney to extend at least 3 feet above the roof ridge or a certain number of feet from the property line. Cross-reference these details with your measurements. If your plans exceed or fall short of these requirements, adjust your design accordingly before proceeding to avoid expensive modifications later.
Create a Detailed Construction Plan
Draft a step-by-step plan outlining how you’ll achieve the necessary chimney height. This plan should include the foundation reinforcement, chimney extension methods (such as using approved chimney caps or blocks), and support structures. During my project, I hired an engineer to verify that my planned extensions met safety standards, which prevented potential structural issues.
Coordinate with Permitting Authorities
Submit your detailed plan along with the measurements for review. Use resources like navigating permits to understand the documentation required. During my submission, I clarified how my planned height complied with local setbacks and fire safety regulations. This proactive approach expedited approval and minimized revisions.
Prepare for On-Site Adjustments
Once construction begins, verify the chimney height periodically against the approved plans. My team used a simple carpenter’s level combined with a measuring rod to monitor height as we built up the chimney. This helped catch small deviations early, preventing the need for rework and ensuring compliance.
Engage Certification and Inspection
After completion, schedule a check with local inspectors. Present your measurements and documentation, emphasizing compliance with the specific height requirements. When I did this step, I was prepared with detailed photos and logged measurements. The inspector approved my chimney without requiring further modifications, saving time and money.
Mastering these steps transforms what seems complex into manageable tasks. By planning meticulously, verifying continuously, and aligning with local codes, you ensure your home upgrade proceeds smoothly—saving both time and resources in the long run. To refine your estimating skills and better prepare for permits, consider exploring estimating additions, which provides detailed strategies for accurate planning.
Many homeowners believe that estimating costs and securing permits are straightforward tasks, often relying on rough numbers or generic guides. However, this approach can lead to costly mistakes because the real challenge lies in understanding the intricate details and nuances hidden beneath the surface. Contrary to popular belief, accurate estimation isn’t just about summing material prices; it involves understanding jurisdiction-specific variables, contractor behaviors, and the subtle rules that affect project timelines and budgets. For instance, some overlook that local authorities often have updated codes requiring specific foundation depths or insulation R-values, which, if ignored, can delay approvals and inflate expenses. One common myth is that permits are a mere formality; in reality, they are a complex process where missing a critical detail, like a soil stability report or fire-resistant material certification, can terminate your project before it starts. An advanced mistake many make is underestimating the importance of proper planning for permit timelines. Filing an application without detailed plans and thorough documentation may lead to multiple review cycles, extending the project by months. Be aware that some jurisdictions apply unique rules based on property location—such as setback variances or special zoning overlays—that are easy to overlook. These nuances can make or break your project’s feasibility and costs, especially if you plan without consulting local regulations thoroughly. According to a study by the Urban Institute, projects that omit early compliance checks face a 30% higher risk of delays and budget overruns. This underscores why expert knowledge and proactive planning are vital. Have you ever fallen into this trap? Let me know in the comments. To avoid these pitfalls, it’s crucial to go beyond basic estimates and invest in understanding the specific codes and permit processes relevant to your project. Learn more about such strategies at [mastering new build estimating](https://constructionedgez.com/mastering-new-build-estimating-essential-tips-for-success) and ensure every detail aligns before breaking ground. The key is to anticipate every nuance—whether it’s soil irregularities, hidden easements, or evolving regulations—so you can navigate the process smoothly and stay within budget.When undertaking a significant home addition or renovation, having the right tools and maintenance practices can make all the difference in ensuring enduring quality and safety. I personally rely on a combination of advanced equipment and software that streamline the process, reduce errors, and save time. For example, a high-precision laser level is invaluable for verifying height alignments, especially for chimney work or roof modifications. Unlike traditional bubble levels, laser tools provide quick, accurate measurements over long distances, which is critical when maintaining consistent elevations throughout your build.
On the software side, I recommend using detailed estimating programs like Construction Master Pro or PlanSwift. These tools help break down complex calculations into manageable parts, allowing you to foresee potential cost overruns and adjust accordingly. I personally prefer PlanSwift because it integrates directly with digital plans, enabling real-time adjustments and instant material quantity updates, which improves estimation accuracy and project planning.
Keeping your tools in top shape is equally essential for long-term success. Regular calibration of measurement devices and cleaning power tools prevent wear and inaccuracies that could compromise safety or finish quality. Developing a routine maintenance checklist—covering blade sharpening, filter replacements, and lubricant applications—keeps everything running smoothly and extends the lifespan of your equipment.
Looking ahead, automation and smart tools are poised to further transform home renovations. Imagine tools that not only measure but also upload data to cloud platforms for instant sharing with your team or inspectors. This integration will reduce errors and facilitate faster approvals, especially when dealing with permits and inspections.
So, how do I maintain my tools over time? The key lies in consistent care and staying updated with the latest technology trends. For example, I set aside time quarterly to inspect and calibrate my laser levels and update my estimation software to incorporate the newest building codes and cost data from sources like mastering new build estimating. This proactive approach ensures accuracy and readiness, minimizing delays and surprises during construction.
Incorporating these practices—using precise tools, maintaining them diligently, and embracing emerging technology—sets a strong foundation for long-term success. I encourage you to try upgrading at least one piece of equipment or software this year. For instance, invest in a laser level and see how it transforms your site measurements. Remember, addressing minor maintenance issues early can prevent costly repairs down the line and keep your project moving smoothly.
What I Wish I Knew Before Starting My Chimney Project
One of the toughest lessons I learned was the importance of meticulously understanding local height regulations. Even a minor miscalculation resulted in delays and added costs. Don’t underestimate the value of early measurement verification and code review—it can save you from costly rework down the line.
Secondly, I realized that relying on generic guidelines is a trap. Every jurisdiction has its quirks, and personalized research is essential. Consulting your local building department or an experienced inspector can provide insights that no online guide can offer, ensuring your project stays on track.
Finally, I discovered that proactive planning and continuous documentation make a real difference. Keeping detailed records of measurements, plans, and communications helps during inspections and approvals. It’s your best armor against surprises and setbacks, fostering confidence in your project management skills.
Toolkit to Elevate Your Home Addition Journey
My go-to resources include Mastering New Build Estimating for accurate cost projections, which has transformed how I approach budgeting. For navigating permits, I trust the permit guide for builders—it’s comprehensive and practical. To refine my project documentation and communication, I often consult adding value with expert home additions, which offers strategies for presentation and compliance. These tools combined serve as my professional secret arsenal, elevating the quality and efficiency of my home upgrades.
The Bold Step Forward You Can Take Today
Embarking on your home addition journey should fill you with confidence, not stress. Use these tailored insights and resources to demystify permitting, accuracy, and planning. Remember, the most successful projects start with informed, deliberate steps—your home deserves nothing less. What’s one permit challenge you’ve faced, and how did you overcome it? Share your story below, and let’s learn from each other’s experiences.