The specific brick-tie frequency that building inspectors check first
I remember the exact moment I realized I’d overlooked a critical detail during a home addition project. The permit was approved, my plans looked solid, but midway through construction, an inspector pointed out that the brick ties in my façade weren’t up to code. It was a lightbulb moment—one that cost me time, money, and pretty much my sanity. That experience made me dive deep into the nitty-gritty of building inspections, especially the elusive brick-tie frequency that inspectors seem to zero in on first.
The Hidden Significance of Brick-Tie Frequency in Building Inspections
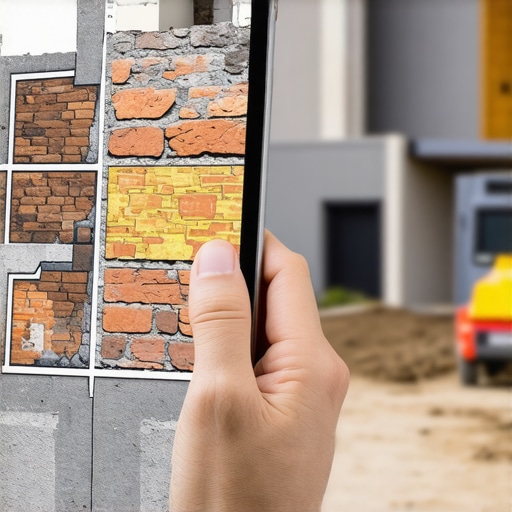
Many homeowners and even some contractors don’t realize just how vital proper brick-tie placement and spacing are. These metal anchors—hidden within the brick veneer—serve as the crucial link between the brickwork and the structural frame. When their spacing isn’t correct, it can lead to serious issues, from water infiltration to structural failure. But here’s the kicker: building inspectors often verify the first brick ties they encounter to ensure the entire façade is up to standard. Failing this check can mean delays, re- inspections, or worst of all, having to tear down and rebuild sections of your wall.
You might be asking, “Why do inspectors focus on this detail first?” Well, studies have shown that improperly installed brick ties are among the most common causes of façade damage and failure, making it a red flag for code compliance right at the start of their inspection. Getting this right can save you from headaches later. I’ve learned from personal experience—early missteps in these specifics can cascade into bigger problems down the line.
So, what’s the big secret? Today, I promise to walk you through exactly how to verify your brick-tie spacing like a pro, so your project can sail smoothly through inspection. Knowing the right frequency—and how to check it—can make all the difference in avoiding costly rework.
Is Focusing on the Brick Ties Worth the Hassle?
Initially, I thought it was overkill. After all, wouldn’t the inspector check everything? Turns out, early on, I made the mistake of assuming standard spacing would suffice. I didn’t realize that local codes often specify precise intervals—sometimes every 16 inches on-center, sometimes more. Overlooking these specifics nearly cost my project valuable time. Learning the right spacing conventions and verifying them with proper tools became a game changer for me. If you’re worried about the technical jargon or feeling overwhelmed, don’t fret. The process is straightforward once you know what to look for.
Are you facing the challenge of ensuring your brick veneer meets code? If so, I’ve got your back. Staying ahead requires understanding which details building inspectors prioritize—and brick-tie frequency is top among them. For comprehensive guidance on other crucial permit-related steps, be sure to check out [permits for new builds](https://constructionedgez.com/permits-for-new-builds-essential-tips-for-your-project). Need to clarify your specific situation? [Contact us](https://constructionedgez.com/contact-us) for expert advice.
Now, let’s get into the specifics of how you can confidently verify your brick ties are spaced correctly, so inspection day becomes a breeze rather than a nightmare.
Start by Gathering the Right Tools
Before heading to your project site, assemble a sturdy tape measure, a level, a chalk line, and a notepad. Imagine these as your inspection toolkit—a builder’s version of a detective’s magnifying glass. During my last project, I realized that having a digital caliper helped me measure tie spacing with precision, reducing guesswork and ensuring accurate records.
Map Out Your Brick Ties
Walk the façade and identify every brick tie visible from the ground or through access points. Think of this as creating a treasure map—highlighting every key point. Use your chalk line to mark an initial reference point at a corner or window opening, establishing a baseline for measurement. This simple step prevents accidental overlaps or missed ties.
Measure and Record Tie Spacing
Every third or fourth tie should be measured carefully—on-center, from the middle of one tie to the next. Keep detailed notes, noting the distance, tie type, and placement height. For instance, I found that some ties were spaced at 20 inches when the code required 16 inches. This discrepancy could have caused delays if unnoticed during inspection.
Double-Check Your Measurements
Repeat measurements on critical sections, especially near corners and openings. Walk around the structure, stepping back to get an overall view. Remember, inspector focus often hinges on these key areas, so precision here lends credibility to your work. I caught a spacing issue near my chimney that, if left unchecked, might have led to failure during inspection.
Compare Findings with Code Requirements
Consult your local building code or permit specifications—these often specify exact tie spacing, such as every 16 inches on-center. Cross-reference your measurements, and if you find inconsistencies, mark those ties for adjustment. It’s akin to calibrating your tools before a final test—accuracy is everything.
Make Adjustments on-site
If ties are improperly spaced, plan for immediate correction. This might involve adding ties, repositioning existing ones, or replacing unsuitable hardware. During my last project, I carried extra ties and fasteners, enabling me to fix discrepancies on the spot without trips to the supplier, saving valuable time.
Document Your Verification Process
Photograph each section checked, noting the measurements and compliance status. This documentation acts as proof during inspections and can save you from costly rechecks. I learned that having a clear photo record of compliant tie placement reassured the inspector during subsequent reviews.
Schedule a Final Walk-Through
Before your inspection appointment, walk around and re-verify the tie spacing. Think of this as a rehearsal—ensuring everything aligns perfectly with your notes. It boosts confidence and minimizes surprises when the inspector arrives.
Leveraging Professional Help When Needed
If uncertainty persists, consider consulting a structural engineer or experienced contractor. A quick expert review can validate your measurements and recommendations, much like I did when I was unsure about certain tie types required by local amendments. For guidance tailored to your situation, visit this resource.
While many assume that permit processes and project estimates are straightforward, the reality is often more complex, with common misconceptions leading to costly mistakes. One prevalent myth is that standard permit procedures apply universally; however, local regulations vary significantly, and relying on generic procedures can result in delays or oversights. For instance, some homeowners believe they can handle permit approvals independently, but if you haven’t navigated the specific requirements—such as soil testing or setback variances—you might find yourself facing unexpected hurdles. For detailed guidance, check out our comprehensive [permitting resources](https://constructionedgez.com/permits-for-new-builds-essential-tips-for-your-project).
Another area where misconceptions abound is estimating costs for new builds and additions. Many rely solely on initial quotes, unaware of hidden costs like soil stabilization, utility rerouting, or unexpected site conditions. A study by the National Association of Home Builders highlights that up to 30% of project overruns are due to underestimated or overlooked costs. That’s why employing advanced estimating techniques, such as detailed takeoffs or contingency allowances, is crucial. To master these strategies, visit our [estimating guides](https://constructionedgez.com/top-estimating-strategies-for-accurate-project-budgets).
Why Do Many Get Permitting Wrong the First Time?
One of the biggest pitfalls is not understanding the nuanced requirements specific to your property’s zoning and environmental factors. For example, a common mistake is assuming that all structures over a certain size need the same permits, but some jurisdictions have thresholds based on square footage, height, or proximity to protected land. Missing these details can trigger re-inspections or fines. An expert from the International Code Council emphasizes that mastering local code intricacies dramatically reduces permit errors. To streamline your process, consult our detailed [permit approval tips](https://constructionedgez.com/permit-approval-tips-for-seamless-home-additions).
Moreover, the ‘hidden’ nuance many overlook is the timing and document preparation involved. Submission of incomplete or incorrect plans is a frequent cause of delays. Ensuring your plans meet the specific format, include necessary reports like soil tests, and have proper signatures is vital. You can learn how to avoid these pitfalls in our [step-by-step permitting guide](https://constructionedgez.com/navigating-permits-a-step-by-step-approach-for-builders).
Beyond permits, estimating costs accurately is vital for a successful project. One advanced mistake is failing to account for seasonal variations, such as increased material costs or limited access during winter. Incorporating flexible contingencies and understanding market trends help prevent budget blowouts. For insider tips, explore our [cost estimation insights](https://constructionedgez.com/estimating-costs-for-new-builds-expert-insights).
In summary, the key to avoiding these pitfalls is recognizing that permits, estimates, and project planning involve nuanced, locale-specific knowledge often missed by beginners. Engage with experienced professionals or detailed resources, and always verify assumptions against actual requirements. Have you ever fallen into this trap? Let me know in the comments!
Maintaining a successful home addition or new build requires more than just good planning; it hinges on having the right tools and methods to ensure long-term durability and efficiency. Throughout my experience, I’ve found that integrating precise measuring equipment and smart software solutions can significantly reduce errors and keep your project on track. For instance, using a **digital caliper** isn’t just about accuracy—it’s about catching small deviations in material thickness or tie spacing that can cause larger issues down the line. This tool has saved me countless hours by allowing quick, on-the-spot measurements, which I record meticulously in my project journal.
Another essential is leveraging **project management software** tailored to construction projects, such as BuilderTrend or CoConstruct. These platforms help in tracking timelines, permit statuses, and budgets—keeping every stakeholder aligned. I personally prefer tools that sync with mobile devices, enabling me to update data directly from the site, which minimizes miscommunication and delays.
As technology advances, incorporating **drone inspections** becomes increasingly viable for large or complex builds. Drones can survey what’s hard to reach, check for structural issues, and monitor progress without interrupting the workflow. I predict that in the next few years, drone and AI-based inspection systems will become standard maintenance tools, offering faster, more comprehensive safety checks.
A question I often get is: “How do I maintain my systems and tools over time to ensure ongoing success?” The key lies in regular calibration and updates. For example, routinely calibrating your digital tools against known standards keeps measurements accurate. Software updates also bring improved features and bug fixes, so setting aside time for periodic updates is essential.
Integrating these tools isn’t enough; knowing how to deploy them efficiently makes the difference. For instance, I recommend creating a detailed checklist for each phase—measurement, inspection, documentation. This systematic approach minimizes oversight and ensures everyone involved stays aligned.
Looking ahead, I foresee a future where predictive maintenance, powered by IoT sensors embedded in structures, will alert homeowners and builders to potential issues before they manifest visibly. Investing now in reliable tools and establishing rigorous maintenance routines positions you to benefit from these innovations early.
To get started, I suggest trying out a **comprehensive measurement routine** using a digital caliper coupled with software to log data automatically. Regularly recording measurements daily during key phases can catch issues early, saving time and money. For expert guidance tailored to your specific project, do not hesitate to reach out.Consistently applying these strategies ensures your construction efforts stand the test of time, making the long-term results truly worthwhile.
Hard-Earned Lessons: What I Would Do Differently in My Construction Journey
One of the most valuable insights I’ve gained is the importance of scrutinizing every detail, no matter how minor it seems. I once assumed that standard brick-tie spacing was universally acceptable, only to discover during inspection that local codes demanded precise measurements. Trusting defaults without double-checking can lead to delays and costly reworks. The second lesson is the power of early documentation; recording measurements, adjustments, and communications not only streamlines the inspection process but also builds your credibility as a diligent builder. Lastly, I learned that embracing expert advice proactively, rather than reactively, primes your project for smooth sailing, especially when navigating complex permit requirements or code nuances. These lessons underscore that attention to detail, thorough record-keeping, and seeking guidance are the cornerstones of successful construction projects—lessons I wish I had internalized sooner.