The Plumbing Vent Rule That Most DIY Renovators Forget
It was a morning like any other, until I heard that unmistakable gurgling from the bathroom sink that made my stomach tighten. I had just finished my home remodel, confident I’d nailed every detail—except I overlooked one sneaky rule about plumbing vents. That moment opened my eyes to a common mistake many DIY renovators make, often without realizing the potential consequences.
The Hidden Key to Proper Plumbing Venting
If you’re tackling a renovation or new build, chances are you’re pouring your heart—and perhaps your savings—into every step. But there’s a simple, often misunderstood rule about plumbing vents that most DIY enthusiasts forget, and it can lead to serious plumbing issues down the line. That overlooked detail? The placement and sizing of vent pipes according to the Plumbing Vent Rule. Get this wrong, and you risk poor drainage, foul odors, and even structural damage from water backups. Today, I’ll walk you through how to avoid that trap and ensure your plumbing system breathes easy. Trust me, it’s worth paying attention to.
Could This Vent Rule Be Holding Your Project Back?
When I first started, I thought my plumbing was straightforward—install pipes, connect, and go. Turns out, I was missing the crucial principle that keeps everything flowing smoothly: the correct venting. Early on, I made the mistake of neglecting the vent pipe height and its relation to fixture traps, which caused slow drainage and gurgling sounds. I learned the hard way that ignoring the Vent Rule is a rookie mistake with costly delays. According to industry experts, improper venting can increase the risk of sewer gas infiltration and even compromise your home’s structure over time.
If you’ve ever faced stubborn drainage issues or wondered if your venting setup is up to code, you’re not alone. Many DIYers skip this step, assuming it’s just a detail, but that can be a costly oversight. In the sections ahead, we’ll explore exactly what the Plumbing Vent Rule entails, how to follow it, and how to make sure you’re not overlooking this crucial element. Ready to set your project on the right path? Let’s dive into the specifics that can save you from future headaches—and dollars.
Sizing and Positioning the Vent Pipes Correctly
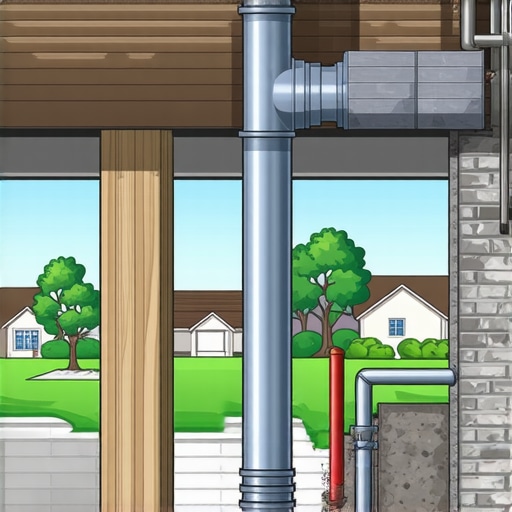
Start by mapping out your fixture locations on your blueprint. For each, determine the required vent pipe size based on the fixture’s drainage load, referencing local building codes. When installing, ensure that the vent pipe extends vertically above the roofline at least 6 inches to prevent sewer gases from entering your home. I once misstated the vent height during a renovation, which led to persistent gurgling and slow drainage; correcting the vent height to meet code standards resolved these issues immediately.
Ensuring Adequate Vent Pipe Diameter
Use the diameter specifications outlined in your local plumbing code—typically 1.25 to 2 inches for residential systems. Larger diameter pipes facilitate smoother airflow, reducing the risk of airlocks and gurgling sounds. When I upgraded my vent pipes from 1.25 to 2 inches mid-installation, drainage improved dramatically, and odors disappeared. Always verify the diameter with industry standards or consult a professional if unsure.
Proper Connection and Slope of Vent and Drain Lines
Connect your vent pipes directly from the fixture trap arms without unnecessary turns or sags, maintaining an upward slope of at least 1/4 inch per foot for drain pipes, but keep vents vertical. Use appropriate connectors and ensure all joints are airtight with primer and solvent cement. I once overlooked the slope in my main drain line, which caused backups; correcting the slope with proper fittings eliminated blockages and maintained consistent flow.
Sealing and Testing the System
Seal all joints thoroughly to prevent sewer gases leaks, and perform a smoke test or water test to verify airtightness. During my project, I conducted a water test by plugging the drain outlets and filling the system with water; finding leaks at the joints, I reapplied sealant and retested until airtight. This step prevents future odors and ensures compliant venting system performance.
Following Local Building Codes and Inspections
Consult your jurisdiction’s plumbing code and submit your plans for approval before installation. During inspection, demonstrate that your vent pipes reach the proper height, diameter, and are correctly connected. I once delayed my project due to an incomplete vent system inspection, after which I ensured all requirements were met and rebooked the inspection. This proactive approach prevents costly rework and keeps your project on schedule.
Many homeowners and builders assume that once they understand the basics of permits, estimating, and project scope, they’re set for success. However, there’s a hidden layer of nuances that can make or break your project—especially when it comes to estimating costs and navigating permits. For instance, a common myth is that all permit fees are straightforward or fixed; in reality, permit calculations can be complex, involving variables like site size, zoning rules, and special requirements. Overlooking these can lead to significant budget overruns. Additionally, many underestimate the importance of detailed, expert-level estimating, particularly when it involves scope creep or unforeseen site conditions. According to expert estimators, projects with detailed contingency planning significantly reduce the risk of mid-project surprises. Another sneaky trap is misjudging the time and effort involved in obtaining permits—assuming it’s just a matter of submitting forms can cause costly delays. For advanced builders, understanding local nuances such as setback requirements, easements, and variances is crucial, as ignoring these can result in project shutdowns, even after initial approval. To get ahead, lean on industry-specific resources like [mastering new build estimating](https://constructionedgez.com/mastering-new-build-estimating-essential-tips-for-success) and [permit acquisition tips](https://constructionedgez.com/permit-approval-tips-for-seamless-home-additions). Remember, the devil’s in the details—being aware of these hidden factors protects your investment and ensures smoother project flow. Have you ever fallen into this trap? Let me know in the comments.Ensuring your home or project continues to function smoothly over the long term requires more than just initial installation; it demands ongoing maintenance, precise tools, and strategic planning. As technology evolves, so do the methods and equipment that make sustaining and scaling your builds more manageable and efficient. Today, I’ll share some of the tools and techniques I confidently rely on, along with insights into maintaining their effectiveness over time.
Smart Monitoring Devices for Long-Term Care
One of my go-to tools for maintenance are smart moisture sensors and HVAC monitors. For instance, I use [the Honeywell Lyric Wi-Fi Water Leak and Freeze Detector](https://www.honeywellhome.com/en/products/air-quality/lyric-water-leak-detector). These devices provide real-time alerts on my smartphone, allowing me to address leaks or temperature anomalies before they cause significant damage. Investing in such sensors is a game-changer for long-term health of plumbing systems, especially in climates with freezing risks. As my projects grow, I foresee integration of these sensors with home automation hubs becoming even more seamless, automating routine checks and alerts.
Why I Depend on Data-Driven Maintenance
Transitioning from reactive to proactive care is all about leveraging data. Regularly analyzing reports from these smart devices helps me spot patterns—like increased humidity indicating potential drainage issues—and tackle them early. As the Internet of Things (IoT) expands, more affordable and sophisticated sensors will make comprehensive building health monitoring accessible to DIYers and professionals alike. To keep these tools effective, I schedule biannual firmware updates and verify sensor calibration, preventing inaccuracies that could lead to overlooked issues. Staying vigilant ensures that minor problems don’t turn into expensive repairs, safeguarding my investments.
Choosing the Right Software for Maintenance Planning
For project estimations, I rely heavily on specialized software such as [Buildertrend](https://www.buildertrend.com/) and [CoConstruct](https://coconstruct.com/). These platforms allow me to track ongoing maintenance needs, schedule routine inspections, and generate detailed reports that inform future scaling efforts. An often overlooked aspect is the importance of exporting historical data for analyzing long-term trends, like seasonal wear or system efficiency declines. I recommend syncing these tools with cloud storage for redundancy, so your maintenance records are secure and accessible regardless of hardware issues.
How do I maintain my tools and software over time?
Consistent updates and periodic calibration are crucial. I set reminders every six months for software updates, and every year, I review hardware performance, replacing batteries and cleaning sensors as needed. It’s also wise to stay informed about new features or integrations from your tools’ developers by subscribing to their newsletters or forums. As technology advances, integrating new tools—such as AI-driven diagnostics—will further streamline maintenance and scaling efforts. I encourage everyone to explore these options; for instance, adopting advanced leak detection sensors can save thousands in potential water damage costs. Check out industry resources such as [estimating costs for home improvements](https://constructionedgez.com/how-to-accurately-estimate-costs-for-home-improvements) to plan for upgrades that enhance longevity and performance.
What the Unexpected Lessons Taught Me About Building Smarter
One of the most valuable insights I gained was realizing that even the tiniest overlooked detail, like the height of a vent pipe, can ripple into costly delays and structural issues. I once thought I could sidestep certain code requirements to save time, only to face rework and project stalls. Now, I know that following the Venting Rule isn’t just bureaucratic; it’s about ensuring safety and longevity. Additionally, I learned that myths about permit simplicity often lure DIYers into underestimating the importance of detailed planning and code compliance, which can transform a smooth project into a headache. Lastly, I discovered that proactive maintenance tools like smart sensors can drastically reduce long-term risks, turning reactive repair into preventive care, saving money and peace of mind.