The Soil Compaction Rule for New Driveways and Patios
I still vividly remember the day I first attempted to pour a new driveway at my home. I was eager, full of anticipation, ready to see my vision come alive. But as I fumbled through the permit process, a lightbulb went off—there’s a critical rule that often trips up DIY enthusiasts and pros alike: the Soil Compaction Rule. My initial assumption was that soil is soil, right? Just level it out, add some gravel, and you’re good to go. Wrong. I learned the hard way that improper soil compaction can cause costly in-home issues down the line, including cracks, uneven settling, and even permit rejections. And honestly, I wish I had known this rule before starting. Today, I want to share my experience with you and delve into why understanding soil compaction is the key to your project’s success.
Why Soil Compaction Matters More Than You Think
Before diving into the technical details, let me ask—have you ever built something that, over time, just didn’t sit right? Maybe a path that developed dips or a patio that cracks after a few seasons? Those issues often trace back to soil preparation, specifically, soil compaction. Proper compaction ensures the soil underneath your driveway or patio can support the load without shifting or settling unevenly. Neglecting this step can lead to uneven surfaces, cracks, and even structural failure, costing you both time and money. Plus, local permitting agencies are increasingly strict about soil testing and compaction proof, making it a necessary part of your permit approval process. For a clearer picture of best practices, check out this comprehensive guide on [streamlining permit acquisition](https://constructionedgez.com/streamlining-permit-acquisition-for-faster-construction), which highlights soil prep as a foundational step.
Is Soil Compaction Overhyped or Underestimated?
Over the years, I see homeowners and even some contractors underestimate the importance of soil compaction. Early in my journey, I made a costly mistake—failing to verify soil density before pouring concrete. This oversight led to additional work, delays, and unforeseen expenses. One thing I wish I knew then: soil that looks firm can still be inadequately compacted. According to the USDA, improperly compacted soil can cause long-term settling issues that compromise building foundations (source: USDA.gov). This was a real eye-opener for me, and I recommend everyone to take soil testing seriously rather than assuming it’s fine. When working on projects involving new driveways or patios, ensure your soil passes proper compaction tests—don’t skip this vital step. In the next sections, we’ll explore how to get this right, step by step.
Prepare Your Soil Like a Pro
Start by clearing the site of debris, roots, and loose materials. Use a long-handled rake or harrow to break up clumps and ensure a uniform surface. Think of this as laying a foundation for a cake—every layer must be smooth and even. I recall a time when I skipped this step, only to find my driveway settling unevenly months later, leading to cracks. Afterward, I learned that proper initial preparation prevents costly corrective work.
Choose the Right Equipment and Techniques
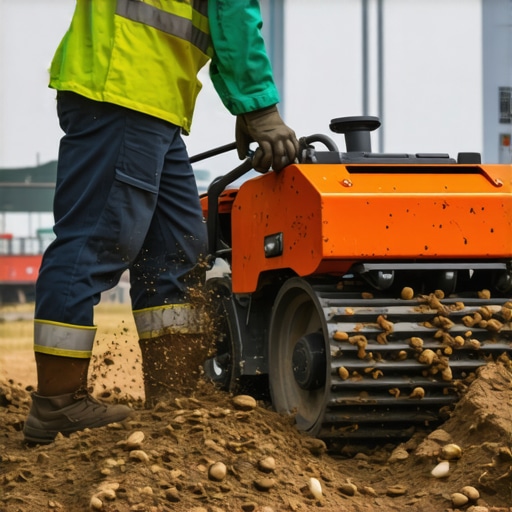
Use a plate compactor or jumping jack compactor suited for the soil type. For larger areas, a roller may be more efficient. Simply walking behind a compactor is ineffective—this is where many beginners falter. I once tried to compact by foot, thinking it would suffice. It didn’t. The soil remained loose, and I faced settlement issues long after. Reach out to local rental stores or a construction professional if unsure about equipment selection. Proper technique involves overlapping passes and applying steady pressure to achieve optimal density.
Test Soil Density Effectively
Conduct a nuclear density test or use a sand cone test to verify soil compaction levels. These tests give quantitative data, much like a blood pressure reading, ensuring your soil meets specified standards. During my project, I borrowed a testing kit and found my soil was only 85% compacted—below the 95% typically required. Corrective measures included additional passes with the compactor until the desired density was achieved.
Document Your Progress for Permitting
Maintain detailed records of test results, compaction procedures, and equipment used. This documentation proves to stakeholders and permit agencies that your soil prep complies with regulations, streamlining approval processes. I once faced a delay because I lacked proper documentation. After learning, I kept a log with dates, equipment, and test reports, which ultimately expedited approval. Remember, some municipalities require proof of soil compaction before granting permits—see permitting insights for more details.
Integrate Soil Stabilization if Needed
If soil is too loose or clay-rich, consider stabilizing it with additives like lime or cement. This creates a stronger base and reduces future settling. I experienced this firsthand; the clay under my patio was too compressible, causing cracks after rain. Adding lime improved compaction and durability, saving me from repairs and permit issues. Consult a geotechnical engineer or local supplier to determine appropriate stabilization techniques.
Inspect and Repeat as Necessary
Before moving to the next construction phase, re-test the soil to confirm compliance. This step is like getting a final exam—you can’t proceed confidently until you pass. During my project, re-testing revealed my soil only reached 90% density after initial compacting. I performed additional passes, then checked again. The result was a solid, long-lasting foundation that held up over time.
By meticulously executing these steps, you prevent future problems and meet regulatory standards with confidence. Soil compaction isn’t merely a preliminary task; it’s the backbone of your project’s stability. For comprehensive planning, consider reviewing permit acquisition strategies that emphasize soil prep as a critical step.
 When it comes to constructing or expanding your home, the prevailing assumption is often that permits and estimates are straightforward hurdles—annoyances to clear before moving on. But in my experience, many homeowners and even seasoned contractors stumble over nuanced pitfalls that can cause significant delays or cost overruns. Let’s explore some misconceptions that tend to trip up even the most diligent builders, and how to avoid making these costly mistakes.
One widespread myth is that permit approval primarily depends on paperwork accuracy. While thorough documentation is essential, the real trap lies in overlooking the intricacies of local regulations that change frequently. For example, a minor oversight in zoning setbacks or ignoring updated ground stability requirements can result in a rejected application or costly redesigns. This is why staying current with [permitting guidelines](https://constructionedgez.com/understanding-permit-processes-for-new-building-projects) and consulting early with local authorities can save you valuable time.
Another common mistake revolves around estimating costs without accounting for hidden or variable expenses. Many assume that initial estimates are enough, but this underestimates the importance of contingency funds for unforeseen issues like soil surprises or material price spikes. Advanced estimators emphasize the importance of detailed [cost analysis](https://constructionedgez.com/how-to-accurately-estimate-costs-for-home-improvements), which includes a buffer percentage—often 10-15%—to accommodate surprises that invariably arise in construction projects.
Here’s an often-overlooked nuance—many underestimate the impact of permit delays on project timelines and budgeting. It’s tempting to view the permitting process as a box to tick, but a pro recognizes that delays in approval can cascade, affecting procurement, scheduling, and labor commitments. A savvy builder plans for these setbacks by aligning procurement schedules with estimated permit review times, which can vary significantly based on local backlog and complexity.
A crucial advanced question often asked is: How can I effectively manage these risks without micromanaging every detail? The answer lies in leveraging comprehensive project management tools and establishing close communication lines with permit agencies and suppliers. Developing relationships and understanding the exact requirements—such as detailed soil assessments or engineered drawings—helps streamline approval paths and minimize surprises.
For example, misjudging soil stability can be a silent cost driver. As a study published in the “Journal of Geotechnical and Geoenvironmental Engineering” indicates, early soil testing and understanding local geotechnical nuances can prevent foundation issues and permit rejection. Investing in proper soil assessments upfront reflects a deeper, more strategic approach to estimating and planning.
In conclusion, the key takeaway is that permits and estimates are intricate components that benefit from expert attention and proactive management. Moving past simplistic assumptions and appreciating the subtleties involved equips you to navigate the process smoothly. Do you have experiences or tips to share about permit challenges? Let me know in the comments, and keep your construction journey efficient and stress-free!
Invest in Reliable Equipment for Long-Term Success
Maintaining your construction projects, whether new builds or additions, hinges on the quality of tools you use daily. I personally rely on a high-grade laser level, like the Bosch GOL 26 D, because it ensures precise measurements over large distances, reducing errors and rework. Similarly, a durable, calibrated torque wrench is indispensable for securing fasteners consistently, preventing future structural issues. For soil compaction, I trust a vibratory plate compactor from Wacker Neuson, which provides consistent pressure to prevent settling problems that could jeopardize permits and project stability. Investing in reputable brands not only extends equipment lifespan but also improves accuracy and safety on-site.
What Are the Best Software Solutions for Project Management?
On the software front, I recommend using Procore for comprehensive project oversight. It centralizes communication, scheduling, and documentation, making it easier to track progress and compliance—crucial for maintaining permit standards. For estimating costs accurately, I turn to Construction Master Pro, which streamlines calculations and helps prevent budget overruns. Staying on top of these tools ensures smooth workflows and minimizes delays that can ripple into permit rejections or costly overruns. As technology advances, integrating cloud-based platforms with real-time updates will increasingly become the norm, enabling better long-term project maintenance and scaling.
How do I keep my tools in top shape over time?
Routine maintenance is key. Regularly calibrate measurement instruments, clean equipment after each use, and perform safety inspections before every shift. For power tools, I follow manufacturer instructions for lubrication and check for loose components. Keeping a maintenance log helps track service intervals and prevents unexpected breakdowns, preserving your investment. Additionally, storing tools in climate-controlled environments reduces corrosion and extends their lifespan, which is especially critical when planning for multiple projects or scaling up operations.
Tools to Future-Proof Your Projects
Looking ahead, the trend points toward automation and smart tools. Electric-powered equipment with integrated sensors can monitor soil compaction and structural integrity, sending alerts if standards aren’t met—saving time and ensuring compliance with permits. Investing in these technologies now positions you ahead of the curve, reducing manual oversight and increasing accuracy. For managing progress and scaling efficiently, consider adopting Building Information Modeling (BIM) software, which provides a digital twin of your project to anticipate issues before they arise.
What’s the Best Way to Maintain Additions and New Builds Over Time?
Once your project is complete, ongoing maintenance involves regular inspections, timely repairs, and updates—akin to maintaining a high-performance vehicle. Establish a maintenance schedule based on manufacturer recommendations and project-specific needs. Keep detailed records of inspections and repairs to identify recurring issues early, preventing permit violations or structural failures. Remember, effective long-term project health relies on proactive upkeep, so invest in quality tools and a disciplined maintenance routine. As I’ve experienced firsthand, routine checks with digital moisture meters or structural sensors can pinpoint problems before visible symptoms emerge, saving money and ensuring continued compliance with building standards.
Integrating advanced tools and systems into your workflow is crucial. For instance, routinely using soil moisture sensors during landscape installations can prevent future settlement issues—avoiding costly remedial work and permit delays. Try implementing a digital maintenance log for your equipment today; it’s a small step that yields significant long-term benefits. Maintaining your tools and systems isn’t just about preservation; it’s about ensuring your projects remain compliant, scalable, and successful for years to come.

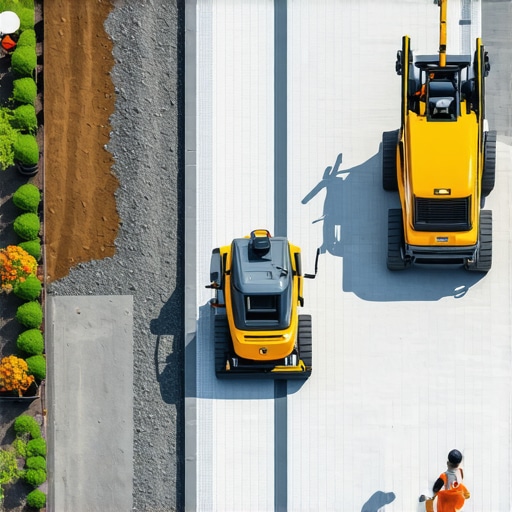
For a visual overview, here’s an illustration of a well-equipped construction site, highlighting the essential tools I rely on daily to keep projects on track and compliant. Proper equipment not only accelerates work but also safeguards longevity and permit compliance, making it a wise investment for any builder planning for growth and long-term success.
The Hard-Earned Lessons That Changed My Approach
One of the most impactful lessons I learned was the importance of insisting on thorough soil testing before pouring concrete. Early on, I trusted visual assessments and skipped detailed compaction tests, only to discover months later that my driveway was sinking unevenly. That costly mistake taught me to prioritize data over assumptions, emphasizing soil verification as the backbone of any successful project.
Secondly, I underestimated the role of proper equipment. Using a lightweight compactor or neglecting overlapping passes seemed insignificant at the time, but it resulted in compromised soil stability and delayed permits. Investing in quality compaction tools and learning their correct use has been a game-changer for my projects, saving time and preventing future issues.
Another insight was the value of meticulous documentation. Keeping detailed records of soil tests, compaction procedures, and equipment used not only streamlined permit approvals but also provided peace of mind. This habit has become a non-negotiable part of my workflow, safeguarding against permit setbacks and ensuring long-term project success.
Tools and Resources That Elevated My Building Game
For anyone serious about soil prep and permit readiness, I recommend investing in a nuclear density meter. It offers precise measurements that are universally accepted and minimize guesswork. Pair this with the permit process guide, which helps demystify what inspectors look for during soil inspections.
Additionally, the ‘Construction Master Pro’ calculator has been invaluable for estimating costs related to soil stabilization and testing. It’s saved me numerous surprises when budgeting, ensuring I allocate enough contingency for unexpected soil conditions or stabilization measures. Lastly, leveraging professional soil consultants for complex projects adds an expert touch, reducing the risk of permit rejection due to overlooked issues.
Seize the Moment to Build Smarter and Safer
Applying these insights and tools has transformed my approach from reactive to proactive. Remember, meticulous soil preparation and comprehensive documentation aren’t just for passing inspections—they form the foundation of durable, beautiful structures that stand the test of time. Now, it’s your turn: what soil preparation challenges have you faced, and how did you overcome them? Share your experiences below, and let’s learn together to build better from the ground up.