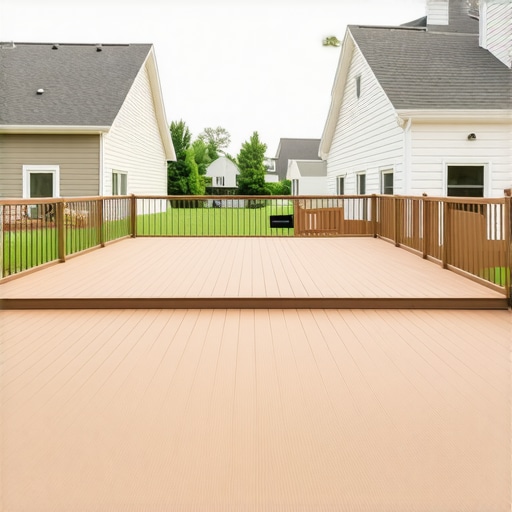
The Lot Coverage Limit That Could Kill Your Deck Plans
I remember the moment vividly—standing in my backyard, plans in hand, dreaming of a spacious deck where I could grill, relax, and enjoy summer evenings. But that dream nearly fizzled out when I ran into a frustrating wall: the local lot coverage limit. Turns out, that tiny regulation could have killed my entire deck project, and I had no idea it was so critical until I was already halfway through. Has that ever happened to you?
The Hidden Danger of Lot Coverage Limits
Many homeowners like us overlook these seemingly straightforward rules until we’re faced with a denial or costly redesign. The lot coverage limit is a zoning regulation—usually expressed as a percentage—that restricts how much of your property can be covered by structures, including your deck. If you exceed this cap, your permit can be denied outright, or worse, you might be forced to rip out your carefully planned deck after construction begins.
I’ve learned from personal experience—trust me—that understanding these limits early can save your project from a major setback. Because my initial plans didn’t account for the maximum allowed coverage, I had to scramble to redesign and delay my project. Later, I discovered that many homeowners make the mistake of not verifying this limit before drawing up their plans, leading to unnecessary frustration.
Let’s face it—building a deck isn’t just about choosing the right materials and design. It’s as much about navigating the legal landscape as it is about craftsmanship. If you’re like me, you want your outdoor space without risking permit rejections or costly adjustments. That’s why today, I’ll guide you through the essentials of lot coverage limits you need to know. And if you haven’t checked yet why this regulation can be a deal-breaker, you’re probably not alone.
For further insights into how to estimate costs and stay within zone rules, check out [this comprehensive guide on permitting](https://constructionedgez.com/the-complete-guide-to-permitting-for-new-builds-and-additions). It covers everything from initial planning to avoiding common pitfalls that delay construction.
Our next step? Digging into how these limits are calculated and how you can make sure your plans stay compliant—before your permit is denied or your budget blows up.
Calculate Your Lot Coverages Early
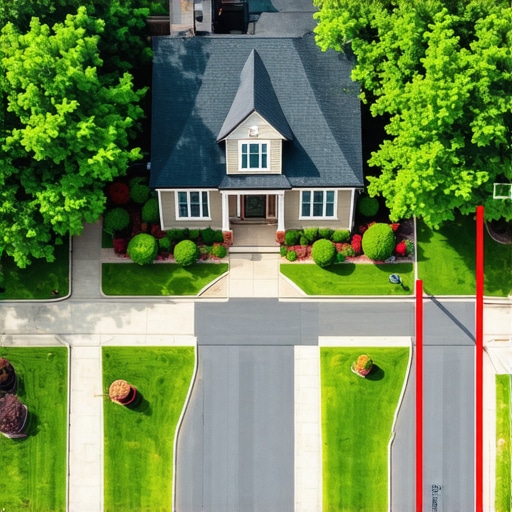
During my own deck project, I was eager to finalize design ideas but skipped verifying the lot coverage limits with the city. This mistake led to costly redesigns. To avoid this, start by measuring your property’s total area and identify existing structures. Use these figures to determine how much space your new addition can occupy without exceeding regulations. Refer to local zoning maps and building codes, and cross-check with the official lot coverage percentages listed in the municipal code or zoning ordinance documents. This step sets a clear boundary for your design and prevents surprises down the line.
Break Down Your Project’s Components
Next, itemize all elements you plan to include—deck, porch, shed, driveway, and any other structures. Assign realistic dimensions to each component and sum their areas to see if they stay within the allowable coverage. For example, I drew scaled plans of my deck and neighboring structures, then added them up to ensure I remained under the 40% limit. Using a simple measuring tape and graph paper or digital sketching tools helps visualize the overall footprint. This granular approach ensures you won’t unwittingly exceed limits, saving time and avoiding permit rejections. To refine your estimations, consider consulting professional estimators or reviewing similar local projects in [this detailed guide on permitting](https://constructionedgez.com/the-complete-guide-to-permitting-for-new-builds-and-additions).
Adjust Your Design to Stay Compliant
Once you know your lot coverage, tweak your plans accordingly. If your initial design approaches the limit, consider relocating or resizing structures. For my deck, I reduced its size by a few square feet and shifted it to a less restrictive area of the yard, which allowed me to maximize space without breaching regulations. Think of this like fitting a puzzle; moving or resizing pieces keeps the overall picture within bounds. In some cases, you might need to redesign features, opt for slimmer profiles, or choose alternative materials to reduce footprint. Remember, minor adjustments can make a big difference in project approval chances. Always verify your final plan against official lot coverage limits, and when in doubt, consult local zoning authorities or review [permit processes](https://constructionedgez.com/understanding-permit-processes-for-home-additions) for any specific nuances or exceptions.
Document and Verify Before Submission
Finally, compile detailed scaled drawings showing each component’s area and total coverage. Include property lines, existing structures, fences, and setbacks to provide a comprehensive view. Having your measurements documented not only streamlines the permit application but also gives you a solid backup in case of review questions. I learned this the hard way when last-minute revisions delayed my permit approval—proper documentation would have saved days. For further tips on managing permits efficiently, see [this step-by-step guide](https://constructionedgez.com/navigating-permit-requirements-for-additions-in-2025). Doing your homework upfront ensures your project stays within legal boundaries and progresses smoothly, avoiding unnecessary surprises or costly modifications later.While most homeowners are aware that permits and accurate estimates are crucial, many overlook deeper complexities and subtle pitfalls that can derail projects or inflate costs unexpectedly. One common myth is that permits are merely bureaucratic hurdles; in reality, they ensure safety, compliance, and long-term value. Jumping into a project without thoroughly understanding permit nuances can lead to costly delays or legal issues. For example, some assume that a simple permit is all they need, but different jurisdictions often have specific requirements—such as detailed site plans or specialized inspections—that can catch even seasoned DIYers off guard. To avoid this, consult local regulations early and consider engaging with permit specialists who understand regional nuances.
Another frequently misunderstood aspect is estimation. Many rely on square footage multipliers or generic costing guides, but these often neglect site-specific factors—soil conditions, accessibility, and material fluctuations—that significantly affect costs. Expert estimators emphasize detailed line-item breakdowns and contingency planning. Skipping this rigorous approach can result in budget blowouts, especially when unforeseen issues like underground utilities or poor soil quality arise. For deeper insights, check out [this comprehensive guide on estimating costs for new builds](https://constructionedgez.com/estimating-costs-for-new-builds-expert-insights), which stresses the importance of nuanced, context-aware calculations.
When it comes to new constructions and additions, a prevalent mistake is underestimating complex structural needs. For instance, many assume that removing a load-bearing wall is straightforward, but failure to consult structural engineers can lead to safety hazards and code violations. An expert tip is always to validate structural changes with professionals early in the process, preventing costly rework or rebuilds later. Additionally, familiarizing yourself with local zoning rules—like setback requirements or easement restrictions—can prevent surprises during inspections.
Have you ever fallen into this trap? Let me know in the comments. Remember, the key to smooth projects lies in understanding these hidden layers—permitting intricacies, estimation nuances, and structural complexities—that often get overlooked but are essential for success.
Keep Your Project Up and Running with the Right Tools
Maintaining your construction tools and software is the backbone of ensuring long-term project success. I personally rely on a blend of digital and manual tools to keep everything running smoothly. For instance, I use SketchUp Pro for quick 3D modeling, which helps visualize changes before groundbreaking. Its intuitive interface and extensive plugin ecosystem make modifications faster and more accurate, reducing costly errors during construction phases. Additionally, I swear by Procore for project management; it streamlines communication, document sharing, and change tracking, so nothing slips through the cracks as the project evolves.
Regular maintenance of your equipment prevents unexpected failures — a lesson learned the hard way on my first few projects. I schedule weekly inspections for power tools, checking cords, blades, and bearings. For construction machinery like excavators or mixers, I adhere to manufacturer-recommended service intervals, which have saved me from costly breakdowns. Remember: clean equipment extends lifespan and reliability.
What is the secret to effective long-term maintenance of your tools?
Develop a routine that includes early detection of wear and tear, proper storage, and scheduled servicing. For electronic tools, keep firmware updated; for manual equipment, lubricate moving parts regularly. I also log maintenance dates and issues in a dedicated app, which helps anticipate replacements before failures occur. Investing in quality tools and maintaining them diligently reduces downtime and adds to your project’s bottom line.
Adopt Software for Seamless Estimating and Permitting
Estimating costs accurately and managing permits efficiently are crucial for scaling your projects without chaos. I recommend using advanced estimating software that incorporates regional price fluctuations, material wastage, and labor variances. These tools adapt as your project progresses, providing real-time budget updates. For the permitting process, digital submission platforms that integrate with local authorities cut down approval times significantly. Staying ahead with these tools makes scaling projects manageable and minimizes surprises.
Predicting future trends, I believe AI-driven estimating and construction management programs will become standard, enabling dynamic adjustments based on site-specific data and regulatory changes. Embracing these technologies now positions you as a forward-thinking builder.
How do I maintain the efficiency of my permitting and estimating tools over time?
Consistently update software, train yourself and your team on new features, and stay connected with regional code changes. Regularly review your data inputs to ensure accuracy, and leverage customer support when new challenges arise. The key is proactive management—prevent small issues from snowballing into costly delays. Explore comprehensive guides like this resource on permitting to refine your workflows further.
Finally, don’t overlook the value of backup equipment and data. Cloud storage ensures your plans and records are safe, and having spare parts or tools ready minimizes project interruptions. Try implementing scheduled maintenance checks combined with software updates—they’re proven to keep your operations smooth and scalable.
< | A professional construction site with tools organized and digital devices in use | Alt: Organized construction tools and devices ensuring efficient project management | Title: Effective maintenance and tools in modern construction projects.
Lessons Hidden in My Permit Journey That Changed Everything
- One crucial lesson I overlooked was double-checking lot coverage limits before finalizing my deck design. Realizing the mistake after submitting permits caused unnecessary delays and redesigns, emphasizing the importance of early due diligence.
- Falling into the trap of relying solely on standard estimating guides led me astray when unexpected site-specific factors, like soil conditions and existing structures, inflated costs. This taught me the significance of personalized estimations backed by regional data.
- I underestimated the complexity of local zoning nuances, assuming generic rules applied everywhere. Connecting directly with municipal authorities early on revealed specific restrictions and saved me from costly missteps.
Tools and Resources That Transformed My Building Approach
- SketchUp Pro: This 3D modeling software made visualizing modifications straightforward, helping me avoid expensive errors and ensure compliance before breaking ground.
- Procore: An all-in-one project management platform that streamlined communication, document handling, and change tracking, keeping my project organized and on schedule.
- Estimating software with regional customization: It provided real-time budget updates and accounted for site-specific factors, making my estimates far more accurate and reliable.
- Permit process guides: These clarified the steps, required documentation, and common pitfalls, reducing approval times and surprises.
Seize the Moment and Build Your Future with Confidence
Remember, understanding permit intricacies and estimating realities isn’t just about avoiding setbacks—it’s about empowering your vision and turning your outdoor dreams into reality smoothly. With the right knowledge and tools, you can approach your build confidently, knowing you’ve laid the groundwork for success. Dive into the permitting world now, and make your next project a story of achievement, not regret. What’s one permit rule you wish you’d known earlier? Share your experiences below.