Why Your Glass Railing Choice Might Not Meet Building Code
I remember the sinking feeling in my stomach when I received the notice: my backyard deck’s glass railing was non-compliant. It was a painfully clear lesson that even a small detail like a railing choice can snowball into major delays and added costs. If you’re dreaming of sleek, modern glass railings but worry about meeting local building codes, you’re not alone. I’ve been there, and I want to share what I learned so you can avoid the same costly mistakes.
Why Your Glass Railing Might Be a Code Nightmare
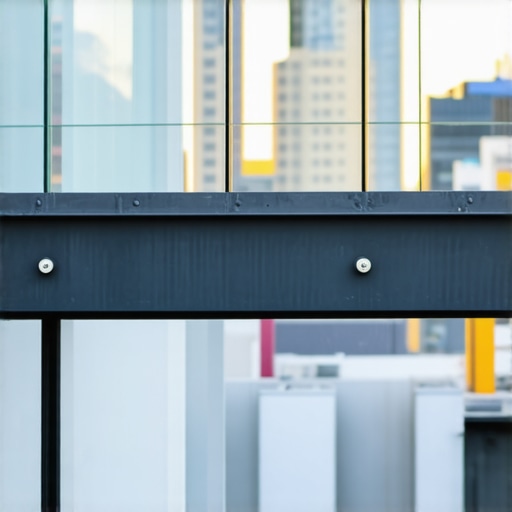
Choosing the perfect glass railing can seem straightforward—it’s stylish, transparent, and modern. But beneath the surface, building codes are pretty strict about what qualifies. If your choice doesn’t meet safety standards, you’ll face compliance issues, potential fines, and even the need for costly renovations. It’s tempting to overlook these details during planning, but trust me—they’re the difference between a smooth project and a paperwork nightmare.
Is the Hype About Glass Railings Just Overblown?
Early in my project, I made the mistake of assuming all glass railings are created equal. I bought the trendiest tempered glass panels without checking the local height and strength requirements. Turns out, my glamorous choice didn’t meet the building code minimums. According to the permit process guide, overlooking these standards can delay your project significantly. This was a costly lesson that could have been avoided with a little research.
If you’ve wrestled with similar doubts or surprises, don’t worry. There are clear, practical steps to ensure your railing is both beautiful and code-compliant—saving you headaches, time, and money in the long run. Let’s dive into what you need to know, starting with the most common pitfalls.
Thank you for trusting me as a helpful neighbor in this journey—let’s get your project on the right track!
Precisely Estimate Before You Build
When I embarked on my deck project, I started by carefully estimating costs and materials. I used the techniques outlined here to create a detailed budget, including all potential permitting fees. This upfront clarity ensures you don’t fall into surprises during inspections or planning stages. We measured precisely, considered material quality, and planned for contingencies, which helped my estimate stay within bounds and avoid overruns.
Identify and Understand Local Building Codes
Before picking your glass panels, I checked my local code requirements through permit process guidelines. Think of building codes like a map—they point out exactly where the traps are. I made sure my desired deck height, glass thickness, and railing height met the standards. A common mistake is buying hardware or glass without confirming these specs—something I learned the hard way. Cross-reference your plans with your city’s zoning ordinances and code requirements, focusing on safety-related standards, such as wind load, glass strength, and height minimums.
Check Your Material Compatibility
Choosing the right glass meant consulting the specifications for tempered, laminated, or unbreakable glass types stipulated by code. I verified my selections against cost-effective estimating insights to prevent overspending on unnecessary features. Remember, not all glass is suitable for exterior use—double-check that your panels meet the required U-Values and impact ratings.
Design with Compliance in Mind
Every design element influences permit approval. I worked with my architect to incorporate features like railing height, panel anchorage, and load-bearing supports that were compliant from the start. Think of this as fitting the puzzle pieces together—if one piece violates a regulation, it can cause delays or rework. Easy-to-implement details, such as making sure the top rail is flush with code-mandated height, prevented future inspection issues. Use permit guides to double-check that your design aligns with local standards.
Engage with Inspections Proactively
Once construction began, I maintained ongoing communication with inspectors. I scheduled a pre-inspection review, walking through each safety feature, ensuring every aspect matched the approved plans. This is like a dress rehearsal—spotting and fixing issues early saves you from costly corrections during formal inspections. Also, keep detailed records of your plans, permits, and correspondence. Doing so is invaluable if questions arise or if you need to appeal a decision. Remember, transparency helps smooth the process.
Confirm Final Approval Before Proceeding
Before closing up the railing, I scheduled the final inspection through permit navigation resources. Final approval isn’t just a rubber stamp; it’s evidence that your project meets all safety and code standards. Once approved, you’re set to enjoy your beautiful, compliant glass railing—without the looming fear of future violations or fines. Keep all documentation handy for potential future property transactions or resale inspections, and always stay updated on code revisions that may affect your property.
 Even seasoned contractors and homeowners often fall prey to misconceptions about estimating costs and navigating permits in new construction projects. One common myth is that creating a rough estimate early on is sufficient; however, without understanding the nuanced complexities of local codes and material costs, such initial figures can be dangerously off-target. Accurate estimation requires integrating detailed regional data and a clear grasp of permit intricacies, which many overlook, leading to budget overruns and permit delays.
Another prevalent mistake is assuming that permit processes are uniform across jurisdictions. In reality, permit requirements can vary significantly even within the same city, depending on zoning nuances, historical districts, or recent code updates. Relying on generic or outdated information can result in rejected submissions, costly reworks, or legal issues. To avoid this, consulting authoritative resources like permitting guides tailored for your locality is essential. Additionally, many underestimate the time and administrative effort that permits demand. Allocating sufficient lead time and engaging proactively with local authorities can be the difference between a smooth progression and project stalling.
Are Hidden Costs Lurking in Your Budget or Permits? An Expert’s Take
Research indicates that unanticipated fees and permit-related surprises account for nearly 30% of project budget overruns in residential construction, according to a study by the NIBS (National Institute of Building Sciences). These hidden costs often stem from overlooked requirements, such as utility connections, erosion control, or special inspections. The key to mitigating these risks is detailed planning and regular communication with inspectors and local agencies—something that advanced project managers prioritize. Remember, the devil is in the details; a comprehensive understanding of regional ordinances can safeguard your project from costly legal or compliance pitfalls. Have you ever fallen into this trap? Let me know in the comments.
Keep Your Construction Systems in Top Shape
Once your build is complete, maintaining the elements that keep your project running smoothly is crucial. Regular inspections, proactive repairs, and strategic upgrades ensure longevity and safety. In my experience, implementing a structured maintenance plan can save thousands in emergency repairs and downtime.
How do I maintain my construction tools and equipment over time?
Investing in high-quality maintenance tools is the first step. I highly recommend a digital asset management software like AssetKeeper because it allows me to schedule preventive maintenance, track service history, and set alerts for replacement deadlines. For smaller tools, dedicated toolkits that include lubricants, calibration devices, and cleaning supplies are vital. Regular cleaning after use prevents corrosion and wear, especially for power tools exposed to dust and moisture. Also, keeping detailed logs of maintenance activities simplifies troubleshooting and ensures compliance with safety standards. Visiting estimating guides can also help you anticipate the lifespan of various equipment based on usage patterns, helping you plan replacements before failures occur.
Tools I recommend for effective maintenance
From my personal arsenal, I rely heavily on infrared thermometers like the Fluke 62 MAX to detect overheating components early, preventing failures. My go-to for ongoing equipment calibration is the Mitutoyo 293-340-30 dial gauge because its precision ensures that measurements stay within tolerances, which is vital for structural safety. For maintaining safety, a comprehensive first aid kit tailored for construction environments and a portable fire extinguisher are non-negotiables. Additionally, I find that a high-capacity air compressor coupled with soft-bristle brushes helps me keep dust and debris off sensitive parts, extending their lifespan.
Future of Construction Maintenance
As technology advances, predictive maintenance driven by IoT sensors and AI analytics is on the horizon. Cameras and sensors embedded into machinery can alert you proactively about wear before it results in breakdowns, saving valuable time and cost. Embracing these innovations now gives you a competitive edge and ensures safer, more reliable operations long-term.
What’s the best way to keep your builds scalable over time?
Designing with modularity and flexibility in mind allows for smooth expansion or renovation down the line. Follow best practices outlined in adding value with expert home additions. Always invest in durable, easily adaptable materials, and employ versatile tools such as multi-bench systems that can be reconfigured for different tasks. Regularly reviewing your maintenance routines with your team ensures everyone is prepared for future scaling endeavors.
By adopting diligent maintenance routines, leveraging advanced tools, and planning for scalability, you set your projects up for long-term success. Don’t wait for equipment failures—be proactive. Try integrating a maintenance management app today and experience the difference it makes.
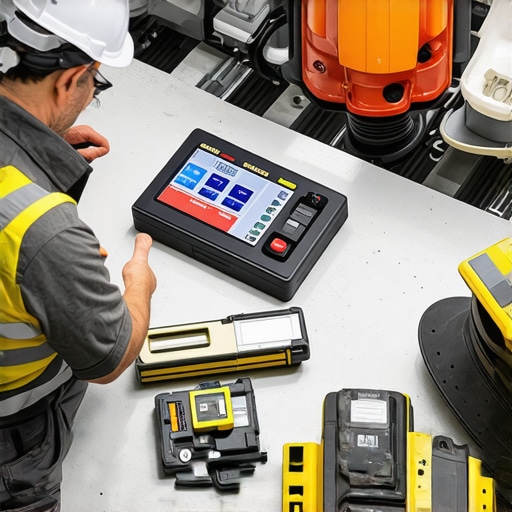
Illustration of a modern construction site with a focus on maintenance tools and equipment, showcasing digital interfaces and preventive measures.
Recognizing My Worst Mistake with Permits and Estimates
The biggest lesson I learned was the danger of rushing through the permit process without thorough research. I once submitted plans based on outdated code requirements, which caused a months-long delay. Now, I double-check all regulations and stay updated with local amendments, understanding that complacency can cost thousands and time. Never underestimate the importance of precise documentation—it’s the backbone of a smooth project.
Tools and Insights That Made All the Difference
I rely on sources like comprehensive estimating guides and permit checklists that keep me aligned with regional standards. Using project management apps such as Buildertrend helps me track permits, documents, and inspections in one place. These tools are invaluable in avoiding costly oversights and ensuring compliance throughout the build process.
What Encourages Me to Keep Going in Construction
Despite the hurdles, the reward of transforming a blueprint into reality keeps me motivated. Each successful permit approval and compliant installation boosts my confidence. To anyone venturing into new build projects, remember that mastering permits and estimates isn’t just about paperwork—it’s about building trust and ensuring safety for the future. Your dedication today paves the way for a resilient, rewarding craftsmanship that lasts a lifetime.