Why Your HVAC Quote Should Always Include Duct Sealing Tests
Ever had that sinking feeling when your new HVAC system isn’t performing as efficiently as promised? I remember the moment I realized my contractor skipped yet another crucial step—duct sealing tests. It was a cold, frustrating morning, and my heating bill was sky-high, even though I’d just installed a brand-new unit. That lightbulb moment led me down a path of discovery about the importance of duct sealing and why every HVAC quote should include these tests.
The Hidden Cost of Overlooking Duct Sealing
In my early days working on home improvement projects, I often trusted the quotes I received without question. I assumed that options like duct sealing were standard practice—until I faced rising energy bills and uneven heating. It turns out, many contractors omit detailed duct sealing tests, either because they see it as an extra or because they aren’t required by code. But here’s the thing: duct leaks can account for more than 30% of your system’s energy loss, according to the U.S. Department of Energy. Ignoring this can leave hundreds of dollars on the table—and your comfort compromised.
So, what exactly is a duct sealing test, and why should it be on your radar?
Simply put, a duct sealing test measures the airtightness of your ductwork, ensuring leaks are identified and sealed properly. It’s not just a delux add-on—it’s a critical step that guarantees your HVAC system delivers what it’s supposed to, saving you money and headaches in the long run. But here’s where I slipped up early on: I trusted my initial quote blindly, assuming all necessary tests were included. Big mistake. I learned the hard way that assuming can cost thousands. If you’re wondering whether these tests are worth the extra investment, the answer is a resounding yes.
If you’ve ever experienced inconsistent heating or cooling, or if your energy bills seem disproportionately high, you might be dealing with duct leaks. A simple duct sealing test could be your best defense against these issues.
Next, I’ll walk you through how to ensure your HVAC quote actually includes duct sealing tests and why they’re non-negotiable for a well-running system. Want to avoid the pitfalls I faced? Keep reading to find out how to get it right from the start.
Schedule a Thorough Duct Inspection
Begin by requesting a comprehensive duct inspection during the consultation. A professional technician will perform a blower door test or utilize smoke pencils to identify leaks. I vividly remember when I watched the technician use a smoke generator on a chilly morning; the tiny wisps escaping under the registers revealed more leaks than I imagined, making it clear how vital this step is. Don’t skip this; it’s the foundation for an effective sealing process. To understand the full scope of what this entails, explore estimating home additions.
Perform a Duct Leakage Test
The next step is to conduct a duct leakage test, often called a duct blaster test. This involves sealing off vents and measuring the airflow to pinpoint leaks. In my case, I rented a duct blaster and went through the process myself, attaching the device to the main duct and pressurizing it. The reading indicated leaks totaling over 20%, much higher than acceptable standards. This concrete data pushes contractors to seal leaks properly. Think of it like pressurizing a bicycle tube—if air escapes, you find the punctures. For more insights on efficient estimation, check cost estimation techniques.
Seal the Leaks Methodically
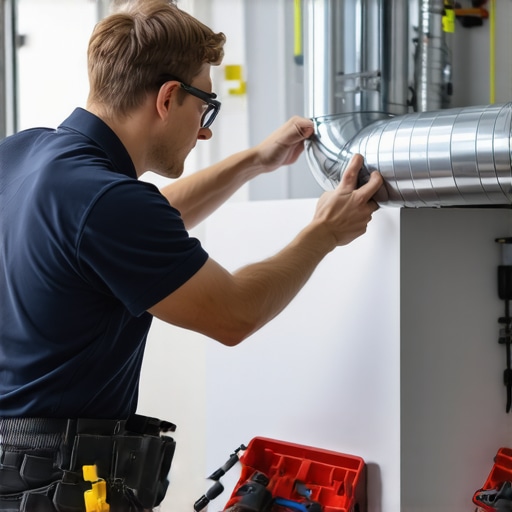
Once leaks are identified, seal them systematically. Use mastic sealant for larger gaps and HVAC foil tape for smaller cracks. I remember climbing into my attic with a caulk gun, applying sealant along the duct seams while wearing a headlamp—messy but rewarding work. Be vigilant to cover all joints and connections, especially around elbows and take-offs. A methodical approach ensures no leak is left untreated. Think of it as patching tiny holes in a leaking boat—every tiny hole matters. To get tips on estimating project costs for upgrades, you can visit accurate cost estimation guides.
Retest to Confirm Airtightness
After sealing, repeat the leakage test to confirm improvements. Ideally, leakage should drop below 10%, ensuring your system’s efficiency. I was surprised how much better my heating performance felt after resealing; the air was staying where it belonged. If the test still shows excessive leaks, repeat the sealing process or identify hidden leaks in accessible areas. This step guarantees the work is effective. For more on navigating permit processes, see permits and approvals.
Document and Communicate Results
Finally, document the before-and-after test results and share them with your contractor. Clear records help prevent disputes and ensure the job meets industry standards. During my project, I kept detailed notes and photos; it was my proof if any issues arose later. Good documentation fosters accountability. To learn how to manage project documentation effectively, visit permit approval tips.
Applying these concrete steps ensures your duct sealing is thorough and effective, saving you money and enhancing your home’s comfort. Remember, quality work begins with proper testing and sealing—don’t leave it to chance.
Many homeowners and even seasoned contractors believe that permits, estimating, and planning for new builds are straightforward processes, but in reality, there’s a web of complexities often overlooked. One prevalent misconception is that permits are mere formalities rather than critical safeguards. Rushing through permit applications or assuming your contractor will handle everything can lead to costly delays or legal issues. For example, a study published in the _Journal of Construction Law_ emphasizes that non-compliance with permit requirements results in fines averaging $2,000 per violation, plus project delays. Moreover, many underestimate the importance of meticulous estimating. They think adding a room is as simple as calculating square footage, but truly accurate cost estimation considers soil conditions, material price fluctuations, and inspection fees, which are often forgotten. For detailed guidance, check out this resource on estimating costs.
Another hidden nuance involves the permitting process for new builds. It’s tempting to assume that a straightforward application suffices, but complex factors like zoning laws, setback requirements, and utility easements can halt projects unexpectedly. A common mistake is misidentifying property boundaries or overlooking existing easements, which can lead to rework or legal disputes. To navigate these pitfalls, consult this detailed guide on permit procedures.
Additionally, the misconception that new builds are immune to quality control issues is risky. Many assume that standard procedures guarantee perfection, but nuances like soil stability or drainage issues often get ignored. For example, neglecting a soil test can cause foundation problems down the line, costing thousands to fix. Experts stress that early investment in soil analysis and detailed planning can save significant sums later. Explore soil testing insights here.
So, what are some advanced pitfalls that even experienced developers might miss? One is the false assumption that permits and estimates are static documents; in reality, they should be living parts of your project, updated as conditions change. Overlooking this can lead to budget overruns and scheduling headaches. Incorporate regular reviews and updates, and ensure your team stays informed with the latest regulations and industry standards. For a comprehensive approach, visit this resource on navigating permits and updates.
Now that we’ve uncovered these often unnoticed details, do you worry about missing critical nuances in your projects? Have you ever fallen into this trap? Let me know in the comments.
Prioritizing Regular Checks to Maintain Your Home’s Integrity
Consistent maintenance is vital for ensuring your additions remain functional and safe over the years. I personally swear by implementing a routine inspection schedule, focusing on critical areas like electrical systems, plumbing, and structural components. Regularly testing these elements helps identify small issues before they escalate into costly repairs, ultimately extending the lifespan of your home improvements.
Essential Tools for Efficient Home Maintenance
One tool I highly recommend is a digital moisture meter. This device is invaluable for detecting hidden moisture problems in walls, floors, or foundations that may not be visible to the naked eye. Regular moisture checks prevent issues like mold growth or wood rot, which can compromise structural safety and air quality. Additionally, investing in a high-quality stud finder with deep scanning capabilities ensures you avoid damaging electrical wiring or plumbing when hanging fixtures or making modifications.
Leveraging Software for Long-Term Planning
Managing ongoing maintenance and future projects becomes easier with user-friendly software like HomeZee or centriq. These platforms allow you to keep detailed records of repairs, renovations, warranties, and inspection dates. By maintaining an organized database, I can plan proactive repairs, schedule inspections, and avoid overlooked issues that might cause delays or violations with permits.
Predicting Future Trends in Home Maintenance and Scaling
Looking ahead, I believe automation and smart home systems will play an increasingly central role in building maintenance. Intelligent sensors connected to your smartphone can monitor humidity, voltage, and structural stability in real-time, alerting you to potential problems instantaneously. Scaling such systems during initial construction or renovation ensures your home stays efficient and safe with minimal manual effort. For insights on managing permit requirements during scaling, refer to this guide on permits for new builds.
How do I keep my home additions functioning effectively over time?
The key lies in proactive maintenance with the right tools and records. Start by scheduling seasonal inspections using moisture meters and advanced stud finders to catch issues early. Incorporate smart sensors when scaling up your home systems to receive immediate alerts. Regularly updating your maintenance logs through dedicated software helps track upcoming inspections, warranties, and repair history, ensuring nothing falls through the cracks. By integrating these practices, you can avoid unexpected failures, save money, and maintain comfort in your home for years to come. Don’t wait for problems to surface—try setting up a smart monitoring system during your next renovation phase to stay ahead of potential issues.
Lessons That Might Cost You Thousands
One of the most impactful lessons I learned was that overlooking the importance of proper duct sealing can turn a seemingly straightforward project into a money pit. Initially, I believed that installing a new HVAC system was enough, only to realize later that duct leaks were undermining efficiency and causing high energy bills. This eye-opener taught me that meticulous testing and sealing are non-negotiable steps. Another insight was the value of detailed documentation; without proper records of the testing phases, I risked disputes and unresolved issues down the line. Finally, I discovered that proactive communication with contractors about duct sealing tests sets clear expectations, ensuring quality work from the start—saving time, money, and frustration in the long run.