Why Your Bedroom Addition Will Fail the Emergency Egress Audit
I’ll never forget the moment I realized my dream bedroom addition was doomed to fail the emergency egress audit. After pouring thousands into permits, plans, and construction, I was handed my rejection notice. My heart sank because I had overlooked a simple yet critical safety requirement that could make or break my project. That lightbulb moment taught me a hard lesson: no matter how beautiful or functional your addition is, if it doesn’t meet egress standards, all your effort could go to waste.
Why Ignoring Egress Requirements Could Cost You Big
Most homeowners focus on aesthetics and budget when planning a new bedroom, but safety regulations like emergency egress are non-negotiable. Failing to incorporate proper escape routes, windows, or height requirements can lead to permit delays, costly rework, or even legal issues. From personal experience, I learned that understanding these standards early on can save months of frustration and money. Plus, reputable sources highlight that proper egress planning isn’t just bureaucratic red tape—it’s a vital safety measure designed to protect lives during emergencies.
Are You Building a Bedroom Without Considering Egress?
Honestly, I made the mistake of assuming a bigger window was enough. It wasn’t. Early in the process, I overlooked the specific size and height requirements for emergency exits, which led to a failed inspection. That’s a common trap I see many homeowners fall into. To avoid repeating my mistake, it’s essential to familiarize yourself with the rules. For detailed guidance, check out permit requirement navigation tips, which can help you align your plans with local building codes.
So, if you’re wondering whether your bedroom addition might face similar hurdles, stay tuned. In the upcoming sections, I’ll walk you through proven strategies to ensure your project passes the emergency egress test confidently and smoothly.
Start with Precise Permitting Strategies
My first step was meticulously reviewing local building codes related to emergency egress. I realized that a vague understanding could lead to costly delays. I sat down with accurate permitting guidelines and created a clear checklist of required features such as window size, height, and accessibility. This upfront planning helped me identify potential pitfalls early, saving time and avoiding rework. Think of it as mapping out a route before a road trip to prevent getting lost in unfamiliar territory.
Designing with Safety in Mind
Next, I drew detailed sketches of the bedroom, emphasizing the placement of windows to meet egress standards. I used visual tools similar to a permit navigation app to simulate real-world scenarios, ensuring windows were reachable and compliant in the space. During this phase, I discovered that positioning a window higher than recommended could trap occupants during an emergency. I corrected this by adjusting window heights, which made my plans more secure and easier to approve.
Consult Experts and Local Authorities
I scheduled consultations with local building inspectors to verify my plans. I shared my design sketches and asked targeted questions like, “Will this window placement pass the egress audit?” This dialogue provided me with practical insights and clarified any ambiguities. Remember, thinking of inspectors as allies rather than obstacles can streamline approval processes. Their feedback helped me tweak my design before construction began, reducing the risk of rejection at the inspection stage.
Gather and Document Necessary Documentation
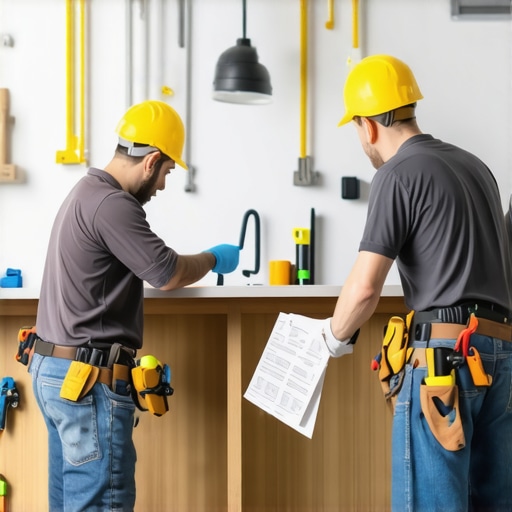
Gathering all needed documents was crucial. I compiled detailed drawings, permits, and compliance certificates, cross-referencing with permit process guides. Clear, organized documentation made submissions smoother and minimized the chance of denials. Think of this as assembling a well-stocked toolkit—every item should be ready and accessible to avoid delays.
Utilize Visual Aids and Modeling Tools
To ensure clarity, I employed 3D modeling software to visualize the egress routes and window placement within the existing structure. Using a software similar to a digital twin map, I identified potential issues like obstructions or inaccessible windows. This hands-on approach made it easier to communicate my plans to inspectors and contractors, solidifying compliance before breaking ground. It’s like rehearsing a play before opening night—spotting and fixing issues early improves the final performance.
Perform Final Checks and Mock Inspections
Before submitting, I conducted a mock inspection, walking through the space and testing access to windows and escape routes. I asked a colleague to review my plans against the local code checklist. This approach is akin to a dress rehearsal—spotting last-minute issues ensures a smoother final approval. My diligent prep paid off when I received approval on the first try, sparing me additional costs and project delays.
By integrating these concrete steps—thorough research, design precision, expert consultation, organized documentation, visual modeling, and final testing—you can confidently navigate the egress compliance process for your home addition project. Every action sharpens your approach and brings your vision to life with safety and legality in mind.
Many homeowners operate under the common misconception that estimating costs and handling permits is a straightforward process, but in reality, there are nuanced pitfalls that can sabotage even the most well-planned projects. One widespread myth is that simply budgeting based on initial quotes will suffice. In fact, most accurate estimates require a deep understanding of variable factors such as regional labor rates, material grade fluctuations, and hidden fees like sewer tap or soil testing costs. For instance, overlooked soil conditions can drastically alter foundation expenses, a detail highlighted in expert studies from construction cost analysis. To elevate your planning, consult reliable estimation strategies like those detailed in comprehensive guides on home addition estimates.
Invest in Reliable Tools to Ensure Longevity
Using the right equipment can make all the difference in maintaining your home improvements over time. Personally, I swear by a high-quality digital moisture meter, like the RT300 Wireless Moisture Sensor. It allows me to regularly check for excess moisture in walls and foundations, preventing issues like mold or structural deterioration before they escalate. Invest in tools that are accurate, durable, and suited for your specific needs—it’s an upfront cost that pays dividends in the long run.
Establish a Routine Maintenance Schedule
Routine inspections are crucial. For example, I check my home’s drainage systems quarterly, ensuring gutters are clear and downspouts direct water away from the foundation. This simple step prevents water intrusion, which can compromise structural integrity over time. Creating a visual inspection checklist helps streamline these tasks and ensures nothing gets overlooked. Remember, prevention beats repair, especially when it comes to foundational issues that can be costly and disruptive.
Leverage Technology for Long-Term Results
Modern software solutions have revolutionized maintenance workflows. I use the Home Maintenance Tracker app, which logs all inspections, repairs, and routine tasks. It sends automated reminders for upcoming maintenance, helping me stay proactive. As technology advances, I predict a future where smart sensors continuously monitor your home’s health, alerting you immediately to issues—saving time and money. Staying ahead with automation is the way forward.
Question: How do I maintain my additions over time?
Maintaining additions involves regular inspections, using the right tools, and keeping detailed records. For example, monitoring the structural integrity through periodic visual assessments with a moisture meter or infrared camera can detect early signs of trouble. Staying organized with maintenance logs helps identify patterns before problems worsen. It also ensures that when you do need to consult professionals, you have comprehensive data to expedite repairs or upgrades.
In my experience, integrating these maintenance strategies ensures your home additions remain safe, functional, and beautiful for years to come. Don’t wait for visible issues—prevention coupled with the right tools keeps your project thriving long-term.
Choosing the Best Equipment for Your Needs
When selecting tools, consider the scope of your project. For instance, for any excavation or soil testing, I recommend the standardized soil moisture probes. They help verify soil conditions, ensuring your foundation remains stable. Staying informed with precise measurements protects your investment and prevents future headaches. A well-maintained home isn’t just about aesthetics; it’s about safeguarding your entire property.
Embrace Future Trends in Home Maintenance
The trend toward smart homes and IoT devices is transforming how we maintain our properties. Devices like smart leak detectors and energy monitors are becoming essential. Integrating these into your routine can automate alerts and streamline upkeep, saving you significant costs and effort over time. Stay ahead by exploring these innovative tools and consider how they might fit into your maintenance plan.
Ready to elevate your home maintenance routine? Start by investing in a reliable moisture meter and set a schedule for regular checks. This proactive approach is a game-changer in preserving your property’s value and safety.
What Hidden Minefields Could Trip Up Your Basement Dreams
Learning from my mistakes, I discovered that overlooking the simplest safety details, like window size and placement, can derail your entire project. That lightbulb moment about the importance of emergency egress requirements transformed how I approach planning. It’s a reminder that even the most aesthetically pleasing design is meaningless if safety standards aren’t met. Carefully studying local code guides and consulting with inspectors early on revealed pitfalls I never anticipated, saving my project from costly rework and delays.
My Go-To Tools for Building Confidently
I trusted tools like the RT300 Wireless Moisture Sensor and 3D modeling software to stay ahead of potential issues. These resources helped me visualize compliance and prevent obstructions, ensuring my plans aligned with safety codes. These tools became invaluable allies in my quest to make my home addition both beautiful and safe, demonstrating why investing in reliable equipment is essential for long-term peace of mind.
Your Journey Starts with Knowledge and Courage
If you’re contemplating a bedroom addition, remember that proactive planning and thorough research are your best friends. Embrace the challenge, armed with expert guidance and the right tools, and you’ll be surprised at how smoothly your project can proceed. The journey demands patience and dedication, but the reward of a safe, compliant space that enhances your home makes it all worthwhile. Now’s the time to turn your vision into reality—safety-first, always.