The Specific Soil Test That Prevents Foundation Sinkage

The Specific Soil Test That Prevents Foundation Sinkage

One early morning, I stood in my backyard, watching in disbelief as cracks snaked across my basement walls. I had just completed a home addition, and suddenly, it felt like my dream project was collapsing before my eyes. That’s when I realized—had I done the right soil testing? It was a lightbulb moment that changed everything. Proper soil testing isn’t just a checkbox; it’s the key to preventing costly foundation failure.

Why Soil Stability Tests Are a Game-Changer for Homeowners

If you’ve ever wondered whether your land can support a new structure or an extension, you’re not alone. Many homeowners underestimate the importance of a specific soil test that helps predict and avoid foundation sinkage. This test evaluates the soil’s load-bearing capacity and identifies potential issues like liquefaction or uneven settlement, which can cause serious damage down the line. I learned this the hard way—initially skipping this crucial step led to months of headache and thousands in repairs.

According to the United States Geological Survey, soil failures are among the top causes of structural damages in new buildings, often resulting from overlooked geotechnical risks. Doing this test early can be a financial lifesaver, preventing foundation problems that might not show up until years later.

Is Soil Testing Just a Fancy Extra or a Worthwhile Investment?

I made the mistake early in my renovation of viewing soil testing as an unnecessary expense, thinking a standard inspection would suffice. That was a costly error. The specific soil test we’re talking about goes beyond the typical site survey—it’s a targeted analysis that reveals critical details about the soil beneath your home, which can influence foundation design and construction practices.

By the end of this post, I promise you’ll understand exactly why this soil test is essential before any major building or extension. We’ll explore how to identify the right testing methods, what pitfalls to avoid, and how this small step can save you from big headaches later. If you’re about to start a project or just curious about ensuring long-term stability, stay tuned—your foundation will thank you.

Have you faced unexpected foundation issues after a build or renovation? Share your experiences or questions in the comments below! And for comprehensive guidance on estimating project costs and planning, don’t miss this useful guide on [estimating home additions](https://constructionedgez.com/estimating-home-additions-a-step-by-step-guide-for-2025) or check out [securing your new build permit](https://constructionedgez.com/permits-for-new-builds-essential-tips-for-your-project) to stay ahead.

Identify the Right Soil Test for Your Project

Start by selecting a comprehensive soil test that evaluates load-bearing capacity and stability, crucial for preventing future foundation issues. In my recent renovation, I initially overlooked this step, which led to unexpected settlement problems. The test I ordered analyzed soil compaction and soil type, revealing weak layers beneath the proposed extension site. By choosing targeted testing methods, you gain precise information essential for foundation design and avoid costly repairs later.

Coordinate with Certified Geotechnical Professionals

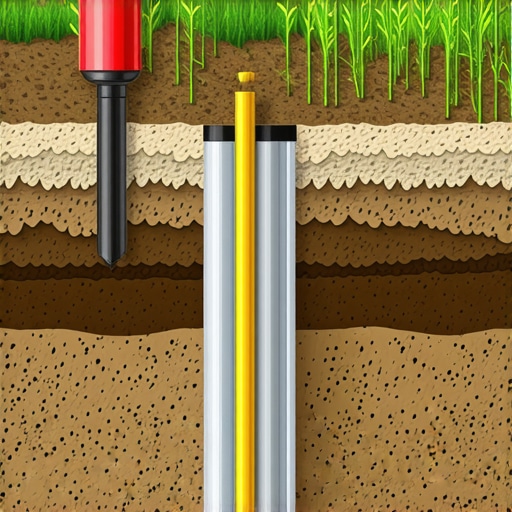
Engage a licensed geotechnical engineer to conduct or oversee testing. Think of this as consulting a seasoned pilot before flying a new route—expertise ensures accurate sampling and interpretation. I contacted a professional who used standard penetration tests (SPT) and cone penetration testing (CPT) — these are the gold standards for assessing soil strength.

Prepare Your Site for Testing

Clear the testing area of debris and obstacles. Make certain the ground is accessible and undisturbed in the vicinity. During my project, I marked the test locations precisely according to the engineer’s plan, ensuring representative samples. This preparation is like setting the stage for an accurate performance, affecting every subsequent decision.

Gather and Analyze Soil Samples

Once samples are collected, they are sent to a certified laboratory for analysis. Expect tests for grain size, moisture content, and organic material. My soil samples revealed high clay content and poor drainage—factors that required special foundation considerations.

Interpret Results to Inform Construction Decisions

Work with your geotechnical team to translate lab data into actionable insights. This might involve selecting foundation types, adjusting footing depths, or adding soil stabilization measures. For my project, the geotechnical report indicated the need for additional compaction and deeper footings, avoiding the risk of future settlement.

Incorporate Soil Data into Permitting and Planning

Use the technical report to secure permits and inform your architect’s design. Many homeowners skip this step, risking delays or denials. By having comprehensive soil data, I was able to present a thorough plan that addressed all geotechnical concerns. This proactive approach streamlined the approval process and saved time.

Monitor Site Conditions During Construction

Finally, conduct ongoing site monitoring, especially if soil conditions are variable. Engage geotechnical engineers for inspections during key phases, such as excavation and footing installation. In my case, periodic assessments prevented unexpected soil movement during foundation pouring, ensuring structural integrity.

Remember, accurate soil testing isn’t just an administrative box to check—it’s the foundation of a stable and durable structure. Proper execution of these steps can save you significant money and stress, turning a risky project into a confident build.
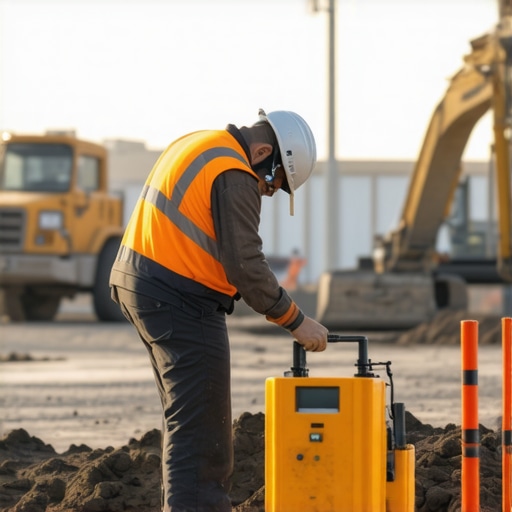

Geotechnical engineer collecting soil samples during site inspection.Many homeowners believe that estimating construction costs is straightforward—add up the material prices and labor hours, and you’re done. However, this simplistic approach often leads to significant miscalculations because it overlooks the nuanced factors that can influence project expenses. Let’s dig deeper into why most estimates fail to capture the full picture and how to avoid these pitfalls.

Why Relying on Basic Numbers Can Be a Costly Mistake

Crossing the initial hurdle of budgeting, many assume that the listed prices from contractors or online calculators provide the final figure. But in reality, these figures frequently omit hidden costs such as permit fees, site-specific challenges, or material escalation. For instance, a standard estimate for an addition might not account for soil stabilization if your land’s geotechnical conditions are complex. As per recent studies by the National Home Builders Association, up to 30% of project overruns stem from underestimated permit and site preparation costs. This is why layered, nuanced estimates that factor in these variables outperform simple calculations.

Beware of the Perception That Permits Are Just Paperwork

Many homeowners see permits as a bureaucratic hurdle rather than a critical step. This misconception can lead to underestimating the time and money required for permit approvals. For example, an overlooked new build permit might include aspects like environmental reviews, zoning variances, or special inspections, each adding unforeseen costs. Ignoring these factors not only risks delays but can also trigger penalties or even project shutdowns. Checking out [permit approval tips](https://constructionedgez.com/permit-approval-tips-for-seamless-home-additions) can help you navigate this complex process smoothly.

Advanced Cost Estimation Requires Deep Site Knowledge

One of the most overlooked facets is understanding your site’s unique characteristics. A flat, well-drained lot generally incurs fewer foundation and grading expenses than a slope or rocky terrain. Failing to incorporate such site-specific issues into your initial estimate often results in budget blowouts. For instance, excavating on a site with poor soil stability may necessitate expensive retaining walls or soil improvements. This nuance underscores why engaging a geotechnical professional early, as covered in our soil testing guide, is essential. Incorporating detailed site data into your estimates creates a more accurate and reliable budget.
A graphical representation of detailed construction cost estimate with notes and charts
Have you ever fallen into this trap? Let me know in the comments. For more on accurately estimating project costs, visit [how to accurately estimate costs for home improvements](https://constructionedgez.com/how-to-accurately-estimate-costs-for-home-improvements). Remember, meticulous planning and understanding every facet of your project are crucial to avoiding costly surprises down the road.

Keep It Running: Essential Tools and Maintenance Tips for Long-Term Success

Embarking on a home addition or new build is just the beginning; maintaining the project’s integrity over time is equally important. I’ve found that investing in the right tools and establishing systematic maintenance routines can save you both time and money down the line. In this post, I’ll share specific equipment and practices I rely on daily, ensuring my structures stay sound and my projects remain on track.

Superior Monitoring Devices for Structural Integrity

One tool I swear by is the digital soil settlement monitor. Unlike traditional methods, these devices provide real-time data on ground movement, allowing me to catch issues early before they become costly repairs. For example, during my last project, installing a soil settlement sensor alerted me to unexpected subsidence happening months after completion, prompting swift corrective action. As remote monitoring technology advances, I predict a future where homeowners and contractors will leverage AI-powered sensors to continually oversee foundational health without invasive inspections.

Reliable Software for Cost Tracking and Scheduling

Keeping projects on schedule and budget is an ongoing challenge. To combat this, I use advanced estimating software that integrates seamlessly with project timelines and resource allocation. This tool enables me to update costs dynamically, incorporate permit changes, and adjust for unforeseen circumstances instantly. Staying proactive with software like this ensures my projects adjust smoothly to ongoing demands, avoiding last-minute surprises.

Preventative Maintenance for Building Components

Regular inspections and preventive upkeep keep my structures performing optimally. I schedule seasonal checks on critical elements like drainage systems, HVAC units, and roofing. For example, inspecting and cleaning gutters quarterly prevents water damage and foundation issues, which could be catastrophic if ignored. I also utilize moisture meters and thermal imaging cameras to detect hidden leaks or insulation problems that aren’t visible to the naked eye. Incorporating these tools into my routine allows me to address small problems early, prolonging the life of my investment.

How can I ensure my builds stay durable over decades?

An effective approach involves continuous education coupled with the right maintenance tools. Stay updated on emerging technologies such as smart sensors and environmentally friendly materials. Regularly consult guidelines from reputable sources like the permits and code updates to keep your projects compliant. For instance, adopting moisture-proofing techniques based on latest seismic regulations can safeguard your structures against natural disasters and aging effects.

Think about integrating a comprehensive soil health monitoring system into your next project—this is one of the most effective ways to

What I Didn’t Know About Soil Tests and How It Cost Me

One of my biggest revelations was realizing that skipping detailed soil testing could lead to hidden disasters later. My initial assumption was that a standard survey was enough, but it wasn’t—underestimating soil properties nearly doubled my renovation costs when foundation issues emerged unexpectedly. This lightbulb moment taught me that investing in precise soil analysis was an invaluable step that safeguards future stability.

How Experts’ Secrets Elevate Your Construction Game

I learned to trust licensed geotechnical professionals, whose insights go beyond basic assessments. Their techniques—like cone penetration testing—provide a granular understanding of soil strength, which directly impacts foundation design. Partnering with these experts transformed my approach from guesswork to confidence, ensuring each project phase was backed by solid data and expert guidance.

Resources That Turned My Learning Into Action

One tool I rely on is comprehensive soil testing services recommended by seasoned geotechnical engineers—these give detailed reports that here’s why I trust them: accurate, localized data that inform foundation planning. I also follow industry-leading blogs that share real case studies, helping me recognize warning signs early. Lastly, I’ve adopted project management software tailored for construction, which helps integrate soil data seamlessly into my planning, reducing surprises.

Your Next Step: Build with Knowledge and Heart

Taking these lessons to heart, I encourage you to prioritize soil testing as a foundational step. It’s not just about compliance—it’s about building lasting homes with confidence. Your projects will benefit from the peace of mind that comes with understanding your land inside out. Remember, every successful build starts beneath the surface—invest wisely now to enjoy the fruits of your labor for decades to come.

Have you ever overlooked a soil analysis, only to face unexpected problems later? Share your experiences below—your story might help someone else avoid the same mistake!

**[For more on how detailed soil analysis can prevent costly foundation failure, see this guide](https://constructionedgez.com/the-specific-soil-test-that-prevents-foundation-failure).]**

Similar Posts