Why Your Grading Plan Must Show Natural Drainage Slopes
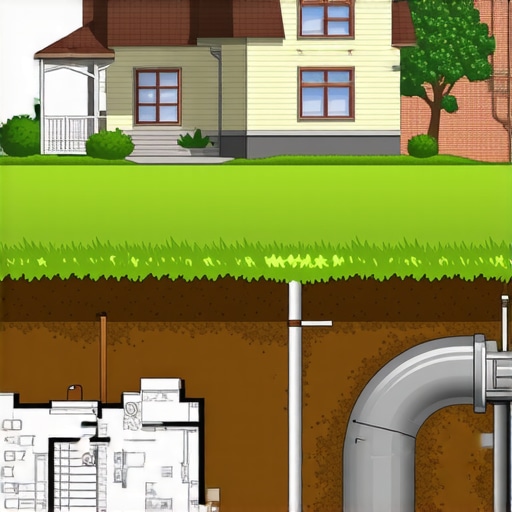
It was a hot summer afternoon when I first realized I had overlooked an essential detail in my building plans. After pouring concrete, I noticed water pooling around the foundation—an ugly, concerning patch that seemed to spell disaster. That moment was a lightbulb for me: your grading plan isn’t just about looks; it’s about ensuring proper drainage that protects your entire project.
Why Natural Drainage Slopes Will Make or Break Your Construction Project
Having been through the trenches myself, I can tell you that neglecting proper grading can lead to costly repairs, water infiltration, and even foundational damage. All because I skipped paying close attention to the slope of the land around the building site. The truth is, natural drainage slopes are critical for directing water away from your home or addition. They are your first line of defense against water intrusion, which, if ignored, can cause long-term deterioration and structural issues. Moreover, local building codes often mandate specific drainage requirements, which if overlooked, can delay permits and increase expenses.
That’s why I’m here to share my experience and guide you through understanding why your grading plan must explicitly show natural drainage slopes—so you can avoid costly mistakes and ensure your project’s longevity.
Is Overcomplicating the Grading Plan Really Necessary?
I admit, early on I thought detailed grading plans were just extra paperwork. I was worried about delays and additional costs. However, I learned the hard way that an incomplete or unclear grading plan can cause permit rejections and need for redesigns. During my first project, I didn’t clearly illustrate the slopes, which led to a reinspection and further delays. That’s a common mistake—one I made myself—so I want to help you avoid it.
Research shows that proper grading can extend the lifespan of your construction by protecting against water damage—something I wish I had known sooner. For more insights, you might find this guide on understanding permit processes helpful, especially regarding the importance of detailed plans.
So, if you’ve faced questions or uncertainties about grading and drainage, stick with me. The next sections will break down exactly how to ensure your grading plan shows natural slopes that move water away effectively—saving you headaches and money in the long run.
Set Clear Elevation Benchmarks
Start by establishing the primary elevation points around your project with a laser level or transit. During my recent addition, I marked existing grades precisely, which became the foundation for accurate slope calculation. This step is crucial because inconsistent benchmarks lead to errors in slope depiction that can delay permits. Use a spot survey to record these elevations thoroughly, creating a reliable reference for the entire grading plan.
Determine Proper Drainage Slopes
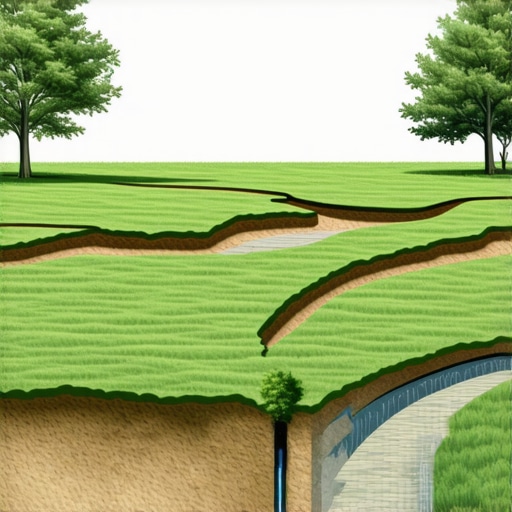
Aim for a slope of at least 2% (or 1/4 inch per foot) away from the structure for effective water runoff. I made this calculation by measuring from the foundation footer lines outward, ensuring water flows away naturally. Sketch the desired slopes directly on your grading plan, highlighting the direction and angle. Remember, a clear arrow indicating flow direction prevents ambiguities during reviews.
Use Simple Tools to Visualize Slopes
I recommend using bright-colored pencils or digital CAD software to differentiate slopes from existing grades. During my project, I drew overlay lines to represent the intended slope, which helped inspectors quickly verify compliance. These visuals make your plan more intuitive and reduce back-and-forth for clarifications.
Incorporate Natural Land Contours
Respect existing land contours to minimize excavation costs and environmental impact. When I surveyed the site, I incorporated natural dips and rises into my plan, ensuring water naturally drains towards designated swales. Mark these features clearly on your grading plan to demonstrate compatibility with existing terrain and adherence to local regulations.
Highlight Critical Drainage Features
Identify and specify features like swales, berms, and drain inlets that facilitate water movement. I detailed these features with annotations, emphasizing their slope grades and flow directions. Such precision reassures permit reviewers that water will be directed properly, reducing the risk of future water issues.
Validate Your Plan with a Practical Test
Before finalizing, conduct a mock water flow test using a garden hose or simulated rainfall over a scaled model. During my last project, this hands-on check revealed minor low spots that I corrected before submitting the plan, saving time and money. Document these tests as supplementary evidence of your plan’s effectiveness.
Document and Clarify All Details
Always include detailed notes explaining your slope calculations and the rationale behind feature placements. When I submitted my grading plan, comprehensive documentation expedited approval, as reviewers appreciated transparent justifications. Ensure your diagrams are legible and legends are clear to avoid misinterpretations that could halt progress.
Many assume that following the basic permits and estimates is enough for a successful addition or new build. However, even seasoned professionals often overlook nuanced details that can derail projects or inflate costs significantly. One common myth is that estimates are just rough numbers, when in reality, a precise and nuanced approach to estimating can save thousands and prevent permit rejection. For example, rushing through the initial permit application without understanding the intricate local regulations can lead to costly rework or delays. A key mistake I’ve seen repeatedly is underestimating site-specific challenges, like soil stability or drainage issues, which are often overlooked but critical for long-term success. Experts like Jim Collins emphasize that detailed due diligence at the planning stage—beyond basic site surveys—ensures smoother permit approvals and accurate cost prediction.
How can advanced site assessments prevent costly surprises in your project?
Engaging in comprehensive soil testing, including geotechnical reports, can reveal underpinning requirements or foundation adjustments early on. This proactive step prevents the dreaded ‘hidden costs’ that emerge mid-project, forcing you to pause work or renegotiate bids. Furthermore, many builders miss the importance of factoring in future-proofing elements, such as energy-efficient designs or updated code requirements, which become mandatory after new regulations are enacted. Staying ahead with continuous education—like reviewing the latest updates on estimating guides for 2025—ensures your plans are compliant and competitively priced. Remember, a well-prepared plan anticipates and adjusts for these nuances before permit submissions. Neglecting these details often results in permit rejections, costly redesigns, or legal complications, which can all be avoided with diligent planning and expert insight. Do not underestimate the power of deep research and precise forecasting in your project’s success. Have you ever fallen into this trap? Let me know in the comments.Maintaining your construction project’s efficiency and quality over time requires the right set of tools and routines. I personally rely on a combination of advanced equipment and specialized software that streamline processes, improve accuracy, and help identify potential issues early. In this article, I’ll share the tools I use daily, why they matter, and where I see trends heading in maintenance practices.
High-Precision Laser Levels for Consistent Elevation Checks
For ongoing site inspections, I use a Leica DISTO D2 laser distance meter combined with a Leica ChipShot laser level. These tools provide quick, accurate measurements of elevation and alignment over large areas, ensuring that my grading and drainage slopes remain optimal throughout the project’s lifespan. Consistent elevation references prevent costly rework and foundational problems down the line.
Geotechnical Monitoring with Digital Sensors
Soil stability can shift over time, especially in areas with fluctuating moisture. I deploy wireless geotechnical sensors from companies like GeoSIG, which monitor soil movement and report data remotely. This real-time monitoring allows me to proactively address potential shifts before they threaten the structure. The future of maintenance leans heavily toward integrated sensor networks—think of it as giving your site a ‘concerted nervous system.’
What tools do I recommend for long-term drainage and slope management?
Beyond sensors, I use software like Autodesk Civil 3D to simulate water flow and assess whether my existing slopes still perform effectively after major weather events. Regularly updating your models keeps your drainage plan responsive to environmental changes, aligning with best practices outlined at understanding permit processes.
Efficient Inspection with Drones
Inspections can be time-consuming, especially for hard-to-reach areas. I rely on DJI Matrice drones equipped with high-resolution cameras and thermal imaging for quick aerial assessments. These drones help me spot issues like compromised drainage channels or structural anomalies early. As drone technology advances, we can expect even smarter, autonomous systems that continuously monitor site health.
Project Management Software That Keeps Everything in Check
Tools like Procore or Buildertrend are invaluable for tracking maintenance schedules, documenting inspections, and managing permits. I personally prefer Buildertrend due to its user-friendly interface. Regularly updating your digital records not only ensures compliance but also creates a rich data history for future maintenance planning.
Anticipating Future Trends
Looking ahead, I predict a surge in AI-powered maintenance tools that analyze sensor data to advise on necessary repairs before problems escalate. Integrating these into your routine can significantly reduce long-term costs and preserve your project’s integrity. Staying ahead means embracing technology, continuous learning, and investing in smart tools now.
How do I maintain these tools over time?
Maintenance begins with regular calibration, firmware updates, and thorough cleaning. For example, laser levels need annual calibration to ensure accuracy, while software licenses should be kept current to leverage new features. Establishing a routine checklist—similar to your site inspections—will prolong your equipment’s lifespan. Consult manufacturer guidelines or your local supplier for specific maintenance tips, like the detailed guidance provided by estimating costs for new builds. Implementing these routines consistently enhances reliability and saves you money over the long run.
Try integrating a wireless soil sensor into your next project’s early post-construction monitoring plan. It will give you a real-time pulse on ground stability, helping you catch issues proactively and avoid costly repairs. Remember, the key to lasting success is tools—paired with routines—designed for durability, accuracy, and adaptability.
 Embarking on construction projects can feel overwhelming, especially when navigating permits and precise estimates. Over time, I’ve learned that the nuances—like detailed grading plans and thorough site assessments—are the difference between smooth approval and costly delays. Trust me, the small details often carry the biggest weight, turning potential setbacks into seamless progress. Incorporate these insider insights into your planning to elevate your projects beyond basic compliance and into long-term success. Remember, meticulous preparation isn’t just about getting permits—it’s about building a foundation for lasting quality and peace of mind.