Why Your Bedroom Addition Will Fail the Emergency Egress Audit
It was late one evening when I finally looked over my plans for our new bedroom addition. As I sat there, staring at the sketchy blueprint, a sinking feeling hit me—my design could fail the emergency egress audit. That realization was a lightbulb moment that changed how I approached home additions. If you’ve ever felt that nagging worry about permits, safety codes, or the risk of project delays, you’re not alone. Many homeowners rush into adding a room without fully understanding the crucial safety requirements, especially the emergency escape and rescue openings mandated by building codes.
Understanding the Risks of Overlooking Egress Requirements
Emergency egress is a safety feature designed to give occupants a quick escape route during emergencies like fires. Yet, early in my project, I made the mistake of assuming that a standard window would suffice for a bedroom without carefully verifying the size, height, and accessibility standards outlined in local codes. This oversight nearly cost me my permit and delayed construction by months. The reality is, failing the egress audit can lead to hefty fines, rebuilding, or even the inability to legally occupy the space. A solid understanding of these requirements is essential—and surprisingly, many overlook this crucial step until it’s too late. For comprehensive guidance, consider reviewing permit processes and compliance tips.
Are you worried that your planned bedroom may not meet the escape standards?
Early mistakes happen. I learned this the hard way when I underestimated the importance of window size and placement on my initial plans. The key is to know exactly what the codes require and how to implement them without sacrificing your design. In the next sections, I’ll share practical steps you can take to ensure your addition passes the emergency egress audit the first time around—saving you time, money, and frustration. Ready to make your project both beautiful and compliant? Let’s dive in.
Ensure Accurate Egress Measurements Before Permitting
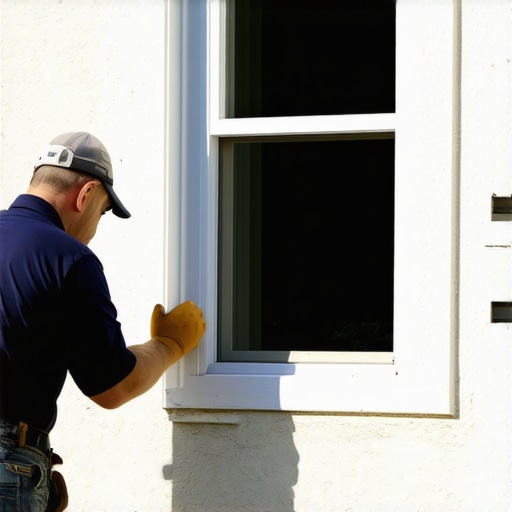
When I embarked on my bedroom addition, I learned that precise window measurements are critical. Measure both the window’s height and width at multiple points to account for irregularities in wall framing or structural deviations. Use a reliable tape measure, record the dimensions, and verify they meet the local code requirements, which typically specify a minimum opening size (e.g., 5.7 square feet). You can simplify this process by reviewing how to accurately estimate home addition costs and incorporate those costs into your planning. This initial step prevents costly surprises later, especially if your measurements fall short of code.
Design Windows That Meet Egress Standards — Don’t Rely on Assumptions
Think of window design as crafting a secret escape hatch that also doubles as everyday light and ventilation source. Select window styles that inherently meet egress standards, such as casement or double-hung windows, which typically offer larger openings. When I replaced a standard window with a larger casement style during my project, I ensured it opened fully without obstructions, saving me from reworking the framing later. Remember, the code often requires an unobstructed opening at least 24 inches high and 20 inches wide, with a total opening area of at least 5.7 square feet for bedrooms. Be vigilant about external obstructions like window wells or landscaping that could reduce accessible opening size. For complex designs, consider using a digital twin map to visualize space and ensure compliance before construction begins.
Streamline the Inspection Process with Proper Hardware and Clear Access
In my experience, the inspection stage hinges on accessibility. Keep the window area unobstructed and ensure hardware, like locks and latches, are functional and easily operable. I once faced a failed inspection because a decorative grill blocked the opening’s full range of motion — a detail not initially obvious. To avoid similar issues, test all units by opening and closing multiple times in different conditions. Prepare by reviewing permit approval tips and familiarize yourself with inspection expectations. Use clear signage or markings to highlight the egress path during the inspection if necessary. The goal is to make the inspector’s task straightforward, emphasizing that safety standards are met without ambiguity.
Create a Checklist for Code Compliance and Review
In my project, I devised a checklist covering measurement accuracy, hardware functionality, unobstructed pathways, and external factors like landscaping. Think of this checklist as your blueprint for success, guiding your pre-inspection review. Cross-verify each item against the local building codes, which you can consult through resources like permit processes. For each window, confirm dimensions, opening mechanism, hardware, and surrounding obstructions. For the overall space, ensure clear access routes and compliance with emergency requirements. This systematic approach caught minor issues early, saving days of re-inspection delays and potential fines, and reinforced the importance of thorough preparation.Many homeowners believe they understand how to accurately estimate costs and navigate permits for new builds and additions, but the reality is often more nuanced. A common misconception is that using generic square footage multipliers yields precise estimates, yet this oversimplifies the complexities involved. In my experience, factors like soil conditions, material fluctuations, and local code requirements dramatically influence the final costs, something many overlook during preliminary planning. Relying solely on online calculators or past projects can lead to significant underestimations, which may cause budget overruns or permit rejections. To truly master accurate estimating, it’s essential to incorporate detailed site assessments and stay updated on evolving regulations, as highlighted in expert guides like this comprehensive resource.Maintaining your home addition over time requires the right combination of tools, regular upkeep, and strategic planning. One essential tool I personally rely on is a digital moisture meter, which helps me monitor indoor humidity levels and prevent issues like mold and wood rot—common problems that can compromise structural integrity if left unchecked. Regular inspections of window hardware and seals are also vital; I schedule biannual checks using a cordless drill and a simple checklist to ensure latches and weatherstripping remain functional, thereby preserving energy efficiency and safety. To streamline these tasks, I use project management software like Trello with customized boards dedicated to maintenance schedules and inspection logs, ensuring nothing slips through the cracks.
In the future, I predict that smart home sensors will become standard for ongoing home maintenance. These devices can automatically detect leaks, temperature fluctuations, or compromised structural elements, alerting homeowners immediately. Adopting such technology early can save significant repair costs and extend your home’s lifespan.
How do I maintain my addition over time?
Developing a routine inspection schedule is crucial. I recommend setting recurring reminders in your digital calendar to check critical elements like ventilation systems, foundation drainage, and electrical integrity. Investing in quality tools, such as an infrared camera, will help you identify hidden issues like insulation gaps or moisture intrusion before they escalate. For more complex projects, consulting experts and leveraging advanced solutions like AI-driven maintenance tools can be a game-changer. Remember, staying proactive with your maintenance not only preserves your investment but also ensures the safety and comfort of your household.
To take your maintenance routine to the next level, try implementing a quarterly deep-dive inspection using an infrared camera to detect unseen thermal leaks or moisture issues. This proactive step can significantly extend the longevity of your addition and prevent costly repairs down the line.
The Pitfalls I Didn’t See Coming in My Home Addition
One of the most valuable lessons I learned was that even minor overlooked details, like window hardware or external obstructions, can cause significant delays because they block permit approval. It’s easy to think that big issues are the main obstacles, but often, it’s the small, seemingly insignificant factors that trip you up and extend your timeline unnecessarily.
How Overconfidence About Costs and Permits Can Trip You Up
I used to believe that online calculators gave me a solid estimate, but I soon realized that site-specific factors and evolving code requirements can render these estimates inaccurate. The true lesson was that proactive, detailed planning—supported by resources like expert estimation guides—saves money and avoids surprises.
The Power of a Systematic Approach to Compliance
Developing a thorough checklist for measurements, hardware checks, and external factors transformed my process. It allowed me to identify potential failures early and address them before scheduling inspections. This systemic approach, inspired by seasoned professionals, turned what felt like a daunting process into a manageable series of steps, dramatically reducing re-inspection delays.
Curated Resources That Elevated My Project
Among the tools I relied on were detailed permit guides from permit process resources, digital twin mapping for visualization, and the latest estimation strategies from home estimation guides. These resources provided clarity, confidence, and a strategic edge that would have otherwise taken me years to acquire on my own.
Your Home, Your Future
Embarking on a home addition is a journey filled with lessons—some costly, some enlightening. But the key is to stay proactive, rely on trusted knowledge, and remember that each challenge is an opportunity to learn and grow. With careful planning and the right resources, you can turn your visions into a safe, beautiful reality. Ready to start your own improvement journey? Dive into the specifics, apply what you’ve learned, and don’t hold back from creating the space you’ve always envisioned.