Why Your Shed Addition Might Encroach on a Utility Easement
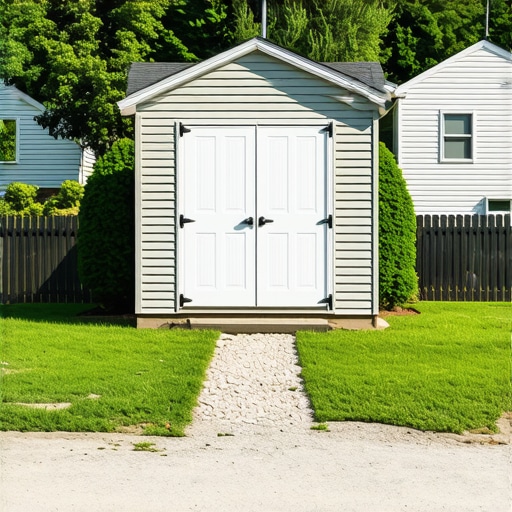
I vividly remember the moment I realized my shed wasn’t just a simple backyard project—it was slowly edging into the invisible boundaries set by my utility easements. It was a sunny Saturday when I finished building my new garden shed, only to find a notice from the city stating that part of it encroached on a utility easement. Panic set in. I had spent months planning, budgeting, and dreaming about that space, and suddenly, I was facing costly reconsiderations.
If you’ve ever embarked on a home addition or an outbuilding project, you know how tempting it is to focus on the design, materials, and permits. But lurking beneath these plans is a crucial detail that often gets overlooked: utility easements. These are rights granted to utility companies to access underground or overhead lines without obstruction, and building into them can lead to serious legal and financial headaches.
In today’s post, I promise to share what I’ve learned from my own experience and early mistakes. We’ll dive into how to identify, understand, and respect utility easements, so your shed or addition doesn’t turn into a permit rejection or a future demolition order. I’ll also guide you through practical steps to ensure your project stays within legal bounds—saving you time, money, and a good night’s sleep.
Why Sneaking Into Utility Easements Can Cost a Fortune
Many homeowners, myself included initially, underestimate the importance of utility easements. These unseen boundaries can span yards, sidewalks, or entire sections of your property. Building into them is not only illegal but can lead to forced removal or costly relocations. A survey from the National Association of Home Builders indicates that legal encroachments into easements account for over 15% of project delays in residential renovations.
One mistake I made early on was relying solely on my property survey without double-checking the easement details. Turns out, surveys often don’t accurately depict easements—something I discovered too late. This error cost me extra fees and a scramble to adjust my plans. You can avoid this fate by understanding how to interpret official plats and contacting your local municipality or utility provider for definitive easement maps.
Have you ever faced confusion about property boundaries or wondered whether your planned shed might infringe on someone else’s rights? If so, you’re far from alone. The good news is that the process of understanding and respecting easements isn’t as daunting as it seems. For detailed insights into legal boundaries and easements, I recommend visiting https://constructionedgez.com/understanding-permit-processes-for-new-building-projects.
Next, let’s look at how you can accurately identify your property’s easements and plan accordingly, preventing surprises before they happen.
Review Your Property Deed and Survey
Begin by examining your property deed and latest survey maps. Look for sections marked as easements—these are rights granted to utility companies. I recall a time when I overlooked the easement details on my deed, leading to a costly redesign after discovering my shed encroached. To avoid this, cross-reference your documents with the official plat maps available from local government offices or online portals. This step is crucial to ensure your planned structure stays clear of restricted zones, and it simplifies subsequent permit applications.
Obtain Clear Easement Maps from Utility Providers
Next, contact your local utility companies directly to request detailed easement maps. Many providers have GIS systems or printed plats that highlight underground and overhead lines. I once called my city’s water and power departments—they provided precise boundary lines, which differed slightly from the survey I had relied on. Incorporate this data into your planning process, especially when marking the layout for your shed foundation. Remember, building over or too close to these easements is a violation that can result in fines, removal orders, or costly modifications later.
Plan Your Structure’s Location with Buffer Zones
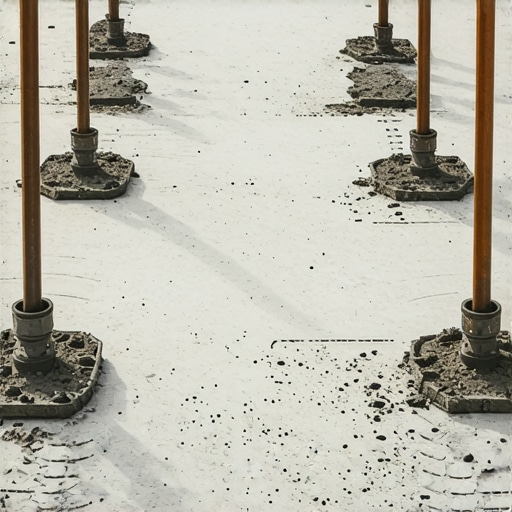
When marking the building site, maintain a safe buffer—at least a few feet—away from easement boundaries. Think of it as parking your car in a reserved space; you wouldn’t park right at the line, knowing a tow or fine could follow. Use stakes and modern tools like laser levels to set clear boundaries. During my project, I used a tape measure and marked the buffer zone explicitly, which helped avoid accidental encroachment when excavating. This proactive step ensures your project remains compliant and simplifies any necessary inspections or permit approvals.
Consult with a Professional Surveyor
If you’re uncertain about easement boundaries or if your property has complex easements, hiring a licensed surveyor is wise. A professional survey can accurately delineate easements and provide legal documentation—an invaluable asset if disputes arise. I hired a surveyor after discovering some ambiguity in the property lines, which expedited my permit review process and avoided future legal challenges. This investment pays off by giving you peace of mind and documentation that your project adheres to local regulations.
Communicate with Local Authorities Before Breaking Ground
Finally, before you start construction, submit your plans to local permitting agencies. Provide them with your survey data, easement documentation, and detailed site plans. The permit reviewer will verify that your shed’s footprint respects all easements and complies with setback requirements. In my case, an early submission with comprehensive documentation helped clarify any regulatory concerns, streamlining approval and saving time. Staying ahead of permitting hurdles prevents delays, stop-work orders, or revisions down the line.
By following these precise steps—reviewing deeds, obtaining official maps, planning with buffers, consulting professionals, and engaging authorities—you cement your project’s legal standing and sidestep costly mistakes. If you want to learn more about estimating costs or navigating permits, visit Estimating Costs for New Builds and Guide to Permitting for New Builds. Proper planning now means fewer surprises during construction and peace of mind for future property owners.Many homeowners and even some professionals believe that estimating costs and planning permits are straightforward tasks: gather a few numbers, add a buffer, and apply for approval. However, this oversimplification can lead to costly surprises down the line. In my experience, one of the most overlooked aspects is the inherent complexity behind seemingly simple estimates and how minor assumptions can derail a project.
**Avoid the Myth of Perfect Estimates**
Contrary to popular belief, estimates are rarely precise. Many rely heavily on historical costs or initial quotes, but these figures often ignore fluctuating material prices, regional permit variances, or hidden site conditions. For example, a miscalculated foundation depth due to underestimated soil issues can exponentially increase costs. For a more detailed approach, explore expert insights on estimating costs. This guidance emphasizes comprehensive site analysis and contingency planning, which are crucial for accurate budgeting.
**The Oops Factor: Underestimating Permitting Complexities**
A common trap is assuming permits are just a paperwork formality. In reality, permit processes vary significantly based on jurisdiction, project scope, and even the specific codes involved. For instance, a tiny addition might require special zoning variances or environmental assessments that aren’t immediately apparent. A presumption of straightforward approval can result in project halts or legal penalties.
**
Why Do So Many Misjudge Construction Risks?
**
One sophisticated question homeowners ask is: “How do I accurately anticipate unforeseen site conditions that could inflate costs or delay permits?” The answer lies in proactive site investigations, such as soil testing or utility locating, rather than relying solely on initial surveys. Studies have shown that unexpected site conditions are among the top causes of project delays and budget overruns. Incorporate detailed site assessments and maintain a flexible contingency fund. Trusted sources like cost-effective estimating techniques can guide you further in managing these uncertainties effectively.
**Don’t Let These Hidden Traps Catch You Off Guard**
In practice, the most resilient projects are those that incorporate layered planning: accurate site analysis, embracing estimate variability, and understanding local permit intricacies. These steps require a nuanced approach that recognizes the unique challenges of each site and project scope.
Correctly estimating and permitting your project isn’t just about adding numbers; it’s about understanding the details that can make or break your timeline and budget. I encourage you to review your current process, question assumptions, and remember: preparedness is your best tool against unexpected costs. For more on mastering project estimates and permit navigation, check out mastering estimation strategies.
Have you ever fallen into this trap? Let me know in the comments.
The Power of Digital Blueprints for Precision
One of my go-to tools is AutoCAD Civil 3D. It allows me to create detailed, accurate site plans that integrate easement boundaries, topography, and utility lines. Using this software ensures that my building footprints stay compliant over time, and I can easily update plans if site conditions change. As construction projects become more complex, leveraging such powerful CAD tools becomes essential to maintaining accuracy and avoiding costly revisions in the future.
Implementing Project Management Platforms to Keep Everything on Track
I personally rely on Procore, a cloud-based construction management platform. It streamlines communication between contractors, clients, and inspectors, and stores all project documentation in one accessible space. Regularly updating project schedules, budgets, and permits within Procore helps me spot potential issues early and address them proactively, ultimately saving time and money long-term. This system adapts well as your project scales up, providing transparency that keeps everyone aligned.
Using Laser Scanning for Site Verification and Maintenance
In my experience, terrestrial laser scanning has revolutionized site assessment. It captures a comprehensive 3D model of existing conditions, which is invaluable for monitoring settlement, verifying foundation integrity, or preparing for additions in the future. I recommend the Leica BLK360 for its portability and integration capabilities. Using laser scans regularly, especially when maintaining a property or planning new phases, ensures your data remains current, preventing surprises that could derail your project down the line. Trends indicate that as hardware becomes more affordable, laser scanning will be a standard part of effective site management.
How do I maintain the accuracy of these tools over time?
Staying current with software updates, calibrating hardware like laser scanners periodically, and investing in ongoing training are key. For instance, I subscribe to updates from Autodesk to ensure my CAD models reflect the latest standards and features. Regular calibration of equipment prevents drift and inaccuracies. Additionally, networking with industry peers through platforms like LinkedIn can expose you to new techniques and best practices, guaranteeing your tools serve you reliably as your projects grow. To deepen your understanding of cost-effective strategies when scaling your operations, visit this resource on estimating techniques.
In future, I believe automation and AI will further streamline maintenance and planning, reducing human error even further. For now, however, mastering these recommended tools and routines offers a tangible advantage in securing long-term project success. For specific guidance on integrating these systems into your workflow, consider exploring resources on managing additions efficiently. Now’s the time to try adopting a laser scan checklist for your upcoming projects—seeing is believing when it comes to precision!
Lessons the Hard Way About Easement Blunders and Costly Revisions
One of my biggest realizations was how crucial it is to double-check easement boundaries before starting construction. Rushing into building without thoroughly understanding these legal zones can result in legal disputes or forced removals, costing thousands and setting back timelines by months. I learned to always cross-reference surveys with official easement maps and consult with utility providers early, sparing myself future headaches.
Another lightbulb moment was recognizing that permits are not mere bureaucratic hurdles but vital safeguards. In my experience, skipping or rushing this step often leads to project delays, fines, or worse—having to redo work that was initially considered complete. Investing time upfront to understand local regulations and engage with permitting authorities can streamline approvals and keep your project on track.
I’ve also discovered the importance of buffer zones around easements. Building with a few extra feet of clearance not only ensures compliance but also simplifies future maintenance or upgrades, preventing accidental violations. By physically marking these boundaries during planning, I avoided costly adjustments and reinforced the habit of thoughtful, proactive site planning.
Tools and Sources That Guided My Success
For precise easement boundaries and site planning, I rely on AutoCAD Civil 3D. It allows me to create detailed, layered plans that integrate utility lines, property lines, and topography—helping me visualize potential conflicts before breaking ground. Pairing this with GIS data from my local utility provider gives me confidence in the accuracy of my plans.
When in doubt about easement locations or permitting requirements, I reach out directly to local authorities and utility companies. Their detailed maps and guidance are invaluable, saving me from costly missteps. I also stay updated through expert resources that break down permit processes and common pitfalls.
Lastly, collaborating with licensed surveyors proved essential. A professional survey delineates easements definitively, providing clear documentation. Investing in this step was well worth it, as it fortified my compliance and expedited permit approvals, ultimately saving time and money on my project.
Your Turn to Make It Happen
Understanding and respecting utility easements and permitting intricacies make all the difference between a smooth build and a frustrating ordeal. Whether you’re planning a shed, extension, or new home, taking these lessons to heart will help you avoid costly surprises. Remember, detailed planning today ensures peace of mind tomorrow.
What has been your biggest challenge navigating easements or permit requirements? Share your experiences below—I’d love to hear and help where I can.