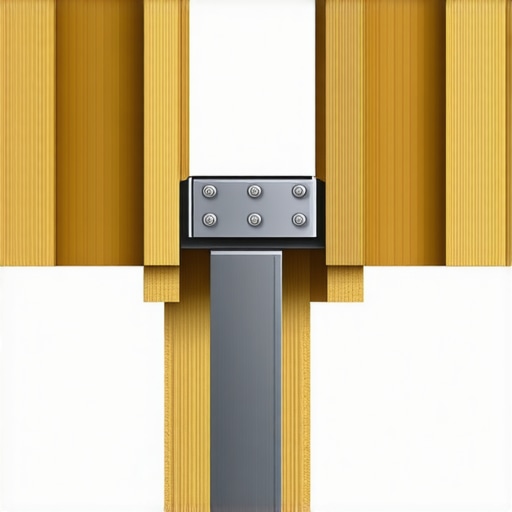
Why Your Second Story Deck Needs Lateral Load Connections
I’ll never forget the moment I watched my newly built second story deck sway in a gust of wind—an unsettling reminder that I overlooked a crucial detail during construction. That lightbulb moment hit hard: without proper lateral load connections, your deck isn’t just a place to relax—it’s a potential safety hazard waiting to happen. If you’ve ever experienced similar doubts or worry about the stability of your outdoor spaces, you’re not alone. Today, we’ll dive into why adding lateral load connections to your second story deck is more than just a building code requirement—it’s a vital step to ensure durability and safety.
The Hidden Risks of Skipping Lateral Load Connectors
When I first built my deck, I thought I was doing everything by the book—until I learned I had missed a key detail in the framing design. Many homeowners and even some contractors underestimate the importance of lateral load connections, which help resist forces like wind and seismic activity that can destabilize a structure over time. Without these connections, your deck could develop dangerous sway, cracks, or even catastrophic failure, especially in regions prone to storms or earthquakes. Installing proper lateral connections isn’t just an enhancement—it’s a necessity to protect your investment and loved ones. For further insight, check out this guide on home value and structural safety.
Are You Putting Your Deck at Unnecessary Risk?
It’s common for homeowners to assume that standard ledger boards and shear nails are enough. However, according to recent research, structures lacking adequate lateral load transfer are significantly more susceptible to failure during high wind events. Early in my project, I made the mistake of relying solely on decorative fasteners, believing they would suffice. That oversight served as a stark reminder: even small details can lead to big dangers. Investing in proper lateral load connectors like straps or bracing can make all the difference in keeping your deck safe and durable for years to come. Curious if your current setup is sound? Consult your local building codes or a qualified engineer to evaluate your design. Also, familiarizing yourself with permit requirements can help avoid costly mistakes—especially with the complexities of modern regulations. For reliable guidance, visit this comprehensive permitting guide.
Let’s explore how you can ensure your deck is built to last and meets all safety standards. Ready? Let’s get started with some practical steps to reinforce your second story deck effectively.
Assess Your Current Setup and Gather Materials
Start by inspecting your existing deck to identify where lateral load connections are missing or inadequate. Take note of areas showing sway, cracks, or movement during windy conditions. For tools and materials, you’ll need metal straps, hurricane ties, Simpson Strong-Tie brackets, screws, a drill, measuring tape, and a level. I once neglected to verify the grade of my framing hardware, which led to a delay until new, code-compliant fasteners arrived. Precise measurement and proper material selection are vital to ensure your reinforcement meets local building codes. For additional guidance on budgeting, see this estimating guide.
Plan and Design Your Reinforcement Strategy
Identify Critical Load Transfer Points
Focus on the ledger board, posts, beams, and the connection points to the house. These are the primary areas where lateral forces apply and need reinforcement. Think of your deck like a ship’s hull—without proper bracing, it’s vulnerable to the storm’s fury. In my project, I sketched a plan to add metal straps across the ledger-to-wall connection, which improved stability noticeably. Use a level and measuring tape to mark exact locations for brackets, ensuring even load distribution. Consult local building codes or a structural engineer if you’re unsure; visit this guide on permits for detailed info.
Install Lateral Load Connections
Attach metal straps across the ledger to framing members or wall studs. Secure them tightly with galvanized screws, ensuring contact that resists sway. For post-to-beam connections, use hurricane ties appropriately spaced according to manufacturer specifications. When I first added straps in my backyard, I had to re-drill several holes because I misaligned the brackets, emphasizing the importance of double-checking measurements beforehand. Also, consider additional bracing or diagonal sheathing to further stiffen the structure. Think of this step like tightening the bolts on a car’s frame—each connection adds to the overall strength. For detailed installation techniques, see this guide on home additions.
Secure and Inspect Your Reinforcements
Once installed, use a level and confirm all connections are flush and properly tensioned. Tighten any loose fasteners and ensure brackets are firmly anchored to framing members or masonry. Don’t forget to add washers if necessary to prevent fastener pull-through. After completing the installation, mimic a gust of wind by manually pushing the deck to see if the sway is eliminated. During my own project, I discovered a loose bracket that could have compromised safety, so I re-secured it immediately. Regular inspections are recommended, especially after storms or seismic events, to confirm everything remains tight and functional. For more safety tips, review this permit process overview. Keeping your deck reinforced isn’t a one-time task—it’s an ongoing commitment to safety and durability.Many homeowners and even seasoned builders believe that permits and project estimates are straightforward processes, but in reality, there’s a wealth of nuance often overlooked. A common myth is that following local codes guarantees smooth approval; however, the reality is far more complex, involving detailed documentation, precise adherence to standards, and strategic planning. For instance, truly mastering permit approval isn’t just about ticking boxes—it’s about understanding the subtle requirements that can make or break your project. Failing to anticipate these nuances can lead to delays, extra costs, or even legal issues. Another advanced mistake is relying solely on basic estimation techniques. Many underestimate the importance of detailed, itemized cost breakdowns and contingency planning, which are crucial for managing unforeseen expenses. For example, neglecting to account for permit fees, design revisions, or site-specific challenges can inflate your budget unexpectedly. A key question for experienced builders and savvy homeowners is: How do you accurately estimate costs without over-scoping or underestimating? According to leading construction economists, integrating historical data and employing sophisticated software tools can significantly improve estimation accuracy, reducing risk and providing clearer budget forecasts. To deepen your understanding, it’s beneficial to explore resources like this comprehensive estimating guide. Moreover, understanding the intricacies of the permitting process—such as permit approval tips—can save substantial time and money. When planning a home addition, ensure you’re familiar with the specific local requirements; a misstep here can lead to costly rework. For example, some jurisdictions require detailed drainage plans or tree removal permits that many overlook. Mastering these details demands a proactive approach, including consulting experienced professionals and reviewing authoritative guides like this permit-related resource. Let’s dig deeper into how these nuances affect your project’s success. Have you ever fallen into this trap? Let me know in the comments.
Maintaining the integrity of your home, especially after large projects like additions or new builds, requires not just initial attention but a strategic, ongoing approach. Over the years, I’ve found that having the right tools and a disciplined maintenance routine make all the difference in ensuring your structures remain safe and functional. Today, I want to share specific tools I recommend and practical methods that can help you keep your project in top shape for the long haul.
Invest in Quality Inspection Equipment
First, precision is key when it comes to detecting issues before they develop into costly repairs. A digital moisture meter, for example, is invaluable for assessing the health of framing and sheathing, especially in areas prone to humidity or leaks. I personally rely on the Protimeter Surveymaster because it provides quick, accurate readings of moisture content, allowing me to catch problems early. Additionally, a laser level helps ensure that your finishes and structural elements stay aligned over time, reducing the risk of uneven settling or shifting. These tools are relatively affordable but save you significant headaches in the future.
Regularly Service and Calibrate Your Equipment
Tools are only as good as their calibration and maintenance. Every few months, I double-check my moisture meter’s calibration against a known reference to guarantee accuracy. Similarly, cleaning and lubricating power tools—like drills and saws—maintain their performance and lifespan. If you neglect these steps, you risk inaccurate inspections or tool failure when you need them most. Making time for routine upkeep might seem minor, but it prolongs the effectiveness of your investments and prevents unexpected breakdowns during critical maintenance tasks.
Create a Maintenance Checklist for Your Property
Beyond tools, a structured approach to home care ensures nothing slips through the cracks. I recommend breaking down your maintenance schedule into seasonal tasks: cleaning gutters, inspecting flashing, checking seals around windows and doors, and verifying the stability of critical load-bearing elements. For example, after heavy storms, I always examine my deck’s lateral load connections for corrosion or loosened fasteners, addressing issues proactively. Keeping an organized log of inspections and repairs simplifies future planning and insurance claims, if necessary. Plus, being systematic helps prioritize repairs before they escalate into safety hazards.
Plan for Future Upgrades and Trends
As construction materials and techniques evolve, staying informed about new tools and standards ensures your home remains up-to-date. For example, advances in crack monitoring sensors can now provide real-time alerts for structural shifts, allowing for prompt action. I predict the future will see even more integration of smart home diagnostics, making maintenance less manual and more data-driven. Adopting these innovations early can turn routine inspections into insights that prevent major failures, ultimately saving money and securing your peace of mind.
How do I maintain my structural reinforcements over time?
Consistency is vital. Regular visual inspections, supplemented by precise tools like moisture meters and levels, help detect early signs of deterioration. Establish a routine, document your findings, and don’t shy away from consulting professionals if anomalies arise. This disciplined approach not only extends the life of your structure but also reinforces your confidence as a homeowner committed to safety and value. To explore more advanced strategies, consider reviewing this guide on ongoing property management. And for a quick win, try setting a quarterly maintenance reminder to assess load-bearing and waterproofing conditions—small steps that yield long-term benefits.
Lessons From the Front Lines of Construction Planning
- Permits are a moving target. I once thought a permit approval was a straightforward process—until I learned that regulations differ drastically between jurisdictions. It taught me to always double-check local requirements early and not assume one-size-fits-all. Missing critical documentation or misinterpreting rules can cause costly delays, so investing time in understanding the process pays off.
- Estimating isn’t just about numbers. I realized that precise estimation requires more than adding up material costs. It involves understanding permit fees, inspection contingencies, and unexpected site challenges. Using comprehensive tools and professional input helps me prevent budget overruns and keeps the project moving smoothly.
- Community dynamics matter. I underestimated how neighbors or existing structures could influence my project timeline. Engaging with neighbors and local authorities early can smooth permit approvals and prevent surprises that stall progress.
- Documentation is your safety net. Keeping detailed records of planning, correspondence, and inspections has saved me countless headaches when questions or disputes arise. It’s a lesson I wish I had learned sooner—organized paperwork creates confidence and clarity throughout the build process.
Tools and Resources That Made a Difference
- Constructionedgez’s Estimating Guide: This resource offers step-by-step insights into accurate cost prediction—crucial for avoiding budget pitfalls.
- Permit Procedures Primer: Understanding local permit nuances saves time and energy. This comprehensive guide helps navigate complex approval pathways efficiently.
- Structural Design Software: Modern tools allow pre-visualizing load paths and compliance, reducing surprises during inspections.
- Professional Consultation: Partnering with experienced engineers and permit specialists has been invaluable in making informed decisions and streamlining approvals.
Embrace a Future Where You’re Informed and Confident
Your journey through permit challenges and estimating is uniquely yours, but you’re not alone on this path. With the right knowledge, tools, and mindset, you can transform complex regulatory and budgeting hurdles into stepping stones for your dream project. Every successful approval and accurate estimate boosts your confidence and brings you closer to a home that truly fits your vision. So, are you ready to take control of your permit and estimating process and turn your plans into reality? Share your biggest concern below—let’s solve it together!
}#}#}#}#}#}#}#}#}#}#}#}#}#}#}#}#}#}#}#}#}#}#}#}#}#}#}#}#}#}#}#}#}#}#}#}#}#}#}#}#}#}#}#}#}#}#}#}#}#}#}#}#}#}#}#}#}#}#}#}#}#}#}#}#}#}#}#}#}#}#}#}#}#}#}#}#}#}#}#}#}#}#}#}#}#}#}#}#}#}#}#}#}#}#}#}#}#}#}#}#}#}#}#}#}#}#}#}#}#}#}#}#}#}#}#}#}#}#}#}#}#}#}#}#}#}#}#}#}#}#}#}#}#}#}#}#}#}#}#}#}#}#}#}#}#}#}#}#}#}#}#}#}#}#}#}#}#}#}#}#}#}#}#}#}#}#}#}#}#}#}#}#}#}#}#}#}#}#}#}#}#}#}#}#}#}#}#}#}#}#}#}#}#}#}#}#}#}#}#}#}#}#}#}#}#}#}#}#}#}#}#}#}#}#}#}#}#}#}#}#}#}#}#}#}#}#}#}#}#}#}#}#}#}#}#}#}#}#}#}#}#}#}#}#}#}#}#}#}#}#}#}#}#}#}#}#}#}#}#}#}#}#}#}#}#}#}#}#}#}#}#}#}#}#}#}#}#}#}#}#}#}#}#}#}#}#}#}#}#}#}#}#}#}#}#}#}#}#}#}#}#}#}#}#}#}#}#}#}#}#}#}#}#}#}#}#}#}#}#}#}#}#}#}#}#}#}#}#}#}#}#}#}#}#}#}#}#}#}#}#}#}#}#}#}#}#}#}#}#}#}#}#}#}#}#}#}#}#}#}#}#}#}#}#}#}#}#}#}#}#}#}#}#}#}#}#}#}#}#}#}#}#}#}#}#}#}#}#}#}#}#}#}#}#}#}#}#}#}#}#}#}#}#}#}#}#}#}#}#}#}#}#}#}#}#}#}#}#}#}#}#}#}#}#}#}#}#}#}#}#}#}#}#}#}#}#}#}#}#}#}#}#}#}#}#}#}#}#}#}#}#}#}#}#}#}#}#}#}#}#}#}#}#}#}#}#}#}#}#}#}#}#}#}#}#}#}#}#}#}#}#}#}#}#}#}#}#}#}#}#}#}#}#}#}#}#}#}#}#}#}#}#}#}#}#}#}#}#}#}#}#}#}#}#}#}#}#}#}#}#}#}#}#}#}#}#}#}#}#}#}#}#}#}#}#}#}#}#}#}#}#}#}#}#}#}#}#}#}#}#}#}#}#}#}#}#}#}#}#}#}#}#}#}#}#}#}#}#}#}#}#}#}#}#}#}#}#}#}#}#}#}#}#}#}#}#}#}#}#}#}#}#}#}#}#}#}#}#}#}#}#}#}#}#}#}#}#}#}#}#}#}#}#}#}#}#}#}#}#}#}#}#}#}#}#}#}#}#}#}#}#}#}#}#}#}#}#}#}#}#}#}#}#}#}#}#}#}#}#}#}#}#}#}#}#}#}#}#}#}#}#}#}#}#}#}#}#}#}#}#}#}#}#}#}#}#}#}#}#}#}#}#}#}#}#}#}#}#}#}#}#}#}#}#}#}#}#}#}#}#}#}#}#}#}#}#}#}#}#}#}#}#}#}#}#}#}#}#}#}#}#}#}#}#}#}#}#}#}#}#}#}#}#}#}#}#}#}#}#}#}#}#}#}#}#}#}#}#}#}#}#}#}#}#}#}#}#}#}#}#}#}#}#}#}#}#}#}#}#}#}#}#}#}#}#}#}#}#}#}#}#}#}#}#}#}#}#}#}#}#}#}#}#}#}#}#}#}#}#}#}#}#}#}#}#}#}#}#}#}#}#}#}#}#}#}#}#}#}#}#}#}#}#}#}#}#}#}#}#}#}#}#}#}#}#}#}#}#}#}#}#}#}#}#}#}#}#}#}#}#}#}#}#}#}#}#}#}#}#}#}#}#}#}#}#}#}#}#}#}#}#}#}#}#}#}#}#}#}#}#}#}#}#}#}#}#}#}#}#}#}#}#}#}#}#}#}#}#}#}#}#}#}#}#}#}#}#}#}#}#}#}#}#}#}#}#}#}#}#}#}#}#}#}#}#}#}#}#}#}#}#}#}#}#}#}#}#}#}#}#}#}#}#}#}#}#}#}#}#}#}#}#}#}#}#}#}#}#}#}#}#}#}#}#}#}#}#}#}#}#}#}#}#}#}#}#}#}#}#}#}#}#}#}#}#}#}#}#}#}#}#}#}#}#}#}#}#}#}#}#}#}#}#}#}#}#}#}#}#}#}#}#}#}#}#}#}#}#}#}#}#}#}#}#}#}#}#}#}#}#}#}#}#}#}#}#}#}#}#}#}#}#}#}#}#}#}#}#}#}#}#}#}#}#}#}#}#}#}#}#}#}#}#}#}#}#}#}#}#}#}#}#}#}#}#}#}#}#}#}#}#}#}#}#}#}#}#}#}#}#}#}#}#}#}#}#}#}#}#}#}#}#}#}#}#}#}#}#}#}#}#}#}#}#}#}#}#}#}#}#}#}#}#}#}#}#}#}#}#}#}#}#}#}#}#}#}#}#}#}#}#}#}#}#}#}#}#}#}#}#}#}#}#}#}#}#}#}#}#}#}#}#}#}#}#}#}#}#}#}#}#}#}#}#}#}#}#}#}#}#}#}#}#}#}#}#}#}#}#}#}#}#}#}#}#}#}#}#}#}#}#}#}#}#}#}#}#}#}#}#}#}#}#}#}#}#}#}#}#}#}#}#}#}#}#}#}#}#}#}#}#}#}#}#}#}#}#}#}#}#}#}#}#}#}#}#}#}#}#}#}#}#}#}#}#}#}#}#}#}#}#}#}#}#}#}#}#}#}#}#}#}#}#}#}#}#}#}#}#}#}#}#}#}#}#}#}#}#}#}#}#}#}#}#}#}#}#}#}#}#}#}#}#}#}#}#}#}#}#}#}#}#}#}#}#}#}#}#}#}#}#}#}#}#}#}#}#}#}#}#}#}#}#}#}#}#}#}#}#}#}#}#}#}#}#}#}#}#}#}#}#}#}#}#}#}#}#}#}#}#}#}#}#}#}#}#}#}#}#}#}#}#}#}#}#}#}#}#}#}#}#}#}#}#}#}#}#}#}#}#}#}#}#}#}#}#}#}#}#}#}#}#}#}#}#}#}#}#}#}#}#}#}#}#}#}#}#}#}#}#}#}#}#}#}#}#}#}#}#}#}#}#}#}#}#}#}#}#}#}#}#}#}#}#}#}#}#}#}#}#}#}#}#}#}#}#}#}#}#}#}#}#}#}#}#}#}#}#}#}#}#}#}#}#}#}#}#}#}#}#}#}#}#}#}#}#}#}#}#}#}#}#}#}#}#}#}#}#}#}#}#}#}#}#}#}#}#}#}#}#}#}#}#}#}#}#}#}#}#}#}#}#}#}#}#}#}#}#}#}#}#}#}#}#}#}#}#}#}#}#}#}#}#}#}#}#}#}#}#}#}#}#}#}#}#}#}#}#}#}#}#}#}#}#}#}#}#}#}#}#}#}#}#}#}#}#}#}#}#}#}#}#}#}#}#}#}#}#}#}#}#}#}#}#}#}#}#}#}#}#}#}#}#}#}#}#}#}#}#}#}#}#}#}#}#}#}#}#}#}#}#}#}#}#}#}#}#}#}#}#}#}#}#}#}#}#}#}#}#}#}#}#}#}#}#}#}#}#}#}#}#}#}#}#}#}#}#}#}#}#}#}#}#}#}#}#}#}#}#}#}#}#}#}#}#}#}#}#}#}#}#}#}#}#}#}#}#}#}#}#}#}#}#}#}#}#}#}#}#}#}#}#}#}#}#}#}#}#}#}#}#}#}#}#}#}#}#}#}#}#}#}#}#}#}#}#}#}#}#}#}#}#}#}#}#}#}#}#}#}#}#}#}#}#}#}#}#}#}#}#}#}#}#}#}#}#}#}#}#}#}#}#}#}#}#}#}#}#}#}#}#}#}#}#}#}#}#}#}#}#}#}#}#}#}#}#}#}#}#}#}#}#}#}#}#}#}#}#}#}#}#}#}#}#}#}#}#}#}#}#}#}#}#}#}#}#}#}#}#}#}#}#}#}#}#}#}#}#}#}#}#}#}#}#}#}#}#}#}#}#}#}#}#}#}#}#}#}#}#}#}#}#}#}#}#}#}#}#}#}#}#}#}#}#}#}#}#}#}#}#}#}#}#}#}#}#}#}#}#}#}#}#}#}#}#}#}#}#}#}#}#}#}#}#}#}#}#}#}#}#}#}#}#}#}#}#}#}#}#}#}#}#}#}#}#}#}#}#}#}#}#}#}#}#}#}#}#}#}#}#}#}#}#}#}#}#}#}#}#}#}#}#}#}#}#}#}#}#}#}#}#}#}#}#}#}#}#}#}#}#}#}#}#}#}#}#}#}#}#}#}#}#}#}#}#}#}#}#}#}#}#}#}#}#}#}#}#}#}#}#}#}#}#}#}#}#}#}#}#}#}#}#}#}#}#}#}#}#}#}#}#}#}#}#}#}#}#}#}#}#}#}#}#}#}#}#}#}#}#}#}#}#}#}#}#}#}#}#}#}#}#}#}#}#}#}#}#}#}#}#}#}#}#}#}#}#}#}#}#}#}#}#}#}#}#}#}#}#}#}#}#}#}#}#}#}#}#}#}#}#}#}#}#}#}#}#}#}#}#}#}#}#}#}#}#}#}#}#}#}#}#}#}#}#}#}#}#}#}#}#}#}#}#}#}#}#}#}#}#}#}#}#}#}#}#}#}#}#}#}#}#}#}#}#}#}#}#}#}#}#}#}#}#}#}#}#}#}#}#}#}#}#}#}#}#}#}#}#}#}#}#}#}#}#}#}#}#}#}#}#}#}#}#}#}#}#}#}#}#}#}#}#}#}#}#}#}#}#}#}#}#}#}#}#}#}#}#}#}#}#}#}#}#}#}#}#}#}#}#}#}#}#}#}#}#}#}#}#}#}#}#}#}#}#}#}#}#}#}#}#}#}#}#}#}#}#}#}#}#}#}#}#}#}#}#}#}#}#}#}#}#}#}#}#}#}#}#}#}#}#}#}#}#}#}#}#}#}#}#}#}#}#}#}#}#}#}#}#}#}#}#}#}#}#}#}#}#}#}#}#}#}#}#}#}#}#}#}#}#}#}#}#}#}#}#}#}#}#}#}#}#}#}#}#}#}#}#}#}#}#}#}#}#}#}#}#}#}#}#}#}#}#}#}#}#}#}#}#}#}#}#}#}#}#}#}#}#}#}#}#}#}#}#}#}#}#}#}#}#}#}#}#}#}#}#}#}#}#}#}#}#}#}#}#}#}#}#}#}#}#}#}#}#}#}#}#}#}#}#}#}#}#}#}#}#}#}#}#}#}#}#}#}#}#}#}#}#}#}#}#}#}#}#}#}#}#}#}#}#}#}#}#}#}#}#}#}#}#}#}#}#}#}#}#}#}#}#}#}#}#}#}#}#}#}#}#}#}#}#}#}#}#}#}#}#}#}#}#}#}#}#}#}#}#}#}#}#}#}#}#}#}#}#}#}#}#}#}#}#}#}#}#}#}#}#}#}#}#}#}#}#}#}#}#}#}#}#}#}#}#}#}#}#}#}#}#}#}#}#}#}#}#}#}#}#}#}#}#}#}#}#}#}#}#}#}#}#}#}#}#}#}#}#}#}#}#}#}#}#}#}#}#}#}#}#}#}#}#}#}#}#}#}#}#}#}#}#}#}#}#}#}#}#}#}#}#}#}#}#}#}#}#}#}#}#}#}#}#}#}#}#}#}#}#}#}#}#}#}#}#}#}#}#}#}#}#}#}#}#}#}#}#}#}#}#}#}#}#}#}#}#}#}#}#}#}#}#}#}#}#}#}#}#}#}#}#}#}#}#}#}#}#}#}#}#}#}#}#}#}#}#}#}#}#}#}#}#}#}#}#}#}#}#}#}#}#}#}#}#}#}#}#}#}#}#}#}#}#}#}#}#}#}#}#}#}#}#}#}#}#}#}#}#}#}#}#}#}#}#}#}#}#}#}#}#}#}#}#}#}#}#}#}#}#}#}#}#}#}#}#}#}#}#}#}#}#}#}#}#}#}#}#}#}#}#}#}#}#}#}#}#}#}#}#}#}#}#}#}#}#}#}#}#}#}#}#}#}#}#}#}#}#}#}#}#}#}#}#}#}#}#}#}#}#}#}#}#}#}#}#}#}#}#}#}#}#}#}#}#}#}#}#}#}#}#}#}#}#}#}#}#}#}#}#}#}#}#}#}#}#}#}#}#}#}#}#}#}#}#}#}#}#}#}#}#}#}#}#}#}#}#}#}#}#}#}#}#}#}#}#}#}#}#}#}#}#}#}#}#}#}#}#}#}#}#}#}#}#}#}#}#}#}#}#}#}#}#}#}#}#}#}#}#}#}#}#}#}#}#}#}#}#}#}#}#}#}#}#}#}#}#}#}#}#}#}#}#}#}#}#}#}#}#}#}#}#}#}#}#}#}#}#}#}#}#}#}#}#}#}#}#}#}#}#}#}#}#}#}#}#}#}#}#}#}#}#}#}#}#}#}#}#}#}#}#}#}#}#}#}#}#}#}#}#}#}#}#}#}#}#}#}#}#}#}#}#}#}#}#}#}#}#}#}#}#}#}#}#}#}#}#}#}#}#}#}#}#}#}#}#}#}#}#}#}#}#}#}#}#}#}#}#}#}#}#}#}#}#}#}#}#}#}#}#}#}#}#}#}#}#}#}#}#}#}#}#}#}#}#}#}#}#}#}#}#}#}#}#}#}#}#}#}#}#}#}#}#}#}#}#}#}#}#}#}#}#}#}#}#}#}#}#}#}#}#}#}#}#}#}#}#}#}#}#}#}#}#}#}#}#}#}#}#}#}#}#}#}#}#}#}#}#}#}#}#}#}#}#}#}#}#}#}#}#}#}#}#}#}#}#}#}#}#}#}#}#}#}#}#}#}#}#}#}#}#}#}#}#}#}#}#}#}#}#}#}#}#}#}#}#}#}#}#}#}#}#}#}#}#}#}#}#}#}#}#}#}#}#}#}#}#}#}#}#}#}#}#}#}#}#}#}#}#}#}#}#}#}#}#}#}#}#}#}#}#}#}#}#}#}#}#}#}#}#}#}#}#}#}#}#}#}#}#}#}#}#}#}#}#}#}#}#}#}#}#}#}#}#}#}#}#}#}#}#}#}#}#}#}#}#}#}#}#}#}#}#}#}#}#}#}#}#}#}#}#}#}#}#}#}#}#}#}#}#}#}#}#}#}#}#}#}#}#}#}#}#}#}#}#}#}#}#}#}#}#}#}#}#}#}#}#}#}#}#}#}#}#}#}#}#}#}#}#}#}#}#}#}#}#}#}#}#}#}#}#}#}#}#}#}#}#}#}#}#}#}#}#}#}#}#}#}#}#}#}#}#}#}#}#}#}#}#}#}#}#}#}#}#}#}#}#}#}#}#}#}#}#}#}#}#}#}#}#}#}#}#}#}#}#}#}#}#}#}#}#}#}#}#}#}#}#}#}#}#}#}#}#}#}#}#}#}#}#}#}#}#}#}#}#}#}#}#}#}#}#}#}#}#}#}#}#}#}#}#}#}#}#}#}#}#}#}#}#}#}#}#}#}#}#}#}#}#}#}#}#}#}#}#}#}#}#}#}#}#}#}#}#}#}#}#}#}#}#}#}#}#}#}#}#}#}#}#}#}#}#}#}#}#}#}#}#}#}#}#}#}#}#}#}#}#}#}#}#}#}#}#}#}#}#}#}#}#}#}#}#}#}#}#}#}#}#}#}#}#}#}#}#}#}#}#}#}#}#}#}#}#}#}#}#}#}#}#}#}#}#}#}#}#}#}#}#}#}#}#}#}#}#}#}#}#}#}#}#}#}#}#}#}#}#}#}#}#}#}#}#}#}#}#}#}#}#}#}#}#}#}#}#}#}#}#}#}#}#}#}#}#}#}#}#}#}#}#}#}#}#}#}#}#}#}#}#}#}#}#}#}#}#}#}#}#}#}#}#}#}#}#}#}#}#}#}#}#}#}#}#}#}#}#}#}#}#}#}#}#}#}#}#}#}#}#}#}#}#}#}#}#}#}#}#}#}#}#}#}#}#}#}#}#}#}#}#}#}#}#}#}#}#}#}#}#}#}#}#}#}#}#}#}#}#}#}#}#}#}#}#}#}#}#}#}#}#}#}#}#}#}#}#}#}#}#}#}#}#}#}#}#}#}#}#}#}#}#}#}#}#}#}#}#}#}#}#}#}#}#}#}#}#}#}#}#}#}#}#}#}#}#}#}#}#}#}#}#}#}#}#}#}#}#}#}#}#}#}#}#}#}#}#}#}#}#}#}#}#}#}#}#}#}#}#}#}#}#}#}#}#}#}#}#}#}#}#}#}#}#}#}#}#}#}#}#}#}#}#}#}#}#}#}#}#}#}#}#}#}#}#}#}#}#}#}#}#}#}#}#}#}#}#}#}#}#}#}#}#}#}#}#}#}#}#}#}#}#}#}#}#}#}#}#}#}#}#}#}#}#}#}#}#}#}#}#}#}#}#}#}#}#}#}#}#}#}#}#}#}#}#}#}#}#}#}#}#}#}#}#}#}#}#}#}#}#}#}#}#}#}#}#}#}#}#}#}#}#}#}#}#}#}#}#}#}#}#}#}#}#}#}#}#}#}#}#}#}#}#}#}#}#}#}#}#}#}#}#}#}#}#}#}#}#}#}#}#}#}#}#}#}#}#}#}#}#}#}#}#}#}#}#}#}#}#}#}#}#}#}#}#}#}#}#}#}#}#}#}#}#}#}#}#}#}#}#}#}#}#}#}#}#}#}#}#}#}#}#}#}#}#}#}#}#}#}#}#}#}#}#}#}#}#}#}#}#}#}#}#}#}#}#}#}#}#}#}#}#}#}#}#}#}#}#}#}#}#}#}#}#}#}#}#}#}#}#}#}#}#}#}#}#}#}#}#}#}#}#}#}#}#}#}#}#}#}#}#}#}#}#}#}#}#}#}#}#}#}#}#}#}#}#}#}#}#}#}#}#}#}#}#}#}#}#}#}#}#}#}#}#}#}#}#}#}#}#}#}#}#}#}#}#}#}#}#}#}#}#}#}#}#}#}#}#}#}#}#}#}#}#}#}#}#}#}#}#}#}#}#}#}#}#}#}#}#}#}#}#}#}#}#}#}#}#}#}#}#}#}#}#}#}#}#}#}#}#}#}#}#}#}#}#}#}#}#}#}#}#}#}#}#}#}#}#}#}#}#}#}#}#}#}#}#}#}#}#}#}#}#}#}#}#}#}#}#}#}#}#}#}#}#}#}#}#}#}#}#}#}#}#}#}#}#}#}#}#}#}#}#}#}#}#}#}#}#}#}#}#}#}#}#}#}#}#}#}#}#}#}#}#}#}#}#}#}#}#}#}#}#}#}#}#}#}#}#}#}#}#}#}#}#}#}#}#}#}#}#}#}#}#}#}#}#}#}#}#}#}#}#}#}#}#}#}#}#}#}#}#}#}#}#}#}#}#}#}#}#}#}#}#}#}#}#}#}#}#}#}#}#}#}#}#}#}#}#}#}#}#}#}#}#}#}#}#}#}#}#}#}#}#}#}#}#}#}#}#}#}#}#}#}#}#}#}#}#}#}#}#}#}#}#}#}#}#}#}#}#}#}#}#}#}#}#}#}#}#}#}#}#}#}#}#}#}#}#}#}#}#}#}#}#}#}#}#}#}#}#}#}#}#}#}#}#}#}#}#}#}#}#}#}#}#}#}#}#}#}#}#}#}#}#}#}#}#}#}#}#}#}#}#}#}#}#}#}#}#}#}#}#}#}#}#}#}#}#}#}#}#}#}#}#}#}#}#}#}#}#}#}