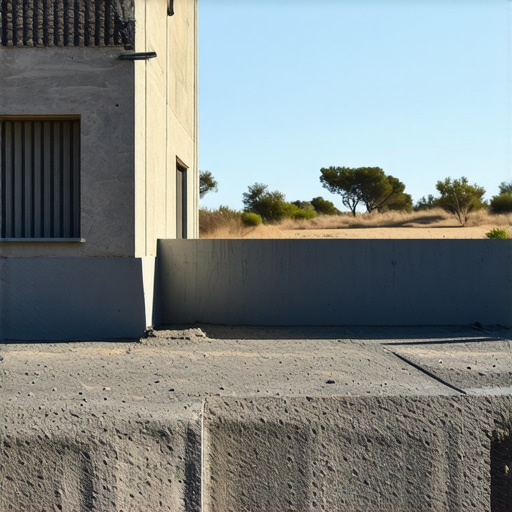
Why Your Foundation Wall Needs Waterproofing Even in Dry Climates
I remember the moment I discovered water seeping through my basement walls during a particularly dry summer. It felt counterintuitive—dry climates are supposed to be less prone to moisture issues, right? That lightbulb moment made me realize something crucial: waterproofing isn’t just for rainy days or humid regions. Even in the desert, my foundation walls needed protection. Have you ever faced a similar surprise while planning your new build or renovation? If so, you’re not alone. Today, we’ll explore why waterproofing your foundation is a vital step, regardless of how dry your climate may seem.
Dry Doesn’t Mean Damage-Free: The Hidden Value of Foundation Waterproofing
Many homeowners and builders assume that in areas with scarce rainfall or low humidity, waterproofing becomes optional. But the truth is, moisture doesn’t only come from rain; it also migrates through soil, vapor, and even from internal sources like plumbing leaks. Skipping waterproofing can lead to unseen damage that escalates over time, causing cracks, mold, and compromised structural integrity. I made the mistake early in my construction projects by neglecting to waterproof my foundation walls, believing my climate’s dryness would shield me. That oversight cost me dearly when I faced damp basement walls and costly repairs months later.
Proper waterproofing acts as a barrier, preventing water infiltration and maintaining a dry, durable foundation. It’s an investment in your property’s longevity—a step that pays off in peace of mind and savings. Learn about effective waterproofing techniques and why they matter in all climates, not just those drenched by rain. For more insights on how to budget smartly for these essentials, visiting this resource on estimating costs for home improvements can help you plan effectively.
Is Waterproofing Really Necessary When It’s Dry?
Yes, and here’s why: Soil tends to retain moisture even in dry climates due to underground aquifers and groundwater. Moreover, vapor transmission through concrete and soil can lead to internal humidity issues. When I initially dismissed waterproofing in my area, I underestimated these factors. It wasn’t until I experienced basement dampness that I realized my mistake. This is a common misconception that many share—believing rain and humidity are the only threats. But the reality is, foundation waterproofing is a proactive measure that safeguards your home against unseen risks.
So, before you break ground on your next project, consider this: waterproofing your foundation isn’t just an accessory; it’s a fundamental component of durable construction. If you’re curious about navigating permit requirements or estimating costs accurately, resources like this guide on permit processes can prepare you for smoother projects.
understanding the importance of this step, regardless of climate, sets the stage for building a resilient, damage-resistant home. Ready to learn the practical strategies that will keep your foundation dry? Let’s dive into the next section.
Start with a Detailed Site Assessment
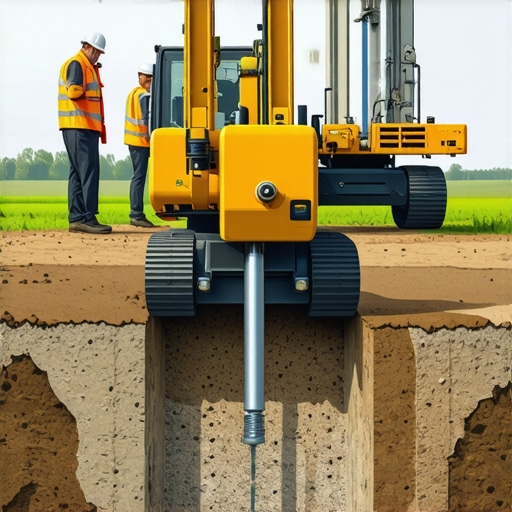
Before laying the foundation, conduct a comprehensive soil and moisture analysis. I once skipped this step in my first project, assuming dry soil meant no water issues. However, during construction, unexpected groundwater flood caused delays and added costs. Soil testing, including a percolation test and groundwater level measurement, reveals hidden moisture risks and guides waterproofing choices. Use tools like soil moisture meters and consult local geotechnical reports to get accurate data, essential for tailoring waterproofing techniques to your site.
Choose the Right Waterproofing System
There are typically two main options: external membrane or internal sealants. External waterproofing applies a layer of waterproof membrane, such as bentonite sheets or liquid-applied membranes, directly on the foundation’s exterior before backfilling. Internal systems involve coating the interior basement walls with waterproof paint or installing drainage mats. I recommend external membranes for long-term durability, especially in areas with fluctuating groundwater. When I waterproofed my basement externally, I used a liquid-applied membrane which adhered well and created a seamless barrier, preventing leaks even after years of ground shifts.
Prepare the Surface Properly
Thoroughly clean the foundation surface by removing loose debris and ensuring it’s dry before applying any coating. Any dirt, oil, or existing cracks can compromise adhesion. I learned this hands-on when a poorly prepared surface led to premature failure of my initial waterproof layer, causing water to seep through. Use brushes and pressure washing if needed, and repair cracks with hydraulic cement—this prevents pathways for water, enhancing the effectiveness of your waterproofing.
Apply Waterproofing Correctly and in Layers
Follow manufacturer instructions precisely, applying multiple coats if specified. Multiple thin layers outperform a single thick one, providing better flexibility and adhesion. During my project, rushing the process resulted in gaps and thin spots, which allowed leaks. Keep the application weather-friendly—avoid pouring in rain or extreme temperatures as these conditions can weaken the coating. Always check for uniform coverage, especially around corners and seams, to prevent weak spots.
Install Proper Drainage and Slope
Waterproofing is ineffective if water isn’t diverted away from your foundation. Install perforated drain pipes around the perimeter, covered with gravel, to facilitate quick drainage. Ensure the landscape slopes away from the building to prevent pooling near walls. I encountered this in my second build when poor grading led to standing water, stressing my waterproof systems. Regular inspection and maintenance of these drainage components sustain the waterproof barrier’s integrity over time.
Seal Penetrations and Joints Carefully
All cracks, pipes, and joints should be sealed meticulously with flexible, waterproof sealants. I once neglected this detail around a sump pump pipe, which became a leak point. Use compatible sealants like silicone or polyurethane and double-check areas where different materials meet. Proper sealing prevents water ingress through these vulnerable points, critical in all climates, especially those with fluctuating soil moisture levels.
Monitor and Maintain Regularly
After completing waterproofing, set up a routine inspection schedule. Look for signs of damage, cracks, or deterioration, particularly after heavy rains or droughts. Regular maintenance, such as reapplying sealant in problem areas, extends the lifespan of your waterproof system. I schedule bi-annual inspections and promptly address issues to avoid costly repairs later.
By systematically following these actionable steps, you arm your foundation against moisture, regardless of your climate. Proper preparation, precise application, and ongoing maintenance form the backbone of effective waterproofing, ensuring your property remains dry and durable for years to come.
Many homeowners and even seasoned builders often harbor misconceptions about the permit process and estimating costs for new construction or additions. One pervasive myth is that obtaining permits is merely a bureaucratic step that can be bypassed with minimal risk. In reality, rushing through or skipping permit procedures can lead to costly delays and even legal penalties, as outlined in this comprehensive guide. Conversely, some believe that all permits are straightforward and inexpensive. However, permit costs can vary dramatically based on project scope and local regulations, which are often underestimated by novices, leading to budget overruns. To avoid this, consult reliable estimation resources like cost-effective estimating techniques to better predict expenses.
An advanced mistake contractors frequently make is relying solely on standard square footage rates when estimating costs, ignoring project-specific nuances. For example, a complex roof design or custom foundation requires detailed structural assessments and can significantly increase costs, which are often overlooked. This oversight can cause project budgets to fall short, causing delays or compromises in quality. Keep in mind that proper estimation involves detailed breakdowns, including allowances for unforeseen issues, which can be better managed by expert evaluation.
Furthermore, misunderstanding local permit requirements is a common pitfall. Not all projects require the same permits, and certain enhancements, such as adding windows or extending fences, may trigger additional reviews or fees. Failing to recognize these nuances early on can stall projects unexpectedly. To streamline this process, utilize resources like permit requirement guides.
A hidden nuance often missed involves the timing and sequencing of permits and inspections. Some assume permits can be secured after construction begins, but this is risky and can result in work being considered illegal, leading to costly rework. Knowing the optimal point to acquire each permit ensures compliance and smooth progress, a topic covered in this article.
Lastly, underestimating the impact of local regulations, environmental considerations, and community expectations can also surprise builders. For example, special setback rules or heritage overlays require additional planning and approval stages that should be integrated into your initial estimates. Remember, thorough site analysis and early consultation with authorities can save time and money, as suggested in this resource.
Recognizing these myths and nuances empowers you to plan more effectively, avoid common traps, and execute projects with confidence. So, have you ever fallen into this trap? Let me know in the comments!
Once you’ve laid the groundwork for your construction or renovation project, maintaining its momentum requires precision, the right tools, and disciplined routines. Over the years, I’ve honed a set of specific equipment and software that help me stay efficient and catch issues early, saving time and money. One indispensable tool I rely on is a laser level—specifically, the Kramer DK700. Its accuracy ensures that my foundation, framing, and fixtures are perfectly aligned, which is crucial for avoiding costly adjustments later. For measuring distances and verifying elevations, I use a Leica Disto D510 laser distance meter. Its Bluetooth connectivity allows me to transfer data directly into my planning documents or estimating spreadsheets, streamlining the workflow significantly.
In addition to physical tools, I leverage professional estimating software like Stack or Buildertrend to keep track of costs, schedules, and scope changes. These platforms enable real-time collaboration with clients and subcontractors, reducing the risk of miscommunication. I also recommend maintaining a detailed change order log—either digitally with a shared Google Sheet or via specialized software—so every tweak during construction is documented and approved, preventing budget overruns.
What do I do to stay on schedule over time? Maintaining routines and checking progress regularly is vital. Weekly site inspections, combined with detailed photo documentation, help me catch issues like drift in measurements or material shortages early. I’ve found that assigning specific team members to monitor different aspects—such as framing, plumbing, or electrical—improves accountability. Staying organized with project management tools that send automated reminders keeps everyone on the same page and reduces delays.
Looking ahead, the trend is moving toward integrating Building Information Modeling (BIM) more deeply into small-to-mid-sized projects. BIM not only visualizes the entire project in 3D but also helps spot conflicts before they happen, reducing rework. As technology advances, I predict more contractors will adopt cloud-based systems that sync data instantly, fostering transparency and immediate response to potential issues.
How do I maintain the building over time?
Long-term maintenance begins with comprehensive documentation—keep digital records of all warranties, inspection reports, and maintenance schedules. Use software like HomeAssistant or specialized facility management tools to plan regular check-ups. For example, inspecting waterproofing membranes and drainage systems annually can prevent small issues from becoming major problems. I also recommend setting up a seasonal maintenance checklist for tasks like gutter cleaning, exterior sealing, and sump pump testing. This proactive approach ensures your building remains in top condition and protects your investment for years to come.
Finally, establishing good relationships with reliable tradespeople and suppliers means you can swiftly address unforeseen issues. Keep a curated list of trusted professionals, and don’t hesitate to call in experts for specialized inspections—like soil stability or structural assessments—to keep your project truly ‘working’ over its lifespan. For in-depth tips on budgeting for ongoing maintenance or scaling your project, check out these cost-saving strategies. Start implementing a detailed routine now, and watch your long-term results improve markedly.
What Nobody Tells You About Dry Climate Waterproofing
One of my most eye-opening experiences was realizing that even in arid regions, foundation waterproofing is indispensable. The misconception that dryness equates to immunity led me to overlook critical moisture barriers, resulting in future headaches. This taught me that underground water migration can be sneaky, making proactive waterproofing essential regardless of climate. Sometimes, the biggest lessons come from overlooked details—like sealant integrity around pipes or proper slope design—and these small steps save huge trouble later.
Tools That Transformed My Approach to Building
Over the years, I’ve relied on gadgets like laser levels and digital moisture meters to ensure precision. My go-to is the Laser Kramer DK700 for alignment, and the Leica Disto D510 helps me verify levels in tricky corners. These tools have been invaluable for catching issues early and maintaining quality, reinforcing that investing in quality equipment pays dividends. Complementing hardware with reliable estimating software keeps my budget on point and reduces surprises.
What I Wish I Could Rewind About Permits and Estimates
In my early days, I underestimated permit costs and the complexities of local regulations. Dismissing the permit process as bureaucratic led to delays, cost overruns, and sometimes even project halts. Now, I advocate for thorough research using guides like this permit navigation resource. Knowing exactly what’s required and budgeting appropriately keeps work moving smoothly. Don’t make my mistake—embrace the permit process as part of your construction journey, not an obstacle.
Stepping Into the Future of Building Confidence
My experience has shown that detailed site assessments and choosing the right waterproofing strategy are game-changers. It’s empowering to take control, stay organized, and adapt as projects evolve. The key is continuous learning and leveraging the right tools and knowledge. I challenge you to view each project as an opportunity to refine your process, integrate smarter estimates, and build stronger, more resilient structures. Ready to turn your knowledge into action? Your future builds will thank you.