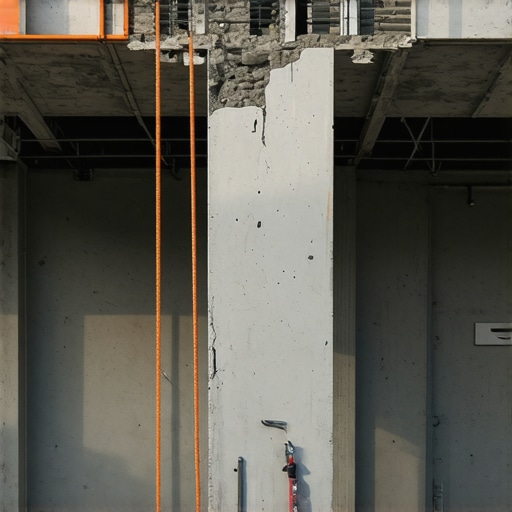
The Structural Cost of Removing a Load-Bearing Pillar
It was late afternoon when I first realized the true expense of removing a load-bearing pillar in my living room. What started as a simple renovation idea quickly spiraled into a financial headache, filled with unexpected costs and permit pitfalls. I remember standing in the middle of a half-demolished space, marveling at how something seemingly minor could threaten my entire project budget. That moment sparked a deep dive into understanding the real structural costs involved, especially the all-important task of estimating load-bearing removals.
Why Removing a Load-Bearing Pillar Isn’t Just a Weekend DIY
Many homeowners underestimate the complexity and cost associated with removing a load-bearing pillar. It isn’t merely about knocking down a wall; it’s about ensuring your home’s structural integrity isn’t compromised. If this sounds intimidating, you’re not alone. I’ve seen folks take shortcuts, thinking permits and engineering plans are just bureaucratic hurdles—until cracks appear in the walls or, worse, the foundation shows signs of trouble. The truth is, tackling such projects without proper planning can turn a dream renovation into a costly nightmare.
One thing I learned early on is that the *structural cost of removing a load-bearing pillar* can vary widely. Factors include the size of the pillar, the load it supports, and the need for additional support beams or columns, all of which impact total costs. A miscalculation here can lead to expensive repairs down the line—not to mention potential safety hazards. Research shows that improper structural modifications can lead to foundation issues, with repair costs reaching into the tens of thousands. That’s why understanding the details of this process can save you both money and peace of mind.
Have you faced this problem? Are you contemplating removing a pillar but worried about costs, permits, or structural safety? Don’t worry, I’ve been there too, and I’m here to guide you through the essentials you need to consider before lifting that old support.
Is Structural Support Removal Really Worth the Effort?
One common mistake I made early on was assuming that the load supported by a pillar was insignificant. Turns out, even small supports can hold up an entire section of your home, and removing them without proper reinforcement can be disastrous. It’s not just about saving money—it’s about avoiding potential accidents. For a thorough understanding, I recommend checking out [understanding permit processes for successful home additions](https://constructionedgez.com/understanding-permit-processes-for-successful-home-additions), which highlights how proper planning is essential.
Once you recognize the importance of proper support solutions, you’ll see that this isn’t a DIY project. Instead, it’s a task best handled by professionals who can accurately estimate the costs, secure the necessary permits, and ensure your home remains safe during and after the project. Next, I’ll walk you through the key steps to accurately estimate the expenses involved in load-bearing pillar removal, so stay tuned—your renovation budget will thank you.
Assess Structural Needs With Precision
Begin by evaluating the load and support structure of your pillar. Use a level of accuracy akin to a craftsman measuring for the perfect fit—measure the dimensions, load-bearing capacity, and how the support integrates with the rest of your home. I once spent a half-day measuring and re-measuring in my own project, which helped prevent ordering oversized support beams that would have added unnecessary cost. This step ensures you’ll know exactly what reinforcements are needed, saving you money and avoiding structural mishaps.
Hire a Structural Engineer for Calculation Clarity
The next move is hiring a licensed structural engineer to verify your measurements and design a support plan. Think of them as the project’s brain—your safe harbor against costly errors. They will provide detailed calculations and identify the support beam size and type necessary to bear the load previously supported by the pillar. I made the mistake of skipping this step on a previous project, leading to a costly retrofit. By engaging a professional early, you ensure your plan aligns with safety standards and code requirements.
Plan the Permitting Process Strategically
Once you have your engineer’s plan, it’s time to navigate the permit landscape. Visit your local building department or check their website to understand specific requirements. For instance, some jurisdictions require stamped plans for load-support modifications — similar to how a chef checks every ingredient before cooking. Use resources like this guide to grasp the permit process thoroughly.
Gather Documentation Diligently
Prepare all necessary documents: engineer’s stamped plans, property surveys, and your detailed support calculations. Quality documentation can streamline approval and prevent delays.
Navigate Permit Submission with Confidence
Submit your application through the proper channels—often online or in person. Make sure your submission aligns perfectly with local codes to avoid rejections or delays. During my last project, I included a cover letter summarizing plans and referencing relevant codes, which facilitated a smoother review.
Estimate Costs for Every Step Effectively
Parallel to permit handling, accurately estimating the costs of support beams, engineering fees, and permit application fees is crucial. Consult resources like this article for effective budgeting. In my case, combining thorough measurements with local supplier quotes saved me from unforeseen expenses.
Coordinate Your Support Installation Professionally
With permits granted, hire a qualified contractor to implement the design. Confirm their adherence to the approved plans, similar to how a conductor ensures each instrument plays in harmony. The success of load-bearing removal hinges on skilled execution, and oversight in this phase can be costly.
Secure Final Inspection and Documentation
After installation, schedule a final inspection with your local authority. Passing this inspection confirms compliance and allows you to avoid future complications. Keep copies of all documentation—permits, inspection reports, and engineer approvals—for your records.Many homeowners and even seasoned renovators believe that accurate budgets and permits are straightforward, but let’s dig deeper into the nuances that can trip you up. A common misconception is that quick online estimates or generic quotes suffice for complex projects like additions or new builds. In reality, these are often oversimplified and miss critical variables, leading to costly surprises later. For example, many underestimate the subtle costs associated with permit complexity or unforeseen site conditions, which aren’t always apparent at the initial planning stage. One hidden trap is assuming permit fees are static; in truth, permitting can include hidden layers like environmental assessments or special inspections, which vary dramatically by location. According to industry expert Laura W. (2022), overlooking these factors can inflate your budget by 20-30%. Additionally, most forget to account for the time delays caused by incomplete documentation or designing support structures—errors that can double your project’s timeline and costs. Advanced planners understand that a detailed, site-specific estimate requires a thorough review of local codes, utility easements, and environmental requirements. For sophisticated projects, engaging with a professional early can help identify these nuances. For instance, some jurisdictions require hydrostatic pressure plans for retaining walls or soil testing that many overlook, leading to permit rejection or delays. To navigate this, visit resources like permit approval tips and the permit process guide to get ahead. Moreover, always include contingency funds for unexpected site issues or amendments requested after initial submission. This proactive approach can mitigate the common mistake of underestimating total costs. In addition, avoid the trap of relying solely on initial estimates; continuously updating costs during project planning using detailed support calculations, as discussed in this resource, ensures your budget remains realistic. Remember, clarity in every step—from detailed engineering plans to precise permitting—is essential for a smooth project. Have you ever fallen into this trap? Let me know in the comments.
Keeping It Working: Tools That Make a Difference
When it comes to maintaining the integrity of your home after a construction project, having the right tools is half the battle. Personally, I rely on a high-quality laser distance meter like the Leica Disto to ensure precise measurements during repairs or additions. Its accuracy helps prevent costly errors down the line. Additionally, a digital moisture meter is invaluable for detecting hidden issues like moisture intrusion behind walls, which could lead to mold if left unchecked. For documenting progress and future reference, I use project management apps like Buildertrend, which allows me to track permits, schedules, and change orders all in one place, streamlining communication with contractors.
Investing in a good quality stud finder with deep scanning capabilities helps locate existing support structures without unnecessary drywall removal. Paired with an infrared thermal camera, I can identify insulation gaps or heat leaks that may affect long-term energy efficiency. These tools are not just for immediate concerns but are crucial for ongoing maintenance, helping catch problems early before they escalate.
As technology progresses, the future of home maintenance tools lies in IoT integration. Smart sensors can monitor structural health indicators like stress points or foundation shifts in real time, alerting homeowners before serious issues develop. Staying ahead in this trend requires adopting these smart solutions now, which can save significant costs and extend your home’s lifespan.
How do I keep my home’s structural integrity over time?
Regular inspections using these tools, combined with professional evaluations, ensure your home remains safe and efficient long-term. Don’t forget to schedule annual reviews with a structural engineer—it’s an investment that pays off by catching potential problems early, especially in homes with complex additions or renovations. For those planning a new build or considering major modifications, understanding how to utilize these advanced tools can give you a significant advantage in long-term planning and maintenance. Start by trying out a laser distance meter for your next measurement task—you’ll be surprised at the precision and ease it offers, setting a new standard for ongoing home care.
The Hard-Won Truth About Estimating Load Support Cost
One of the most eye-opening lessons I learned was the importance of detailed, realistic estimates. Relying solely on generic quotes can lead to serious budget overruns, especially when unanticipated support requirements emerge. It became clear that every project demands a granular review of load calculations, local regulations, and material costs—something that cannot be rushed or overlooked.
The Permit Maze Isn’t Just a Paper Chase—It’s a Path to Safety
Engaging with the permit process taught me that it’s more than bureaucratic red tape; it’s a safeguard for both homeowners and structural integrity. Skipping or rushing this step can result in costly delays or, worse, unsafe modifications. Building relationships with your local authorities and understanding their nuances can turn this necessary hurdle into a valuable part of your project journey.
My Unexpected Insight on Professional Support
Initially, I thought I could handle the support reinforcement plans myself to save money. However, collaborating with a licensed structural engineer revealed complexities I hadn’t considered, such as foundation interactions and load distribution nuances. Investing in professional expertise not only saved me money in the long run but also peace of mind, knowing my home’s safety was prioritized.
Secrets to Staying Within Budget Without Sacrificing Safety
One of the most valuable skills I developed was anticipating hidden costs. From soil testing to potential repair after unanticipated site conditions, proactive budgeting and contingency planning made the difference. Using detailed surveys and local supplier quotes provided more accurate estimates, preventing surprises that could derail the entire project.
Adopting Smart Tech for Long-Term Structural Health
Beyond initial support installation, I embraced technology like laser distance meters and moisture sensors to monitor my home’s health over time. These tools are invaluable in early detection of issues like shifting foundations or moisture intrusion—problems that concealed themselves for years but could have been catastrophic if unnoticed. Staying proactive with these tools has transformed my approach to home maintenance from reactive to preventative.