The Eave Ventilation Gap That Fails Your Roof Audit
It was a quiet Saturday morning when I received that dreaded call from my roofer—an unexpected failure on the roof inspection. I had thought all was well, but turns out, a tiny detail I overlooked during construction was causing big headaches. That moment—that lightbulb moment—made me realize how the smallest gaps in eave ventilation could be the silent culprits behind roof failures.
Why Overlooking Eave Ventilation Gaps Can Cost You
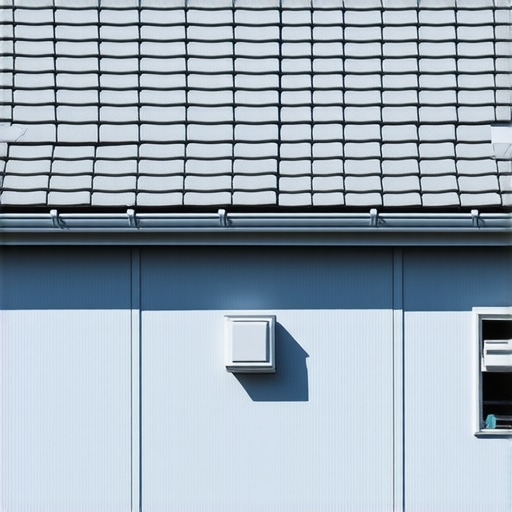
If you’ve ever built or renovated, you know how tempting it is to focus on the big-ticket items—sturdy shingles, solid rafters, or a sleek new façade. But one small mistake, like a gap in your eave vent installation, can sabotage your entire project. These gaps might seem insignificant, yet they can drastically reduce airflow, leading to moisture buildup, mold growth, or even structural issues. They might even trigger your roof’s inspection failure, forcing costly rework or delays.
In my early days of home building, I made the mistake of assuming that sealing the vents with standard flashing was enough. I didn’t realize that a poorly sealed or misaligned vent can create hidden gaps, which compromise ventilation. That oversight cost me time, money, and peace of mind. I learned the hard way that paying attention to detail in the ventilation system is as critical as choosing quality materials. To avoid such pitfalls, understanding the common weaknesses in eave vent installation is essential.
Is a Small Gap Really That Critical?
Absolutely. The Health & Safety Executive highlights that even minor flaws in roof ventilation can lead to long-term damages. A small unsealed gap can let moist air escape, but more often, it allows external elements to infiltrate—be it pests, debris, or water during heavy rains. This infiltration can undermine the entire roofing system, causing rot and compromising the integrity of the structure.
Early in my projects, I overlooked the importance of properly sealing eave vents, which sometimes led to water leaks and rodent entry. Establishing meticulous sealing practices has become a non-negotiable part of my process. If you’re wondering whether your installation is airtight, a simple inspection can reveal gaps that need attention. And remember, avoiding common mistakes at this stage can save you from extensive repairs later.
If you’re experiencing doubts or have faced similar issues, you’re not alone. Many homeowners and builders stumble on this detail—it’s easy to miss when you’re caught up in other tasks. But awareness can change everything. Want to learn how to identify and fix these gaps effortlessly? Keep reading, and I’ll walk you through tested strategies to ensure your roof passes every inspection with flying colors.
Assess and Identify Gaps Accurately
Start by inspecting your eave vents during different weather conditions—look for light seepage from inside the attic or feel for drafts around the vents. Use a quality flashlight and a mirror to spot hidden gaps, especially near flashing seams. I once discovered a tiny gap behind a misaligned vent cover by doing a thorough daylight inspection; sealing this saved me from potential water leaks.
Choose the Right Sealant and Materials
Use weatherproof, flexible sealants designed for roofing—like high-grade silicone or polyurethane. Cheap silicone might crack over time, reintroducing gaps. In my project, I applied a generous bead of sealant along the edges of the vents, ensuring each seam was fully sealed without excess overflow. For larger gaps, consider expanding foam or backer rods combined with sealant for a secure, airtight fit.
Properly Install Flashing and Vent Covers
Align flashing correctly over vents, ensuring it overlaps building shingles per manufacturer instructions. Secure with corrosion-resistant nails or screws. During installation, I once temporarily misaligned a vent cover, which created a small gap at the edge; re-sealing it with additional flashing and sealant fixed the issue immediately. Remember, over-tightening screws can warp the flashing, creating new leaks, so tighten just enough to seat everything snugly.
Tackle Gaps During Construction
If installing new vents or replacing old ones, do a mock-up first. Place the vent in its position, run a bead of sealant around the perimeter, and then secure it. It’s easier to ensure a perfect seal before the roofing materials go on. In one case, I pre-sealed a vent during framing, which prevented water penetration during heavy rains in the final stages—saving me from costly rework.
Implement Regular Maintenance and Re-Inspection
After sealing, set a schedule for annual inspections—especially after storms or seasonal changes. Look for signs of sealant deterioration or physical damage. During my last inspection, I noticed some sealant had cracked—reapplying it restored the integrity of the seal. Quick touch-ups prevent minor issues from evolving into costly repairs.
Document Your Work
Keep a record of sealed and repaired vents, noting dates and materials used. This documentation helps if you need to claim warranties or consult with professionals later. I photograph my sealing work and note details in my project journal to track the lifespan and effectiveness of my fixes. Plus, it helps in future projects or when preparing for inspections.
When it comes to new construction projects, a widespread misconception is that adhering strictly to guidelines and initial estimates ensures success. However, in my experience as a seasoned builder, I’ve observed that many professionals and homeowners overlook critical nuances that can lead to costly errors. One such mistake is underestimating the complexity of permit processes, especially for additions, where permits are not just bureaucratic hurdles but vital steps that safeguard the structural and legal integrity of your project. Many assume permits are mere formalities, yet failing to navigate them correctly can result in delays, fines, or even mandatory demolitions. For detailed strategies, check out [Understanding Permit Processes for Successful Home Additions](https://constructionedgez.com/understanding-permit-processes-for-successful-home-additions).
Another common trap is the over-reliance on basic estimations like square footage or historical costs. Yet, the real nuance lies in accounting for variables such as site-specific conditions, material fluctuations, and unexpected hidden costs. For instance, a project may appear straightforward, but soil tests revealing unexpected subsoil issues can inflate foundation costs by thousands. To master accurate budgeting, I recommend reviewing [Estimating Costs for New Builds: Expert Insights](https://constructionedgez.com/estimating-costs-for-new-builds-expert-insights).
Now, for the advanced builders and homeowners: how many consider the actual impact of local zoning intricacies on their project timeline and costs? Many projects falter because they overlook minor setback variations or rare zoning overlays—details that can halt construction or trigger redesigns. Be sure to scrutinize local regulations thoroughly; a missed nuance can cause significant delays. For tips on this, see [Navigating Permit Requirements for Additions in 2025](https://constructionedgez.com/navigating-permit-requirements-for-additions-in-2025).
One sneaky
Keep Your Home in Top Shape with the Right Tools
Maintaining your construction work—whether it’s a new build, an addition, or ongoing renovations—demands the right equipment and software. From visual inspection tools to estimation programs, investing thoughtfully can save you time and money in the long run.
Choosing a High-Quality Infrared Camera for Inspections
I personally rely on a Fluke Ti480 PRO thermal imager because it helps me identify moisture intrusion and insulation gaps invisible to the naked eye. This tool proves invaluable during routine maintenance or post-construction inspections, ensuring issues are caught early before they escalate.
Utilize Construction Management Software for Long-Term Tracking
Tools like PlanGrid or BuilderTREND have transformed how I keep records of every phase—permits, inspections, repairs, and upgrades. These platforms offer cloud-based storage, making it easy to organize, review, and share data with clients or team members. As construction technology advances, I predict these solutions will become even more integrated with real-time monitoring systems, allowing for predictive maintenance.
Implement Regular Visual and Mechanical Checks
Setting routine maintenance schedules—say monthly or quarterly—using detailed checklists can extend the lifespan of your structures. I recommend creating customized checklists based on your project type, focusing on common wear points like flashing, seals, and vents. This proactive approach reduces surprises and keeps your property functioning smoothly over years.
How do I maintain the ventilation system over time?
Maintaining ventilation and sealing integrity involves periodic inspections of vents, flashing, and sealants. Use a quality ladder and a mirror to access hard-to-reach areas, and keep an eye out for cracked or deteriorated sealant surfaces. Reapplying sealants with weatherproof, flexible options—like high-grade silicone—can prevent moisture ingress and pest entry. For larger gaps, expanding foam combined with sealant provides a robust airtight solution. Establishing this routine not only sustains air quality but also protects the structural integrity of your home. For detailed strategies on estimating and maintaining your projects, check out expert insights on estimating costs.
The Future of Maintenance: Smart Monitoring
Looking ahead, integrating IoT devices—such as smart humidity sensors and leak detection systems—will revolutionize property upkeep. These sensors can alert you to issues before they become apparent, enabling preventative action and reducing costly repairs. Embracing such technology now will position you to handle future challenges more effectively.
Start by evaluating your current maintenance routine, then consider incorporating one advanced tool or tech that aligns with your needs. For example, try deploying a thermal camera during your next routine check—it’s a game-changer for early detection of moisture issues. The key is consistency and leveraging technology smartly, ensuring your investments stand the test of time and time-consuming issues are minimized.
Lessons That Changed How I Approach Home Building
- I realized that even the tiniest gap in eave ventilation can lead to significant structural issues, teaching me the importance of meticulous sealing over hurried installations.
- Discovering hidden gaps during inspections highlighted that proactive assessments save time and money, rather than waiting for post-construction problems to surface.
- Understanding the nuanced interaction between ventilation, moisture, and building codes has reshaped my entire approach, emphasizing education and attention to detail.
Tools and Resources That Elevated My Construction Knowledge
- Infrared Cameras: My trusted Fluke Ti480 PRO detects moisture leaks invisible to the naked eye, helping me prevent long-term damage.
- Construction Management Software: Platforms like BuilderTREND streamline documentation and scheduling, ensuring sealing tasks aren’t overlooked amid complex projects.
- Expert Literature: The article Estimating Costs for New Builds has provided in-depth insights into budgeting for detailed components like ventilation systems, enhancing my planning accuracy.
Your Next Step in Building with Confidence
Mastering the art of sealing eave ventilation gaps can dramatically improve your construction outcomes and longevity of your home. Small details make the biggest difference in preventing future headaches—embrace thorough inspections, quality materials, and regular maintenance. With the right knowledge and tools, you’re well on your way to craft a durable, efficient build that stands the test of time. Have you faced challenges with ventilation or sealing in your projects? Share your experiences below—I’d love to hear how you’ve tackled similar issues.