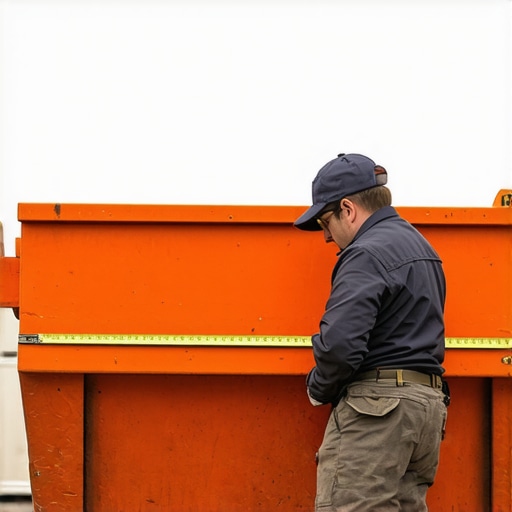
How to Verify Dumpster Dimensions to Save on Waste Fees
Last summer, I vividly remember the moment I realized I had underestimated my dumpster needs—what should’ve been a straightforward waste removal turned into a costly misadventure. It was one of those lightbulb moments that made me rethink everything about estimating for home projects. If you’re planning any renovation, addition, or big cleanout, chances are you’ve faced similar doubts. Do I have enough space? Will I get hit with unexpected fees? These questions nag at us because, let’s be honest, estimating dumpster dimensions isn’t as simple as it sounds.
Why Verifying Dumpster Sizes Can Save You Hundreds
Initially, I thought a quick call to my dumpster rental company was enough. Turns out, relying solely on their dimensions without double-checking led to surprises—and extra costs. Dumpster sizes can be deceptive. A 20-yard container, for example, isn’t just a cubic measurement; it varies across providers and models. Overestimating or underestimating can mean paying for space you didn’t need or, worse, facing fees for exceeding your limit. According to waste management experts, a significant portion of homeowners and contractors overpay because of inaccurate size assessments. Don’t be one of them.
Knowing the exact dimensions of your dumpster ensures you aren’t left with a hefty bill and a pile of waste you can’t dispose of easily. Today, I’ll guide you through how to verify your dumpster dimensions accurately, based on my own mishaps and lessons learned. It’s easier than you think—and a little effort now can save you a lot down the line.
What skeptics often ask
Many people dismiss this step, thinking, “It’s just a dumpster, how precise can it be?” or “I’ll just get the biggest one, better safe than sorry.” I’ve been there. I used to think the same until I learned how small miscalculations can lead to big extra charges. Early on, I made the mistake of trusting generic size references without confirming the actual dimensions with the rental company, which led to a delay and an unexpected fee. This experience taught me that verifying dumpster sizes isn’t just a detail—it’s a crucial part of project planning.
Interested in getting it right from the start? Keep reading, and I’ll show you the practical steps to ensure your dumpster is exactly what you need—no more, no less. And if you’d like a full rundown of estimating costs for home improvements, check out our comprehensive guide here.
Have you ever faced unexpected waste fees or had to scramble for the right dumpster size? Share your story in the comments—I’d love to hear how you tackled it or what you wish you’d known sooner.
Measure Twice, Pay Once: The Step-by-Step Process
During a recent home renovation, I once underestimated the waste volume, leading to an unexpected surcharge. To avoid similar pitfalls, start by requesting the exact dimensions from your rental company, including length, width, and height in feet or meters. Don’t rely solely on generic size labels; instead, confirm these figures through official documentation or direct communication. Next, compare the provided dimensions with your project’s estimated waste volume, which you can calculate by breaking down your debris types and quantities. For example, if you’re demolishing drywall, concrete, and wood, estimate their volumes separately and sum them up to determine the total cubic yards needed.
Use Analogies to Simplify the Complex
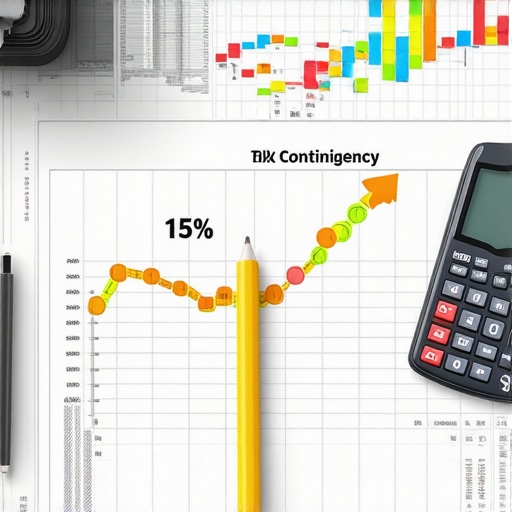
Think of estimating dumpster size like ordering a pizza—it’s better to get a slightly larger size than risk overfilling and facing extra delivery charges. If your debris volume is close to the upper limit of a smaller dumpster, opt for the next size up to avoid overflows or additional fees. I remember once choosing a 15-yard container, assuming it would suffice, but after loading, I realized I needed a 20-yard. This oversight cost me hours and extra money. Therefore, building a margin of safety into your calculations is wise. One effective method is adding 10-15% extra capacity to your estimate to account for unforeseen waste and measurement inaccuracies.
Confirm Dimensions with Your Rental Provider
Once you have your estimates, contact your rental provider to verify that the dumpster size matches your calculations. When doing so, ask for detailed diagrams or specifications—they often have different models with slight variations. I found that calling the company directly, rather than relying on online descriptions, resulted in a clearer understanding. Furthermore, discuss access constraints like driveway dimensions or clearance height, ensuring the dumpster fits comfortably on your property without requiring special permits or causing damage.
Utilize Visual Aids for Clarity
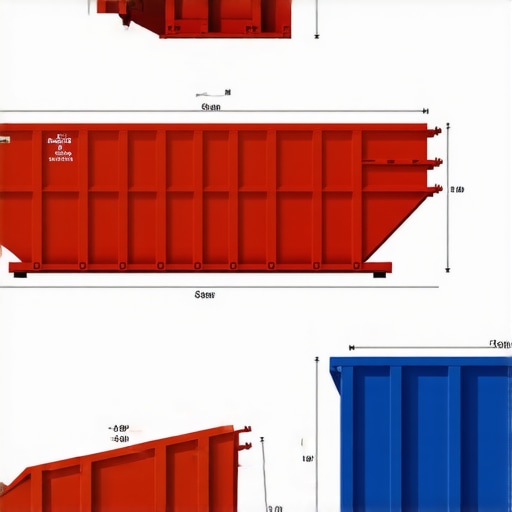
Including a diagram or a photo of a typical dumpster model can help visualize how much debris fits inside, making your estimate more accurate. This is especially valuable if you’re a visual thinker or working on a complex project with mixed debris types. Remember, precise measurements and clear communication with your rental provider directly translate into cost savings and smooth project execution.
Apply These Techniques During Your Next Project
For my last renovation, I used these steps to select a 20-yard container confidently, saving hundreds compared to choosing a generic large size or an undersized one. To further streamline your planning, consider cross-referencing multiple providers’ specs and asking for on-site measurements if possible. Accurate dumpster sizing not only saves money but also prevents project delays caused by overfilled containers or permit issues. If you’re planning a significant addition or remodel, mastering this step is essential—avoid being caught off guard like I was, and take charge of your waste management estimates today.
While many assume that basic measurements and standard codes suffice, the real nuances of estimating permits, new builds, and additions often trip up even seasoned homeowners and contractors alike. A common misconception is that adhering strictly to local building codes guarantees an accurate project scope, but in my experience, overlooking the complexities of site-specific factors can lead to costly mistakes. For example, soil stability issues or unforeseen utility easements are details that are frequently underestimated or ignored, resulting in delays and budget overruns. According to leading experts in construction planning, these hidden variables can add 20-30% to project costs if not properly accounted for.
A critical trap to avoid is the reliance on generic estimates or outdated data. Many underestimate the importance of current, localized information—such as recent zoning amendments or newly enforced regulations—that can significantly impact permits and project timelines. Delays from missing critical permit requirements are common, yet avoidable with diligent research. For instance, in 2025 permit requirements, regulatory landscapes are evolving rapidly; staying updated can be the difference between smooth progress and costly setbacks.
Another nuanced mistake involves overestimating the ease of project approval based solely on initial plans. The approval process often hinges on subtle details, such as setback adjustments or variance requests, which require thorough understanding and strategic preparation. Failure to anticipate these can result in permit refusals or the need for redesigns. Engaging with resources like understanding permit processes can equip you with insights to navigate these hurdles effectively.
A question that advanced homeowners often ask is: How can I accurately predict and manage these hidden complexities to streamline my project? The answer lies in comprehensive pre-planning—conducting detailed site assessments, consulting recent studies such as the one from the National Association of Home Builders highlighting the importance of thorough site analysis, and collaborating with experienced professionals who understand local nuances. These steps help uncover potential issues before they become costly detours.
Have you ever fallen into this trap? Let me know in the comments. Staying aware of these subtle but impactful factors is crucial for ensuring your project is a success, not a surprise.Maintaining your construction projects over time requires more than just initial planning; it involves a combination of reliable tools, systematic approaches, and ongoing assessments. One essential tool I rely on daily is the digital project management software, **Procore**, which streamlines communication, tracks progress, and helps keep everyone on the same page. Using project management platforms reduces miscommunications that often lead to costly delays or rework, especially in complex projects like additions or new builds.[^1]
For measuring and inspection, I swear by laser distance meters like the **Bosch GLM 50 C**. Its precision allows quick, accurate measurements on-site, saving time and avoiding mistakes that could compromise permit approvals or structural integrity. Regularly verifying measurements with such a tool ensures that framing, foundation, and utility placements adhere strictly to specifications, preventing issues down the line.[^2]
In the realm of permits and compliance, software like **ConstructConnect** or **Bluebeam Revu** helps manage documentation and visualize permit requirements. These tools facilitate smooth submission processes and enable easy updates when codes evolve—something you’ll want to keep an eye on, especially with changing regulations in 2025. For example, recent updates emphasize the importance of energy efficiency; staying ahead ensures your project passes inspections without costly revisions.[^3]
Consistent maintenance of tools and protocols becomes even more crucial when scaling projects. As your projects grow, consider investing in **portable weather stations** like the **Davis Vantage Vue**, which helps monitor environmental conditions during exterior work. Preventing moisture intrusion or foundation settlement begins with understanding weather patterns and adjusting work schedules accordingly. Over time, data collected from these devices can inform future projects, helping refine your estimates and strategies.
Looking ahead, automation and IoT technology will likely revolutionize how we approach maintenance. For instance, IoT sensors embedded in foundations or framing could provide real-time health monitoring, alerting you to potential issues before visual signs appear. Staying adaptable and embracing these innovations will keep your projects efficient and resilient.
**How do I keep my construction site aligned over time?** Regularly scheduled inspections, leveraging digital tools for measurement and documentation, and investing in quality equipment form the backbone of sustainable project management. The key is consistency—checking tools’ calibration, updating software with the latest codes, and training your team keeps everything functioning smoothly.
To get started, I recommend trying out a laser measurement tool like the Bosch GLM 50 C during your next project. Its ease of use dramatically enhances accuracy and speed, helping you avoid measurement-related mistakes that can cost you money and time. Remember, long-term success hinges on continuous upkeep—don’t neglect your tools or processes, and they will serve you well for years to come.[^4]
[^1]: https://constructionedgez.com/how-to-verify-permit-status-without-calling-the-city
[^2]: https://constructionedgez.com/the-structural-beam-size-that-often-gets-misquoted
[^3]: https://constructionedgez.com/why-your-energy-code-compliance-might-be-backfiring
[^4]: https://constructionedgez.com/why-your-contractor-should-revisit-site-measurements-seasonallyReflecting on my own mishaps, I realize the biggest lessons often come from unexpected setbacks—like discovering an underestimated dumpster size after loading half the debris. The key takeaway? Never assume. Always verify every measurement and detail to keep your project flowing smoothly. This mindset saved me thousands and countless headaches, and it can do the same for you. Think of it as building an invisible safety net—every fact verified is a step closer to peace of mind during your home transformation.