The Gravel Driveway Mistake That Floods Your Neighbor’s Yard
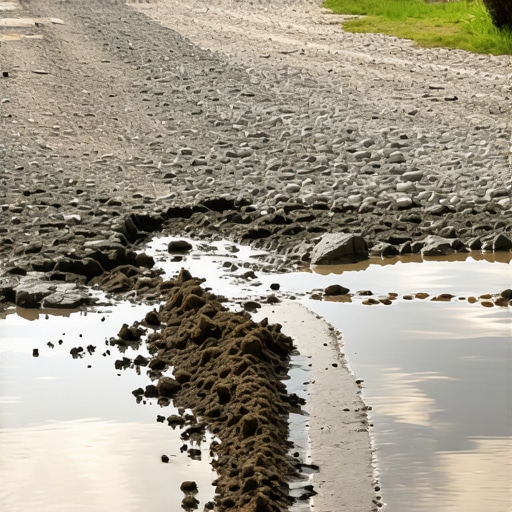
Picture this: I finally finished my new driveway, confident that I’d improved my home’s curb appeal. But weeks later, I noticed my neighbor’s yard was flooding after every rain. That lightbulb moment hit me hard—my driveway had been misinstalled, redirecting water straight into their property. It was a frustrating realization, especially knowing I could’ve avoided it with a bit of forethought.
The Hidden Danger of Improper Gravel Driveways
When I dived into the problem, I learned that a common mistake homeowners make is neglecting proper drainage during driveway installation. A poorly designed gravel driveway can unexpectedly turn into a flood channel, sending water where it shouldn’t go. This isn’t just about puddles—it’s about protecting your neighbor, avoiding potential disputes, and preventing costly repairs down the line. Managing runoff effectively is crucial, and understanding the right techniques can save you from these headaches. According to recent studies, improper drainage is one of the top causes of residential water damage, costing homeowners thousands annually. By addressing this early, you not only safeguard your property but also maintain good neighborly relations.
Is a Gravel Driveway Worth the Effort?
Now, I know some of you might be skeptical—thinking, “Does all this trouble really matter?” Believe me, I was there too. One early mistake I made was assuming that compacted gravel was enough—without considering how water would flow across and away from my property. But small oversights can turn into big problems fast, especially with unpredictable weather patterns. That’s why I decided to dig deeper into the planning process to find practical solutions. If you’ve faced similar issues or worry about potential flooding caused by your driveway, you’re not alone. Let’s explore how to prevent this common mistake before it’s too late.
By understanding the key principles of drainage and proper grading, you can build a gravel driveway that works with nature rather than against it. Ready to learn how to do it right from the start? We’ll walk through the essential steps to ensure your project stays flood-free and neighbor-friendly.
Start with Planning Your Drainage Route
Picture the layout of your property like a riverbed; water naturally flows downhill. During my first attempt at installing a driveway, I skipped this step, leading to pooling and flooding. To avoid that mess, sketch out your property’s natural slopes and identify the lowest points where water tends to collect. Use a long, level board or a laser level to confirm these spots. Mark the high and low points so you can plan the gravel placement to facilitate water runoff, ensuring it flows away from your house and towards existing storm drains or natural drainage paths. Think of this step as drawing a map for water’s escape route, preventing unwanted pooling and damage.
Build Proper Grading and Slopes
Once you’ve planned the drainage route, set the foundation for your driveway with a proper slope. A common recommendation is a 2% grade—meaning a 2-foot drop for every 100 feet of driveway. During my project, I used stakes and a level to establish the correct slope, making sure the center of the driveway was slightly higher than the edges, directing water away. Use a rented plate compactor and a gravel screed to smooth out the surface, ensuring the slope is uniform across the entire width. An analogy here is tilting a flat plate just enough to make water run off evenly—small imperfections can cause ponding. Adjust the grade as needed before moving to the next step.
Install Edge Restraints and Drainage Features
Edge restraints like steel or plastic borders keep gravel contained and help maintain your slope. In my experience, they also serve as guides during leveling. For drainage, incorporate fabric-covered gravel aprons or French drains at strategic low points—think of them as water sponges directing moisture away from your foundation. When I installed a small French drain along the driveway edge, I realized its effectiveness after a heavy rain; water was swiftly channeled away, preventing ponding. Remember, these features work in tandem with your grading. If your property has existing drainage issues, consider adding catch basins or perforated pipe systems connected to your stormwater infrastructure for an extra layer of protection.
Effective Compaction and Gravel Layering
Layering gravel in stages while compacting creates a stable base that resists shifting and allows water to flow through easily. Start with a coarse gravel layer, then top it with finer gravel, each time using a plate compactor to ensure tightness. This layering mimics the natural filtration process of soil and allows water to pass without pooling. During my project, rushing this step resulted in a loose surface prone to washouts after storms. Accurate compaction reduces settling and erosion, helping your driveway maintain proper grading over time. Think of it like packing snow tightly—you get a firm surface that sheds water efficiently.
Maintain and Monitor Drainage Effectiveness
After completing your installation, observe how water moves during rainstorms. Regularly clear debris from drains and check for signs of erosion or pooling. In my case, annual inspections revealed minor depressions that I filled and re-graded to keep flow consistent. Adjusting small imperfections promptly prevents larger issues down the line. Use a garden hose or wait for the next significant rain to assess performance. Remember, the key to long-term drainage success lies in proactive maintenance—think of it as giving your driveway a health check-up after each storm.
By applying these concrete steps—careful planning, precise grading, strategic drainage features, layered gravel, and ongoing maintenance—you’ll build a gravel driveway that directs water away effectively. This approach saves you costly repairs and keeps your property and neighbors safe. Want to dive deeper into the permitting process or budgeting? Check out permits for new builds or explore strategies for accurate cost estimation.
When it comes to new construction and additions, many homeowners and even some contractors fall prey to a set of misconceptions that can lead to costly mistakes. A widely held belief is that sticking rigidly to standard permit procedures guarantees a smooth project, but in my experience, oversimplifying the process overlooks critical nuances. For instance, the myth that permits are merely bureaucratic hurdles ignores their purpose: safeguarding structural integrity, legal compliance, and long-term durability. This misunderstanding often results in skipped steps, which later translate into costly fines or the project’s rejection.
One common trap relates to estimating costs without accounting for hidden variables. For example, assuming straightforward labor and material costs without considering site-specific factors, such as soil condition or existing utilities, leads to underfunded budgets and project delays. According to recent research, poor estimation accuracy—especially neglecting soft costs—contributes to over 30% of project overruns in residential developments. Therefore, a nuanced approach demands detailed site assessments and contingency planning, particularly for complex projects.
Have you ever fallen into this trap? Let me know in the comments.
Why Do So Many Underestimate Permit Complexities?
Many assume that submitting the initial permit application is the final step, but the actual process is often layered with multiple reviews, revisions, and compliance checks—especially with newer regulations. An advanced mistake is failing to anticipate these layers, leading to approval delays. For example, specific zoning ordinances could restrict floor area ratios or setback distances, which might require costly redesigns if overlooked early. To avoid this, it’s essential to familiarize yourself with local regulations through resources like the [permitting guide](https://constructionedgez.com/the-complete-guide-to-permitting-for-new-builds-and-additions) and develop a detailed plan aligning with all requirements.
Another nuance involves estimating the costs related to permit fees and associated inspections. These are often overlooked in initial budgets, yet they can constitute a significant percentage of overall project expenses. The best practice is to consult with local authorities or experienced consultants to get accurate figures upfront, as suggested in [estimating costs for new builds](https://constructionedgez.com/estimating-costs-for-new-builds-expert-insights).
Lastly, a common misconception is that permits are optional or can be bypassed with informal agreements. This is not only illegal but also dangerous, leaving your project vulnerable to fines, stop-work orders, or even demolition. For thorough guidance, visit [navigating permit requirements](https://constructionedgez.com/navigating-permit-requirements-for-additions-in-2025) to ensure compliance.
Understanding these advanced nuances in permit and estimating processes can make the difference between a seamless project and a costly lesson. Stay informed, plan meticulously, and always allocate extra time and budget for unexpected hurdles. Want personalized advice for your project? Reach out through [contact us](https://constructionedgez.com/contact-us-2). Keep digging beneath the surface—your future self will thank you.
Invest in the Right Equipment to Stay Efficient
Having reliable tools can make or break your construction timeline. Personally, I swear by using a high-precision laser level from Leica for site grading. It ensures your slopes are exact, preventing drainage issues that can lead to costly fixes later. For heavy-duty excavation, I rely on a mini skid steer with vibrating plate compactor attachments; it’s versatile enough for trenches and base preparation, saving time and labor costs. Quality equipment reduces errors, improves safety, and accelerates progress, especially when managing multiple projects or large-scale builds.
Software That Simplifies Estimating and Permits
Manual calculations are a thing of the past. I’ve integrated Buildertrend into my workflow, which streamlines communication, scheduling, and cost estimation. Its material takeoff features help me generate accurate budgets quickly, factoring in local permitting fees and hidden soft costs. Additionally, tools like Procore assist in document management—keeping permits, change orders, and inspections organized, so nothing slips through the cracks. As the industry moves towards digital solutions, adopting these platforms positions you to handle project complexity with confidence.
Routine Maintenance and Long-term Results
Maintenance isn’t just for homes—it’s vital for your tools too. Regularly inspecting and servicing equipment prolongs its lifespan and maintains efficiency. For example, I schedule quarterly grease and filter changes on my excavator, preventing costly breakdowns during critical phases. Implementing a preventive maintenance plan not only lowers downtime but ensures consistent performance across all your machinery. Over time, this approach builds a reliable toolkit that supports better quality work and reduces unexpected expenses, ultimately protecting your investment.
Scaling Up: Preparing for Larger Projects
As your portfolio grows, so do your needs for scalable tools and systems. Modular communication setups, like radio repeaters, expand coverage on large sites, ensuring coordination remains seamless. For estimating larger projects, I invest in advanced software such as HeavyBid, which handles complex bid management and resource allocation. Additionally, establishing a dedicated maintenance schedule for all equipment ensures your team isn’t caught off guard. These strategic investments lay a solid foundation for handling multiple builds efficiently without sacrificing quality or safety.
How do I maintain the effectiveness of my tools over time?
Consistent maintenance and training are key. Regularly calibrate your laser levels, update software, and train your team on new features. Engaging with manufacturers for updates or certifications keeps your tools functioning at peak performance. For example, consulting the latest estimating practices and integrating new techniques can help you stay ahead in competitive bids. Make it a habit to review your equipment’s condition monthly, and don’t hesitate to implement upgrades when beneficial. This proactive approach ensures your operations remain smooth and your projects meet deadlines without unexpected setbacks.
Lessons From the Trenches: What I Wish I Knew About Permits and Estimation
- The Hidden Costs of Overconfidence: I once believed that managing permits was straightforward, only to face unexpected delays and fees because I overlooked soft costs and detailed zoning restrictions. This taught me the importance of diligent research and contingency planning, as regulatory nuances can significantly impact timelines and budgets.
- Assuming Uniform Regulations: Every locality has its quirks, yet I assumed my previous experience applied everywhere. The moment I adjusted my approach to local requirements, permit approvals became smoother, saving valuable time and resources. This highlights the need to tailor your process to specific jurisdictions.
- Neglecting Long-term Maintenance and Documentation: Focusing solely on the initial build, I missed setting up proper documentation and understanding ongoing permit obligations. Recognizing this early helped me avoid penalties and ensured future compliance, proving that permits are an ongoing commitment, not a one-time hurdle.
- Underestimating the Power of Expert Advice: Collaborating with seasoned consultants and thoroughly reviewing expert resources—like the comprehensive [permitting guide](https://constructionedgez.com/the-complete-guide-to-permitting-for-new-builds-and-additions)—transformed my project. Their insights helped me navigate complex steps faster and safer, emphasizing the value of seasoned guidance.
- Overlooking Early Planning for Drainage and Site Prep: Poor initial planning led to flooding and costly corrective work. Learning to integrate drainage considerations into my design—by referencing detailed guides—made a significant difference in my project’s sustainability and neighbor relations.
My Must-Have Tools and Resources for Smooth Projects
- Permit Navigation Platforms: Tools like this permit guide streamline understanding local requirements, reducing approval times.
- Estimating Software: I rely on advanced estimation tools to uncover hidden costs early, avoiding budget overruns.
- Site Planning Visuals: Using 3D modeling programs, I identified potential drainage issues before breaking ground, saving money and time.
- Networking with Experienced Builders: Community forums and local associations provide invaluable tips I couldn’t find in manuals, like the importance of early site inspections for drainage planning.
You Have the Power to Master Your Building Journey
Building or expanding your home with proper permits and accurate estimates is more than a checklist—it’s a commitment to quality, safety, and peace of mind. Each project teaches us resilience and the value of informed choices. Remember, taking the time to understand permits deeply and managing expenses wisely turns a stressful process into a rewarding achievement. Trust yourself, seek expert advice, and stay proactive—you’re capable of creating a space that stands the test of time. What’s the biggest lesson you’ve learned about permits or estimating? Share your story below—I’d love to hear it.