Why Your Framing Quote Should Include Sub-Floor Adhesive
It was a chilly morning when I first realized that my new addition was settling unevenly. Watching the floor creak more than it should, I couldn’t help but feel a mix of frustration and doubt. That lightbulb moment hit hard: I had overlooked a small but mighty detail in my framing process—sub-floor adhesive. It might seem like just another step, but neglecting it could spell big trouble down the line.
The Missing Piece in My Framing Puzzle: Sub-Floor Adhesive
Ever felt like you’re missing that little detail that could prevent future headaches? Well, I did, and it cost me more than I anticipated. When I first got my framing quote, I was eager to save a buck. But when the floor started squeaking and moving, I realized I overlooked one essential component—adhering that sub-floor properly. From personal experience, I can say that including sub-floor adhesive in your framing quote is a game-changer. It creates a seamless bond between the sub-floor and the joists, preventing movement, squeaks, and even warping over time.
Choosing to ignore this step seemed harmless at first, but the consequences became evident in the form of noisy, uneven floors just months after completion. Including adhesive in your framing quote isn’t just a technical formality—it’s a safeguard. Think of it like the essential seasoning in a recipe; skip it, and the whole dish suffers. Experts agree that proper adhesion leads to more durable, stable flooring that stands the test of time. In fact, a recent report highlighted that improper sub-floor installation can lead to costly repairs down the line, often exceeding the initial savings (source: [Construction Edgez](https://constructionedgez.com/adding-value-with-expert-home-additions-a-construction-guide)).
But let’s be real—many homeowners and even some contractors underestimate the importance of this detail. Are you worried about increasing your initial estimate? Or perhaps skeptical about whether it’s worth the added cost? You’re not alone. That skepticism is valid, but understanding the risks of neglecting proper sub-floor adhesion might make your decision clearer.
Now, if you’re wondering whether this detail really makes that big a difference or just adds to the budget, stick around. We’re about to dive into why including sub-floor adhesive in your framing quote is one of the smartest moves you can make for a lasting, solid build. And yes, I’ll share practical tips on how to ensure your contractor has this covered, saving you from future surprises and costs.
Secure the Sub-Floor with Adhesive
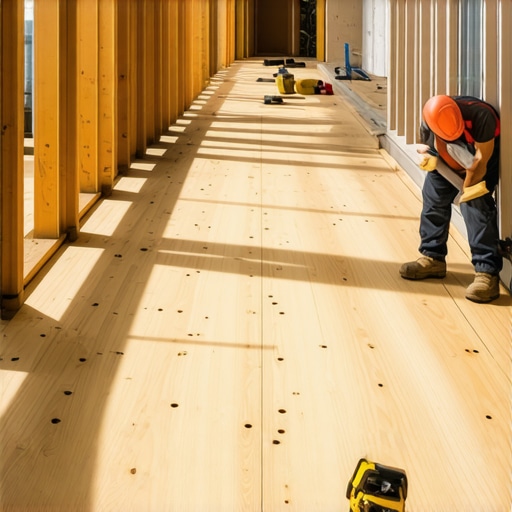
Start by selecting a high-quality sub-floor adhesive suitable for your materials. Before placing your plywood or OSB panels, apply a continuous bead of adhesive along the top of the joists, ensuring coverage reaches the edges. Think of it as spreading mortar before laying bricks—it’s the glue that ensures stability. During my last project, I used a pneumatic caulking gun to run a straight, continuous line, which made the installation smoother and more precise.
Proper Application and Spreading
Lay your sub-floor panels onto the adhesive-coated joists, pressing firmly to ensure good contact. Use a rubber mallet or a block of scrap wood to tap down the panels, eliminating air pockets. Double-check that the panels are aligned correctly; a small shift now can cause uneven flooring later. For best results, place nails or screws along the perimeter and at temporary supports to hold everything in place as the adhesive cures—this prevents shifting. Remember, the faster you complete this step, the less chance dust or debris gets between the panels and the adhesive.
Timing and Curing
Allow the adhesive to cure fully before proceeding with the rest of your flooring. The manufacturer’s instructions will specify curing time, typically ranging from 24 to 72 hours. Avoid walking on or loading the sub-floor during this period, as movement can compromise the bond. I learned this the hard way when I prematurely walked on a newly laid floor, causing a subtle squeak that took months to fix. Patience here pays off in long-term durability.
Inspect Your Work
Once cured, run your hand or a level along the panels to check for any gaps or movement. If you notice any loose spots, reapply adhesive and secure them temporarily until full curing. This step ensures the bond remains strong, preventing future squeaks or unevenness. In my personal experience, attention to detail in this phase saved me from costly repairs down the line, especially in higher-traffic areas or second-story floors.
Coordinate with Your Contractor
Communicate clearly with your builder or framing team to confirm that adhesive will be included in the quote. Use resources like this guide to understand the importance of detailed estimates. Ensuring this step is part of your scope helps prevent surprises and guarantees the longevity of your flooring. Remember, skipping or undervaluing this process often leads to squeaks, warping, or even structural issues later—so prioritize it effectively from the start.
When it comes to planning home additions or new builds, many homeowners and even some contractors rely on common wisdom or simplified methods. But let’s dig deeper into the nuances that often go unnoticed—details that can make or break your project. A frequent misconception is that permitting and estimating are straightforward, one-size-fits-all processes. However, the reality is far more complex and requires a keen understanding of subtleties to avoid costly pitfalls.
Challenging the Norm: Perception vs. Reality
Most people believe that permit requirements are a standardized checklist, but in truth, they vary significantly based on location, zoning codes, and even neighborhood covenants. Relying solely on generic information can lead to oversights, delays, or even legal complications. For example, some believe that a simple building permit covers everything, but certain additions—like a garage conversion or adding a second story—demand specific approvals. To navigate this maze effectively, consult sources like this guide to understand your local requirements thoroughly.
The Oops Factor: Estimating Without Depth
Estimating costs seems like a basic task, but superficial calculations overlook crucial nuances—hidden expenses that emerge only during detailed review. Many rely on square footage rates or online calculators, failing to account for variables like permit fees, material fluctuations, or specialized labor. This oversimplification often results in budget overruns. According to this resource, precise estimates demand a layered approach, considering soft costs, contingencies, and schedule buffers.
Have you ever fallen into this trap? Let me know in the comments.
Advanced Query: How do I adjust my estimates for project complexities that aren’t reflected in standard models?
That’s a smart question that many overlook. Advanced estimating involves not just numbers, but also an understanding of project-specific risks—site access issues, unique material requirements, or unexpected code upgrades. Employing risk-adjusted contingency factors, as discussed in this article, can help you prepare for those hidden costs. Incorporate detailed site assessments, consult with experienced professionals, and leverage project management software to continually refine your estimates.
Remember, rushing through this crucial phase can lead to surprises that derail your budget and timeline. Take the time to understand these nuances, and you’ll set a solid foundation for your project’s success.
Tools That Make a Difference in Long-Term Construction Maintenance
Keeping your build functioning optimally over the years demands the right set of tools and a strategic maintenance plan. Personally, I’ve found that investing in a quality moisture meter, such as the Protimeter Aquant, helps me detect early signs of water intrusion in framing or foundation walls, which can prevent costly repairs down the line. Additionally, using laser levels like the Bosch GLL3-330 ensures that structural elements remain aligned, especially during phase transitions and renovations. These tools, while seemingly simple, provide accurate data that informs proactive concerns before they escalate.
Routine Checks and Preventative Measures
Establishing a regular inspection schedule is crucial. For example, inspecting flashing, gutters, and sealing joints semi-annually can prevent water damage and deterioration. I personally schedule these checks every spring and fall, aligning with seasonal weather changes. Employing thermal imaging cameras occasionally, like the Fluke Ti105, reveals hidden heat leaks or moisture accumulation. By catching these issues early, you’ll mitigate their impact and extend the lifespan of your construction investments.
Embracing Digital Tools for Better Project Oversight
Software plays a pivotal role in maintaining project integrity over time. I recommend using construction management platforms such as Procore or Buildertrend, which enable documented defect tracking, scheduling, and communication logs. These tools help keep everyone accountable and provide historical data for future references. Looking ahead, AI-driven predictive maintenance tools are likely to become more integrated, offering real-time alerts based on sensor data, reducing downtime and repair costs dramatically.
How do I keep my project running smoothly over time?
Maintaining a project’s functionality isn’t limited to initial construction; it extends well into its lifespan through scheduled inspections, timely repairs, and leveraging the right technology. For instance, employing moisture meters during routine inspections can identify potential issues early, saving thousands in repairs. Additionally, documenting all maintenance activities using digital platforms ensures you have a track record to guide future renovations or troubleshooting. As the trend shifts toward smart building systems, integrating IoT sensors for ongoing condition monitoring will soon be standard, promising even greater control and longevity for your structures. Consider adopting advanced tools like thermal imaging or digital project management software today to stay ahead and preserve your investments effectively. For comprehensive guidance on project management and long-term maintenance, check out this article on efficiently managing additions from planning to execution: this guide.
What I Wish I Knew When Starting Out
One of the most valuable lessons I learned was the importance of paying close attention to small details, like the quality of sub-floor adhesion, which significantly impacts the durability of the entire structure. Overlooking this step taught me that even seemingly minor omissions can lead to costly repairs and frustrations down the line.
Another insight was realizing that asking the right questions to your contractor—such as whether sub-floor adhesive is included in the scope—can save you from surprises later. Transparency and thorough communication are key in ensuring every aspect of the build is up to standard.
Finally, I discovered that investing time in understanding the technical aspects of proper installation, such as spreading adhesive evenly and allowing sufficient curing time, pays dividends in the form of quieter, more stable floors. These practices might seem tedious initially but guarantee long-term satisfaction.
Recommended Resources to Elevate Your Building Knowledge
Firstly, I recommend exploring this step-by-step guide on estimating. It provides practical insights into accurate budgeting and helps you anticipate costs related to materials like sub-floor adhesives. Secondly, this resource on navigating permits can clarify how proper planning and permits can influence the scope and quality of your project. Lastly, I trust this guide on managing home additions for maintaining oversight throughout construction. These tools have helped me stay informed and proactive, ensuring projects stay on track and meet quality standards.
Your Next Step Begins Today
Don’t let the intricacies of additions, permit processes, or estimating overwhelm you. Embrace the learning process, and trust that paying attention to details like sub-floor adhesive will save you headaches and money in the future. Every successful project starts with making informed decisions—so take action today, and build with confidence!