The Attic Ventilation Ratio That Prevents Roof Rot
Ever had that sinking feeling during a storm or hot summer day, wondering if the moisture collecting in your attic could be causing unseen damage? I remember when I first noticed a musty odor upstairs, and suddenly, the real reason behind it became glaringly clear—poor attic ventilation. That moment was a lightbulb for me, an eye-opener that inadequate ventilation isn’t just about comfort; it impacts the very integrity of your roof and home.
Why Proper Attic Ventilation Matters More Than Ever
In my early days of homeownership, I thought ventilation was just about air circulation. Turns out, there’s a delicate science to it—specifically, the right ratio of intake to exhaust vents that can make or break your roof’s lifespan. Without this balance, warm, moist air gets trapped, leading to condensation and, eventually, roof rot. This isn’t just theory—I’ve seen it happen in homes nearby, and the costs of repairs are often staggering.
Struggling with the Skepticism: Is Accurate Ventilation Ratio Really Critical?
I used to dismiss these ideas until I made a costly mistake by ignoring this vital aspect. Early on, I installed vents without a proper plan, thinking more vents meant better airflow. Unfortunately, it disrupted the natural balance, causing moisture buildup instead. That experience taught me the importance of understanding the correct ratio, which, I discovered, is often recommended to be around 1:300 for exhaust and intake vents combined. For a typical home, that means calculating your attic’s square footage and installing vents accordingly—more on this in a moment.
To stay ahead of such issues, I recommend exploring detailed guides like understanding permit processes and consulting with professionals about your home’s specific needs. Remember, treating attic ventilation as just a box-checking task can cost thousands in repairs later. Ensuring your home breathes properly isn’t just good practice—it’s essential for maintaining its longevity.
Now, let’s dive into how you can determine the perfect ventilation ratio for your roof to keep it healthy and your family safe.
Calculate Your Attic Space Accurately
Begin by measuring the total square footage of your attic floor. I recall spending an entire weekend climbing up and down, jotting dimensions on a notepad, and double-checking my calculations. This number forms the baseline for selecting the right number of vents, as a common recommendation is one vent for every 300 square feet. Precise measurement avoids overspending on unnecessary vents or risking insufficient airflow.
Determine Vent Types and Placement
Choose the Right Vents
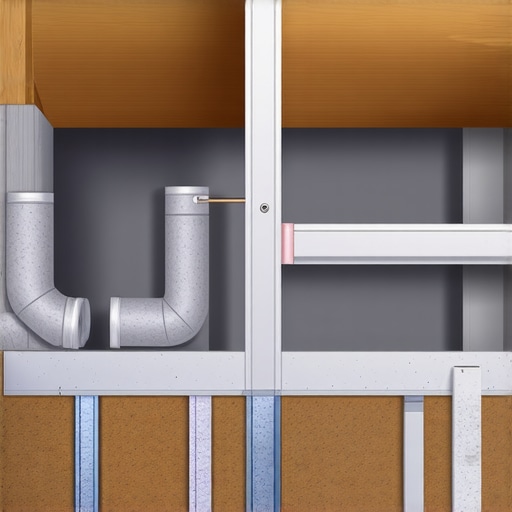
Install a combination of intake vents at the soffits and exhaust vents at the ridge or roofline. Think of it like a natural breathing system—one brings fresh air in, and the other allows hot, moist air to escape. I once attempted to install only ridge vents, neglecting soffit vents, which caused moisture to get trapped, resulting in condensation. After correcting this imbalance, I saw a noticeable difference in attic dryness during humid months.
Achieve the Correct Vent Ratio
The goal is a balanced ratio—about 1:300. For example, in a 1500 sq ft attic, aim for roughly 5 vents. But remember, the total opening area of vents matters more than count alone. Use a calculator or refer to manufacturer specs to confirm that cumulative vent area matches recommendations, ensuring optimal airflow without creating pressure issues. This step is akin to tuning a car engine—small adjustments can lead to better performance.
Install Vents Properly
Placement is critical. Soffit vents should be evenly spaced along the eaves, while ridge vents run continuously along the roof peak. During my third DIY project, I cut into soffits, installed subtle vent baffles, and sealed gaps with weather-resistant caulk. This precise placement reduced wind infiltration, preventing worse moisture problems. Mimicking professional standards involves careful planning—use a chalk line to ensure vents are straight and aligned, avoid obstructions like insulation or debris, and seal all joints tightly.
Test and Adjust Ventilation System
Once installed, monitor your attic’s environment for a few weeks. Use a simple smoke test by holding a cigarette or incense stick near vents; the smoke should flow naturally outward at the exhausts and inward at intakes, indicating proper airflow. If airflow seems weak or uneven, revisit vent placement or increase vent size. I learned this the hard way when I underestimated the importance of unobstructed pathways—adjustments significantly improved ventilation efficiency, prolonging the roof’s lifespan.
Consult Professionals for Complex Roofs
If your home has multiple levels, complex rooflines, or unusual architecture, expert advice can save you time and money. Think of it as hiring a navigation guide for a mountain hike—knowing the terrain prevents costly missteps. Professionals can perform detailed assessments and recommend customized solutions, ensuring your attic breathes properly and protects your investment. Explore navigate permit requirements to include ventilation upgrades in your project plan effectively.
While many homeowners and even some builders focus on getting permits and estimating costs, there’s a lesser-known nuance that can make or break your project: the tendency to oversimplify or misunderstand permit processes and cost estimates.
Are Your Permits Truly Ready for Inspection? The Complexity Behind the Scenes
It’s a common belief that once you’ve submitted permit applications, the hard part is over. However, many overlook the intricacies involved in permit approval—such as ensuring detailed documentation and understanding local variances. According to industry experts, a significant cause of delays isn’t just incomplete paperwork but also a failure to anticipate the specific requirements unique to your jurisdiction, which can be quite different from what you expect.
Why Most Estimating Goes Wrong Despite the Latest Tools
Many rely on digital calculators or generic online estimates, assuming these are sufficient. But the reality is that accurate estimation demands a deep understanding of local labor rates, material costs, and potential hidden expenses, such as permit fees or unexpected site conditions. A study published in the Journal of Construction Engineering emphasizes that many errors stem from neglecting these Maintaining your home construction or renovation projects over time requires more than just good initial planning. Employing the right tools and practices ensures that your efforts pay off for years to come. Personally, I rely heavily on a combination of digital software and precise measurement tools that have consistently saved me time and money. For estimating, I swear by Buildertrend, which offers comprehensive project management features, from scheduling to budgeting. It helps me keep track of evolving costs and deadlines, especially when scaling projects like additions or new builds. When it comes to on-site measurements, a laser distance meter such as the Leica DISTO D2 is indispensable. Its accuracy up to 0.002 meters allows me to verify dimensions quickly, reducing costly errors in framing or material ordering. Visual inspection and quality control are non-negotiable, and for that, I prefer a thermal camera like FLIR’s C5. It identifies hidden moisture or heat leaks, preventing long-term issues that could compromise the project’s integrity. Looking ahead, trends suggest integrating Building Information Modeling (BIM) technology more deeply into home building workflows, providing 3D models that help catch problems early and streamline permits and inspections. Moreover, adopting streamlined permit management systems can significantly decrease delays, making your process more predictable.
How do I maintain project margins and quality over time?
Regularly updating digital models with real-time data, maintaining reliable tool calibration, and establishing routine site audits are key. Personally, I schedule quarterly reviews of my project documentation and tool maintenance logs, which has paid off by catching issues before they escalate. For example, staying diligent with permit compliance ensures no unexpected hold-ups that can spiral costs. To truly master long-term success, I recommend integrating advanced estimating techniques, like detailed quantity takeoffs and variable cost analysis—techniques I learned from the expert guide on estimating. Whether you’re scaling a small addition or undertaking a full new build, these tools and strategies are the foundation of a resilient, predictable construction process. Try implementing a laser distance meter if you haven’t yet; accurate measurements can prevent many costly mistakes down the line.
As I traced the roots of my attic moisture issues, I realized that overlooking the subtle nuances of ventilation can lead to costly mistakes. The real lesson? Improper attic ventilation isn’t just a comfort concern—it’s a silent enemy that can compromise your entire roof structure over time.
What Hidden Lessons Did I Learn from My Ventilation Mistakes?
- Balance is everything: Installing vents without considering the correct intake-to-exhaust ratio can trap moisture. After trial and error, I found that aiming for a 1:300 ratio made all the difference in maintaining attic health.
- Placement impacts performance: Strategic positioning of soffit and ridge vents ensures airflow flows naturally, preventing condensation buildup. I once missed this, leading to unnecessary repairs—something I won’t repeat.
- Measuring matters: Accurate attic square footage and proper vent sizing prevent overspending and guarantee efficiency. Using tools like a laser distance meter has saved me countless headaches.
- Professional guidance is invaluable: For complex rooflines, consulting specialists or referring to trusted guides can prevent overlooked details that lead to long-term problems. Exploring permit guidelines from experts has streamlined my projects immensely.
Tools and Resources That Made a Difference for Me
- Buildertrend: This comprehensive project management software keeps my budgets and schedules in check, especially when coordinating multiple aspects of home additions.
- Leica DISTO D2: Precise measurements are key; this laser distance meter’s accuracy reduces costly errors and ensures perfect vent placement.
- FLIR Thermal Camera: Detecting hidden moisture spots before they become structural issues has saved me from future headaches.
- Building Information Modeling (BIM): Embracing 3D modeling early in my projects helped me visualize airflow and identify potential shortcomings before installation.
Seize the Moment and Breathe Easy
You now hold the keys to safeguarding your roof’s longevity through smarter attic ventilation. Implementing these insights not only shields your home from hidden damage but also adds value and peace of mind. Remember, mastering ventilation is a journey—every project is a learning opportunity to build a healthier, more durable home.
Are you ready to evaluate your attic’s ventilation system and make adjustments? Share your experiences or questions below—your insights might prevent others from costly mistakes!