The Framing Clip Rule for High-Wind Zones
It was a chilly Saturday morning when I stood in my backyard, staring at the half-finished framing of my new deck. The forecast had called for mild weather, but as I checked the sky, I realized I’d overlooked a crucial detail in the construction codes—the Framing Clip Rule for High-Wind Zones. Suddenly, the entire project felt uncertain. That lightbulb moment hit me hard: I’d underestimated how local wind standards could impact my build. Have you ever been deep into planning a new addition or renovation only to hit a permit roadblock because of missing or misunderstood structural requirements? If so, you’re not alone.
Permitting and understanding local wind load rules can seem intimidating, but I promise, once you grasp the principles, you’ll feel more confident navigating your project. Today, I’ll walk you through what I’ve learned—sharing personal insights and practical tips to help you avoid the mistakes I made early on.
Why Wind Zones and Structural Clips Matter More Than You Think
In areas prone to high winds—think coastal regions or open plains—the building codes are strict for a reason. High-wind zones aren’t just a minor concern; they can dramatically affect the safety and durability of your structure. The Framing Clip Rule is designed to ensure that load transfer between framing members can withstand gusts and storms, protecting your investment and your loved ones. Failing to comply can lead to delays, costly rework, or, in the worst case, structural failure.
I learned this the hard way when my early framing estimate fell short of code requirements. I assumed standard clips were enough. Turns out, not all clips are created equal, and choosing the wrong type without verifying wind zone compatibility can be a costly mistake. An article from Construction Edgez emphasizes how crucial it is to match clip specifications with local wind load requirements, especially since these details can be the difference between passing or failing your permit inspection.
Just a few years ago, I would have blindly followed generic framing plans, thinking permitting was just a formality. But ignoring the specifics of the Framing Clip Rule in high-wind zones became a setback. My advice: get familiar with your local building code, especially the sections on wind load and fastening methods, early in your planning process. Doing so saves you time, money, and a whole lot of frustration.
Are you currently facing issues with structural compliance or unsure whether your clips meet high-wind zone standards? If so, don’t worry—you’re not alone. And the good news is, with a little extra homework and guidance, you can confidently move forward, knowing your project will stand strong against nature’s fiercest gusts. Now, let’s explore what the Framing Clip Rule entails and how to ensure your build is up to code.
Assess Wind Zone Requirements Before Finalizing Your Plans
Start by thoroughly reviewing your local building codes to determine the specific wind load standards applicable to your property. Visit your city’s planning or building department website or consult with a code official. When I was planning my deck, I initially skipped this step, assuming generic standards would suffice. However, I realized that my coastal location required higher wind resistance measures, which meant revisiting my plans to incorporate appropriate clips and reinforcements. This proactive check prevents costly rework later.
Select the Right Framing Clips and Fasteners
Not all clips are built to withstand high wind pressures. Once you know your zone’s requirements, choose clips compliant with those standards. Cross-reference product specifications with your local code sections—many manufacturers provide this documentation. I once ordered standard clips for my deck, only to find during inspection that they didn’t meet the high-wind zone criteria. I had to reorder specialized clips, which delayed my project and increased costs. Double-checking product compliance is essential.
Document Your Structural Choices Effectively
Create a detailed ledger of all the components used, including clip types, fastener sizes, and spacing. Include manufacturer datasheets and installation instructions. When submitting your permit application, include this documentation as evidence of compliance. During my permit review, clear records helped avoid back-and-forth questions about whether my structure met wind standards. Think of this step as assembling evidence for a case—organized documentation expedites approval.
Consult with a Structural Engineer if Necessary
If your design involves complex loads or atypical conditions, engaging a licensed engineer can make a difference. I reached out to an engineer for my porch redesign—his review ensured my chosen clips and bracing were adequate. Their stamped calculations can often fulfill permit requirements and give inspectors confidence. While an extra expense upfront, it can save significant trouble during reviews.
Prepare and Submit Accurate Permit Applications
Use the specific guidance from your local permit office to fill out your application correctly. Include all supporting documents—drawings, load calculations, product datasheets—and explicitly reference high-wind standards. During my initial attempt, vague descriptions led to permit delays; reapplying with precise documentation and clear compliance statements helped me succeed faster.
Respond Promptly to Inspector Feedback
Once your permit is under review, be ready to provide additional info or make minor adjustments if needed. I made photocopies of product datasheets and safety certifications to have on hand, which facilitated quick responses when asked. This proactive stance shows your commitment to code compliance, smoothing the path to approval.
Update Documentation During Construction to Maintain Compliance
As your build progresses, record any deviations from the original plan and get approvals if you modify components or methods. When I adjusted the spacing of some clips on-site, I documented the change and provided updated reports, ensuring my permit remained valid. Keeping thorough records prevents inspection hiccups and potential penalties.
Leverage Resources to Streamline the Process
Consult guides such as Permitting for New Builds to understand common pitfalls and best practices. Engaging with experienced professionals or online communities can also provide insights tailored to your region. Staying informed reduces surprises and saves time during the approval process.
Many homeowners and even experienced builders fall into common misconceptions when it comes to new builds and additions. One widespread myth is that simple cost estimates and permit applications are straightforward, but in reality, the nuances are where projects often go awry. For example, a frequent mistake is relying solely on generic estimates without accounting for regional nuances like soil conditions or specific wind load requirements, which can lead to costly reworks or permit delays. As I’ve learned firsthand, assuming that early planning stages are quick and easy ignores the importance of detailed, region-specific data—missing this can jeopardize the entire project.
Furthermore, many believe that once permits are approved, the job is done. However, the permit process often involves ongoing documentation, adjustments during construction, and detailed compliance checks, especially for structural elements. A common trap is underestimating the time and effort needed to synchronize your plans with evolving building codes, which can vary significantly depending on your locale. It’s advisable to stay actively engaged throughout the project, constantly updating your documentation and double-checking compliance to avoid rejections or fines.
An advanced consideration is understanding how local environmental factors influence your structural design. For instance, high-wind zones require specialized framing and fastening methods, not just a standard approach. Neglecting this can cause catastrophic failure during storms—literally a costly oversight.
Why do so many get this wrong? The key lies in incomplete knowledge or assumptions based on generic templates. According to expert construction consultants, meticulous attention to detail in early planning and documentation dramatically improves permit success rates and structural integrity—see their insights in the comprehensive permit guide.
Have you ever fallen into this trap? Let me know in the comments.
Mastering these nuances isn’t just about avoiding penalties; it’s about ensuring your project stands the test of time and nature. Don’t skip on regional research and detailed estimates—your future self will thank you. For a deep dive into accurate cost estimation and what pitfalls to vigilantly avoid, check out these expert tips. Keeping abreast of these details transforms a ticking time bomb into a smooth construction journey.
Investing in the Right Tools for Longevity
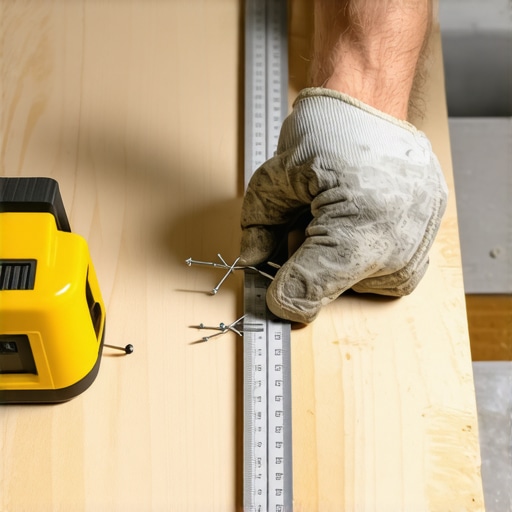
Having the appropriate equipment is crucial for maintaining your build over time. I personally rely on a high-quality digital level, such as the Bosch GLL 3-80, which provides precise measurements even in challenging lighting conditions, ensuring structures stay level during assembly and over the years. Additionally, a cordless impact driver like the DeWalt DCF887 not only accelerates fastener installation but reduces hand fatigue, making routine adjustments much more manageable in the long run. Using reliable, well-maintained tools minimizes errors and extends the lifespan of your equipment, translating into fewer breakdowns and less downtime.
Software to Keep Your Documentation Effortless
Staying organized is half the battle in maintenance. I recommend using software like Buildertrend to track all project details—from material specifications to permit documents. Its real-time updates and cloud storage allow me to access important files from anywhere, reducing the risk of lost data and ensuring compliance. My experience shows that maintaining an accurate digital record simplifies future inspections and makes repairs or additions smoother. Embracing digital tools not only streamlines management but also prepares you for scaling your project with ease.
Creating a Routine Inspection and Maintenance Plan
Scheduled inspections are vital for catching issues early. I set quarterly checks using a checklist from Construction Edgez that emphasizes aspects like fastener integrity, sealant condition, and structural shifts. Regular upkeep—such as tightening loose fasteners, clearing debris, and resealing joints—ensures your structure remains sound over the years. Developing a maintenance schedule tailored to your build’s specifics is an investment that pays off by preventing costly repairs down the line.
Anticipating Future Growth and Scaling Up
If you’re planning to expand or add new features, considerations like modular designs and flexible connection points become essential. For example, incorporating tie-downs and adjustable supports in early phases can facilitate future extensions. As building standards evolve, staying compliant means periodically updating your methods—becoming familiar with advanced permitting strategies can simplify these processes. Preparing your structure to adapt over time ensures long-term value and reduces hassle when scaling.
How do I maintain the integrity of my build over time?
Adopting routine inspections, investing in quality tools, and leveraging digital management platforms are essential. Regularly scheduled upkeep, combined with proactive upgrades, keeps your construction safe, efficient, and ready for future improvements. Remember, detailed documentation isn’t just for the permit stage; it becomes a blueprint for ongoing care and expansion. For a hands-on approach, try implementing a quarterly inspection routine using checklists from Construction Edgez. This practice can lead to significant savings and peace of mind.
Three Lessons That Changed My Approach to High-Wind Building
First, I underestimated the importance of digging deep into local wind codes—assuming generic standards were enough. It taught me the value of thorough research early in the project. Second, I realized that choosing the right clips isn’t just about material but ensuring they meet specific wind zone requirements; a mistake here can compromise safety. Lastly, I learned that detailed documentation, including manufacturer datasheets and load calculations, can fast-track permit approval and prevent delays. These lessons underscore how attention to what might seem minor details can make or break a project in high-wind environments.
My Go-To Resources for Structural Confidence
When I need trustworthy insights, I turn to Construction Edgez’s permit guides. They break down complex regulations into actionable steps. The home addition strategies articles help me plan for future-proofing structures, especially in wind-prone zones. For technical details, product datasheets from reputable manufacturers give me peace of mind that my materials are up to code. Combining these resources ensures I stay informed and compliant, preventing costly oversights.
Your Next Step: Be Bold, Stay Informed
Building in high-wind zones isn’t just a challenge—it’s an opportunity to master your craft. By learning from my experiences, you can approach your project with confidence, knowing you’ve accounted for critical factors like wind load standards and proper fastener selection. Remember, detailed planning and documentation are your best allies—they transform uncertainty into success. Don’t wait to implement these insights; your sturdy, compliant build depends on it. What’s the biggest lesson you’ve learned when dealing with building permits or high-wind considerations? Share below and keep the conversation going!
,