How to Verify Sub-Panel Amperage for Your Basement Addition
Ever stood in your basement, scratching your head over the electrical panel, wondering if it can handle that new addition you’re dreaming about? I’ve been there. A few years ago, I finally decided to expand my basement—an extra bedroom, a home office, maybe a small gym—and everything seemed straightforward at first. But when it came time to get the permits and make sure my existing electrical system could support the load, I hit a frustrating snag. It wasn’t just about numbers; it was about peace of mind, safety, and making sure my project wouldn’t come to a halt or, worse, cause hazards down the line.
Why Properly Verifying Your Sub-Panel Amperage Is Essential
Is This Step Really Worth the Fuss?
At first, I thought, “It’s just a matter of checking the breaker size.” Turns out, that’s a common misconception. Your sub-panel’s amperage isn’t just a trivial detail; it’s the backbone of your entire electrical safety and capacity. If your panel can’t handle the added load of your basement addition, you risk overloading it—potentially leading to dangerous circuit failures or fires. Early on, I made the mistake of assuming my existing panel was sufficient because it looked large enough. A rookie error, as it turned out, since the actual load capacity can be tricky to gauge without the right knowledge.
According to the Occupational Safety and Health Administration, electrical overloads are among the leading causes of residential fires. So, ensuring your sub-panel can support your planned additions isn’t just red tape—it’s a critical safety step. That’s why today, I’ll walk you through how to verify your sub-panel’s amperage like a pro, avoiding costly mistakes and keeping your home safe.
The Cost of Guesswork in Electrical Planning
If you’ve faced the uncertainty of whether your current electrical setup can handle a new project, you’re not alone. Many homeowners skip this verification and end up with surprises—power trips, insufficient outlets, or dangerous overloads. Getting this right from the start saves you time, money, and stress. Plus, understanding the specifics can make permit applications smoother. If you want to avoid the common pitfalls I encountered early on, stay tuned—I’ll guide you through the straightforward steps to check your sub-panel’s amperage and ensure your basement addition is wired safely and efficiently.
Check Your Panel’s Main Label and Breaker Sizes
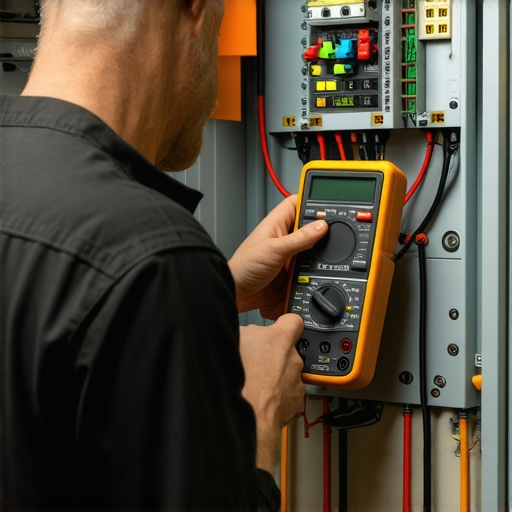
Start by locating your sub-panel and inspecting the main label. This label indicates the maximum amperage capacity, often noted as 100A, 125A, or 200A. Confirm whether this matches your current service panel’s specifications. For example, I found a sticker reading 125A in my basement panel. Don’t solely rely on the breaker size; the label provides the true capacity. If the label is missing or illegible, move to the next step.
Open The Panel and Examine the Main Bus
Carefully remove the panel cover using insulated tools. Once open, locate the main bus—the thickest set of conductors at the top of the panel. Count the number of conductors and observe their gauge; common sizes are 4/0 or 2/0 AWG. The bus’s configuration and conductor sizes give clues about the panel’s capacity. I once encountered a panel with a 250 kcmil bus but only rated for 125A, which highlights the importance of visual confirmation.
Identify Circuits and Their Loads
List all circuits connected to the panel, noting their amperage ratings and attached loads. Turn off all breakers, then switch each on one at a time while measuring load. For precise measurement, use a clamp meter around individual cables—if you have one—while appliances are running. This helps estimate real-time usage, avoiding overload risks.
Calculate Total Load and Compare
Add up all individual circuit loads to estimate your total current draw. Keep in mind continuous loads = 125% of the actual load, per electrical codes. For example, if your circuits sum to 80A, the actual load might be around 100A. Compare this to your panel’s capacity to ensure there’s enough headroom for the new addition. When I did this for my project, I realized my existing 125A panel could handle an additional 20A comfortably, which saved me the cost of upgrade.
Consult an Electrician for Confident Verification
If any step feels uncertain, hire a licensed electrician to verify your findings. They will perform a load calculation and inspect your panel physically. This step isn’t just about compliance but about safety—faulty assumptions can lead to hazards. I always recommend a professional review if you’re unsure, especially since incorrect load analysis can compromise your home’s safety.
Applying these steps thoroughly will give you a clear picture of your sub-panel’s capacity and help plan your basement addition safely. Remember, a misjudged electrical load isn’t just inconvenient; it can be dangerous. Regularly referencing reliable resources like understanding permit processes ensures your project stays compliant and safe as you expand your home.
 When homeowners or even some contractors approach permit estimation, a common mistake is oversimplification—assuming that if you have a rough idea of the project’s scope, you can just multiply by a standard rate. In reality, the process is far more nuanced. Many believe permits are a straightforward upfront cost, but in my experience, overlooking the hidden nuances can lead to project delays and budget overruns. One often-missed factor is the local jurisdiction’s specific requirements, which vary widely and can impact costs significantly. For example, some areas have strict zoning overlays or environmental regulations that don’t appear in initial estimates, making it essential to layer your calculations with detailed research on local rules, like those discussed in the guide on understanding permit processes.Maintaining precision in your permit estimates and ensuring long-term results requires more than just initial calculations. Personally, I rely on specialized software like PlanSwift and Bluebeam Revu. PlanSwift streamlines takeoff processes, allowing me to quantify materials and labor precisely, which reduces costly overruns. Bluebeam Revu enhances collaboration with stakeholders, enabling real-time markups and version control that keep everyone aligned throughout the project lifecycle. Using these tools consistently has significantly improved my project accuracy and speed. In addition, I incorporate regular review sessions—weekly check-ins to compare actual costs against estimates—and adjust plans accordingly. Establishing clear communication channels with subcontractors ensures potential scope changes or unforeseen challenges are swiftly incorporated into estimates, preventing surprises during permit submissions. As the industry evolves, the integration of Building Information Modeling (BIM) tools like Revit can provide a dynamic 3D model of your project, facilitating clash detection and precise scheduling, which directly impacts your estimating accuracy and permit compliance. Looking ahead, I believe AI-driven estimating platforms will further refine predictive accuracy, allowing for even more reliable budgets and schedules. How do I keep my permit estimates accurate over time? The key lies in adopting a disciplined review process, leveraging the latest tech, and staying informed through resources like top estimating strategies. This approach helps me catch discrepancies early, refine my methods, and maintain confidence that my projects will stay on track.
Lessons That Changed My Approach to Electrical Planning
One of the toughest truths I faced was realizing that my initial assumption about my electrical panel’s capacity was dangerously naive. A simple glance at the breaker size isn’t enough; understanding the true load capacity requires a careful inspection of labels and conductors. I’ve learned the importance of never rushing this step—oversights can lead to hazards. Additionally, I’ve discovered that consulting with a licensed electrician, rather than guessing, saves time, money, and uncertainty, especially when dealing with complex load calculations. Finally, I found that ongoing education about electrical safety standards empowers homeowners to make informed decisions confidently.
My Go-To Resources for Electrical and Permit Mastery
To stay ahead, I rely on industry-leading tools like estimating software that help accurately calculate loads and costs, ensuring my projects are compliant and safe. I also trust the comprehensive guides on permit processes to navigate local regulations smoothly. My reading list includes practical titles on electrical safety standards and permit strategies, which have transformed my approach from reactive to proactive. Using these resources has genuinely elevated my confidence level in managing home expansion projects.
Embracing the Power of Action in Your Home Enhancement Journey
The journey toward a safe and successful basement addition begins with understanding your electrical system’s capacity and ensuring compliance every step of the way. Remember, proactive planning not only averts risks but also lays the foundation for future upgrades. I encourage you to take that first detailed load assessment today—it’s a small step with enormous long-term benefits. Dive into the resources provided, keep learning, and don’t hesitate to seek professional guidance. Your home improvement journey is a marathon, not a sprint—equip yourself with knowledge, patience, and the right tools, and you’ll turn your vision into reality safely and efficiently.