Verify Window U-Values to Avoid Energy Code Penalties
I remember the moment vividly—standing in the middle of my semi-finished room, rubbing my temples as I stared at the permit paperwork that just wouldn’t clear. Everything looked perfect: the plans were detailed, the builder was confident, but I hit a wall with the energy compliance check. Turns out, I had overlooked an essential detail: the window U-values. That light bulb moment taught me a harsh lesson about the importance of verifying these numbers early on—something I wish I had known from the start.
Why Overlooking U-Values Could Cost You Big Time
Transforming a house, whether adding a new room or converting an attic, demands meticulous planning. Not just about the design or materials but also about meeting local building codes—especially energy codes that have become stricter over the years. One critical metric often underestimated in this process is the U-value of windows and glazed openings. This little number can be the difference between a smooth permit approval or a costly delay.
Ensuring your windows meet the required U-values from the get-go can help you avoid penalties and redesigns. Believe me, misjudging this can result in reordering materials, delays in construction, or even the need to redo approved work—all of which drain your budget and patience. I learned this the hard way early in my project, after a surprise inspection found my windows’ thermal performance was just not up to code. It was a lesson I’d prefer to share upfront, so you don’t end up like I did.
For further insights into navigating permits for new builds and additions, check out our comprehensive guide on proper permitting processes. But let’s get into the specifics of what verifying window U-values entails and how it can be your best friend against energy penalties.
Is Verifying U-Values Really Worth the Extra Step?
I know what some of you are thinking—”sounds technical and time-consuming,” or “isn’t this just for the experts?” Well, I’ll admit, early on I fell prey to the misconception that all windows are created equal—and that generic specs would pass muster. That’s a mistake. The truth is, verifying the U-values of your windows is a straightforward process that can save you significant headaches and money, especially considering that non-compliance can lead to fines or mandatory upgrades. An independent third-party verification, like a certified testing or lab report, provides peace of mind and helps keep your project on track.
Much like how accurate cost estimating and permit management are essential for smooth construction workflows, verifying U-values is a critical piece of the puzzle. It’s also well-supported by industry standards; according to the U.S. Department of Energy, choosing energy-efficient windows can reduce heating and cooling costs by up to 15%—a figure that underscores the importance of quality materials and compliance.
Have you ever faced unexpected delays because of overlooked energy code requirements? If so, you’re not alone. Many homeowners and builders make the mistake of assuming their specs are correct without double-checking. That’s why taking the time upfront to verify these values is a tiny investment that pays off big time.
In the sections that follow, I’ll walk you through the practical steps for verifying your window U-values, so you can confidently tackle your project without the fear of penalties looming over your head. Ready to dive in? Let’s get started and set your project up for success from the very first step.
Gather Accurate Window Data Early
Start by collecting detailed specifications of all selected windows. Contact suppliers directly to obtain official U-value ratings, or request certified test reports. I recall visiting a supplier whose documentation claimed certain U-values; cross-referencing these with independent testing reports saved me from potential permit delays. Keep these records organized, as you’ll need them for submission or inspection.
Understand the Local Energy Code Requirements
Consult your local building authority or permit office to determine the specific U-value thresholds required for your project. This step is crucial because standards vary by region, and misunderstanding them can result in costly replacements later. For example, my project’s code mandated a maximum U-value of 0.3 for all window openings, which initially surprised me. Recognize that these requirements are often embedded in the permitting process.
Perform an Independent U-Value Verification
Engage a qualified third-party laboratory or certification body to verify your window manufacturer’s data. This can involve submitting samples for testing or requesting an official certificate of compliance. I coordinated with a local testing lab, which took about two weeks and cost a few hundred dollars. The validation report then became a key document in my permit application.
Document Every Step and Keep Records
Create a comprehensive file including the manufacturer’s data, test reports, correspondence, and verification certificates. This documentation should be readily available during inspections and for future reference. When my inspector requested proof, having organized records prevented any renegotiation or delay.
Incorporate Verification Into Your Permitting Package
When submitting your permit application, include all verification documents alongside your drawings and specifications. Clearly highlight compliance features and attach third-party test results to substantiate your claims. Doing so was the difference between a smooth permit approval and a drawn-out review process.
Use Visual Aids to Clarify Compliance
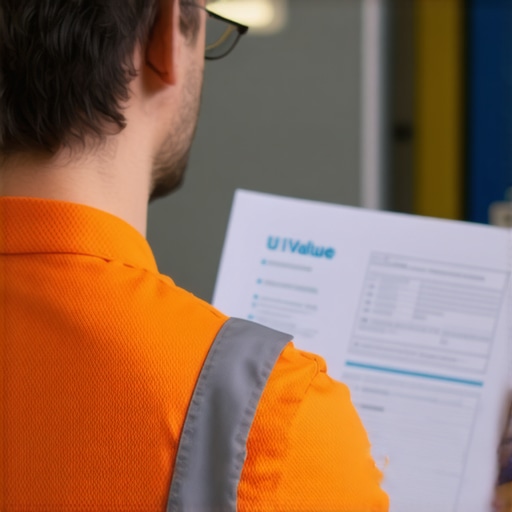
Visual aids like diagrams or stamped certificates can make your submission clearer. I included annotated images illustrating the window U-value data with references to accepted standards, which helped streamline the review. Remember, the goal is to preempt questions and demonstrate proactive compliance.
Review and Confirm Before Ordering
Before finalizing your purchase, double-check that all selected windows meet the specified U-value requirements and that certificates are up-to-date. A small misstep here led me to replace a batch of windows after the order was placed, causing delays. Verifying upfront saves money and mitigates project risks.
Keep Up with Evolving Standards
Stay informed about any updates to your region’s energy codes. Subscribe to relevant industry newsletters or consult with your permit officer periodically. As building standards continually evolve, proactive adherence keeps your project compliant and minimizes surprises during inspection.
Many homeowners and even experienced builders fall into pitfalls when planning additions or new builds, often due to misconceptions about the complexity of permitting and estimating. Let’s dig deeper into some nuanced misconceptions that can trip you up and how to sidestep them.
Firstly, a widespread myth is that permits are just a bureaucratic hurdle rather than an integral part of the construction process. Some assume that if plans look good, permits will be straightforward, but in my experience, overlooking detailed permit requirements can lead to expensive delays or even the need to redo work. For example, not understanding local zoning nuances or the specific documents needed can cause your application to stall. To streamline this, I recommend thoroughly reviewing the permits process to identify potential red flags early.
A second misconception revolves around cost estimation. Many believe they can rely solely on initial quotes without accounting for hidden or nuanced costs. In truth, underestimating contingencies or overconfidence in early estimates can blow your budget. An advanced mistake is failing to include permit-related costs, inspection fees, or recent code upgrades—for instance, newer energy codes often silently increase material costs. To improve accuracy, consult comprehensive guides like home addition estimating strategies, which detail the often-overlooked expense factors.
Now, here’s an advanced question to consider: How can understanding local regulatory changes prevent budget overruns?
Keep in mind, building codes and permit requirements evolve with new standards aimed at safety and energy efficiency. Staying informed through official updates or industry newsletters prevents surprises that can delay your project or increase costs. For example, recent updates to seismic or fire safety standards may require additional materials or engineering assessments. Regularly reviewing authoritative sources or consulting with local permit officers can keep your project compliant and on schedule.
Lastly, a trap many fall into is assuming that all contractors are equally familiar with local permitting nuances. This misconception can lead to hiring firms unprepared for specific regional requirements, resulting in delays or fines. To avoid this, verify that your contractor is well-versed with local processes or engage specialists who understand regional nuances. For insights on managing this aspect, check the project management and permitting tips.
Remember, detailed planning, thorough estimation, and up-to-date knowledge of local standards are your best tools for smooth project execution. Have you ever fallen into this trap? Let me know in the comments.
Keep It Running: My Go-To Tools for Lasting Results
When managing a home addition or renovation, having reliable tools and systems in place is essential to ensure longevity and smooth operation over time. I personally swear by a combination of hardware, software, and strategic methods that streamline workflow and preempt future issues.
The Power of Digital Project Management Software
For tracking progress, budgets, and permits, I rely heavily on Buildertrend. Its intuitive interface allows me to set milestones, attach permits, and monitor weather delays—all in one dashboard. This centralization reduces miscommunication and keeps everyone accountable. Additionally, for estimating and cost control, I leverage cost estimation tools that integrate current market data, which helps prevent over- or under-budgeting.
Reliable Hardware for Construction and Inspection
In the field, I recommend a high-precision laser level like the Leica Disto. Its accuracy ensures that foundation grades and framing align perfectly, reducing call-backs or structural issues later. For inspection readiness, always carry a durable, waterproof camera—like the Nikon AW130—to document ongoing compliance, especially with energy standards like U-values. Regular photographic records act as proof during permit audits and help minimize disputes.
The Future Might Include Smarter Systems
Looking ahead, I predict increased integration of IoT devices—such as smart moisture sensors and energy monitors—which will help maintain optimal home performance over decades. Implementing these now or in future renovations can dramatically reduce maintenance costs and detect issues early.
Guarantee Long-Term Performance Through Routine Checks
Establishing a routine for system checks is vital. For instance, periodically testing window U-values with calibrated equipment and updating energy model data can keep your project compliant and energy-efficient. Consistent maintenance routines, backed by the right tools, cultivate a space that ages gracefully and retains value.
How do I maintain my project’s longevity and performance over time?
Regularly review all documentation—inspection reports, permit records, and warranty information—and keep your equipment up-to-date. Don’t hesitate to invest in quality tools initially; they often pay for themselves by preventing future expensive repairs. For detailed strategies on sustaining your home’s performance, visit adding value with expert advice.
As you implement these tools and routines, you’ll find that maintenance becomes a manageable, integral part of your project lifecycle. Try integrating a laser level or adopting comprehensive project management software, and see how it transforms ongoing operation and longevity.

The Hardest Lesson I Learned About additions,estimating,new build,permit
One of my most humbling experiences was underestimating the complexity of permit approval, especially relating to energy compliance. It became clear that even with perfect blueprints, a missing detail like the window U-value could derail months of progress. That realization drove home the importance of proactive research and certification early on. Additionally, I wish I had understood the value of organizing documentation meticulously—what seemed tedious initially became my greatest asset during inspections.
3 Myths About additions,estimating,new build,permit That Held Me Back
- All windows are created equal: Assuming generic specs suffice led me to costly delays. Always verify U-values with official certifications.
- Permits are just paperwork: Treating permits as a formality ignored important regional nuances, causing rejection or rework.
- Estimates are set in stone: Failing to include permit-related costs or unexpected code upgrades resulted in budget overruns. Regularly revisit and update your numbers.
What Experts Won’t Tell You About additions,estimating,new build,permit
Many seasoned builders overlook the evolving nature of regional energy standards. Staying current with local code updates not only ensures compliance but also avoids mid-project surprises. Engaging with a knowledgeable permit officer can reveal hidden requirements specific to your locale. Lastly, investing in third-party verification of critical components like windows isn’t just a bureaucratic step—it’s a safeguard against costly red flags.
My Essential Toolkit for additions,estimating,new build,permit
- Buildertrend: Centralizes project tracking, permits, and communication, reducing missteps.
- Certified testing labs: Provide verified U-value data, crucial for energy compliance and permit approval.
- Laser levels and quality cameras: Keep structural and inspection documentation accurate and verifiable.
- Industry newsletters & local code updates: Stay ahead of changes that could impact your project scope and costs.
Take Action: Shape Your Building Journey Today
Understanding the nuances of additions, estimating, new builds, and permits is more than just a checklist—it’s about empowering yourself to avoid costly delays and compliance pitfalls. Embrace proactive planning, thorough verification, and continuous learning. Your dream project is within reach if you approach it with knowledge and confidence. Remember, every detail counts, and the effort you invest now pays dividends in peace of mind later.
What’s the biggest permit challenge you’ve faced so far? Share your story below and let’s learn from each other’s experiences!