The Egress Window Myth That Fails Basement Bedroom Permits
It was a chilly morning when I finally realized I’d been caught in a trap I didn’t even see coming. Just a few weeks into planning my basement bedroom addition, I heard the dreaded words from my permit officer: “Your egress window setup doesn’t meet code.” I had spent hours researching permits, estimating costs, and imagining that I was ahead of the game. But that myth about egress windows—that they’re just a simple requirement—caught me off guard. And honestly, I hadn’t even considered the common pitfalls that could derail my entire project.
Why You Need to Rethink the Egress Window Myth Today
Imagine pouring your heart and savings into a renovation, only to find out your permit is denied because of a little detail overlooked—like your egress window size or placement. It’s frustrating, yes, but it’s an all-too-common story among homeowners and builders who assume that following the basic rules is enough. The truth is, the rules surrounding basement bedroom egress windows are more complex than most realize—mainly because of misconceptions that these windows are trivial or can be a quick fix.
Early in my project, I made the mistake of assuming that as long as I had an egress window installed, I’d be compliant. That’s a trap many fall into. The code requirements aren’t just about adding a window; they encompass size, accessibility, and safety standards that are often more detailed than a typical DIY might expect. For instance, the International Residential Code (IRC) states that each sleeping room must have an egress window with an opening of at least 5.7 square feet, and the window sill height must not exceed 44 inches from the floor. Missing these specifics can cause immediate permit setbacks.
One thing I wish I’d known from the start is how easy it is to neglect these details and end up with costly delays. I learned this the hard way, and I want to share my experience so you don’t make the same mistake. Wouldn’t it be better if we could understand exactly what inspectors look for and how to avoid having your project halted on technicalities? That’s precisely what I’m here to help you with.
Another eye-opener is how much these rules can differ from place to place. What’s acceptable in one jurisdiction might be a red flag in another. According to a recent survey by the National Association of Home Builders, over 60% of permit delays are caused by misunderstandings of local building codes, often due to incomplete information or assumptions about code uniformity. It’s a sobering statistic that underscores the importance of thorough research.
So, if you’re feeling overwhelmed or just unsure whether your plan will pass inspection, you’re not alone. I’ve been there. Next, let’s dive into the common mistakes folks make when planning their egress window installation—and how you can dodge them. For a comprehensive understanding of permits and requirements, I recommend checking out [this detailed guide](https://constructionedgez.com/permits-for-new-builds-essential-tips-for-your-project).
Start with Precise Measurements and Local Code Research
When I undertook my basement egress window project, I began by realizing that hands-on measurements were just the first step. I used a sturdy tape measure to determine the current window opening sizes and checked my local building codes on the permit requirements guide. This dual approach prevented surprises later in the process, saving me from costly rework. To execute this step, set your tape to measure window openings and review your jurisdiction’s specific code requirements—like minimum opening sizes and sill heights—since they vary across regions.
Design Your Window to Meet and Exceed Code Standards
Based on my measurements, I sketched a new window design that slightly exceeded the minimum size requirements—adding extra safety margin. For example, if the code stipulates a 5.7 sq ft opening, I targeted a 6 sq ft opening. I also considered ease of operation and accessibility, ensuring the window could be opened with minimal effort. Use the cost-effective estimating techniques to project the investment needed for these enhancements, and consult with local suppliers to select compliant window units. Remember, focusing on slightly larger, easier-to-operate windows can prevent future code issues and improve safety.
Choose the Right Materials and Hardware for Compliance
During my project, I opted for a window with a robust latch system and reinforced frame, ensuring it met egress and safety standards. I avoided cheaper models that looked similar but lacked the necessary hardware or structural integrity. Verify that your window hardware—handles, locks, hinges—are rated for emergency egress and are easy to operate from the inside without tools. For detailed specs, review manufacturer datasheets and cross-check them against your local code’s hardware requirements. This dedication to quality hardware avoids violations during inspection and ensures occupant safety.
Install with Precision According to Best Practices
My installation process involved framing the window opening accurately, maintaining the correct sill height, and using waterproof barriers to prevent mold. I trusted a step-by-step process outlined in home addition construction guides. As I worked, I kept measuring every step of the framing and sealing, knowing that even a slight misalignment could trigger inspection failures. The use of a level and clear marking on the wall helped maintain proper positioning. When sealing, ensure you use approved flashing materials and sealant to prevent leaks that can cause future structural issues.

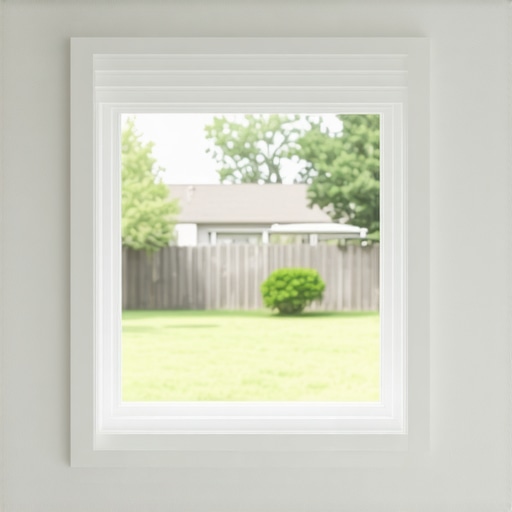
Image showing proper egress window positioning, with dimensions marked for compliance
Prepare for Inspection and Final Adjustments
Before scheduling my inspection, I inspected my work against local code checklists. I tested the window for ease of opening and closing, ensuring it fully opened without obstruction. I also verified sill height and opening size. If anything was off, I made quick adjustments—like sanding the window frame or tweaking hardware—so I could demonstrate compliance. This proactive step is critical; it reduces the risk of re-inspections and delays. Keep documentation of your measurements, hardware specs, and photos to show that you followed all standards meticulously, aligning with tips from permit approval tips.
By adhering to these concrete actions—meticulous measurements, design enhancements, quality hardware, precise installation, and inspection prep—you set a strong foundation for your project’s approval. This methodical approach can turn a daunting compliance requirement into a manageable process, preventing costly delays and ensuring safety for your home’s inhabitants.
Many homeowners and even seasoned builders fall into common misconceptions when it comes to new build permits, estimating costs, or planning additions. Let’s dig deeper into these pitfalls and reveal the hidden nuances that can make or break your project.
What do most people get wrong about the scope of permits and budgets? and why does it lead to costly surprises? Some believe permits are just a formality, but in reality, they encompass detailed requirements that, if overlooked, can halt construction for months. Relying solely on initial estimates without understanding regulatory complexities often results in underbudgeting. A study by the Urban Land Institute highlights that 65% of project delays trace back to permit miscalculations or misunderstandings, emphasizing the importance of thorough planning and realistic budgeting.How can advanced planning prevent common mistakes in new builds and additions? Going beyond basic permit checks and estimates involves understanding project-specific nuances like soil conditions, architectural intricacies, and local code debates. For instance, overlooking how soil type affects foundation choices or ignoring recent zoning amendments can lead to costly redesigns. Expert resources, such as the detailed guides on [permitting](https://constructionedgez.com/the-complete-guide-to-permitting-for-new-builds-and-additions) and [estimating](https://constructionedgez.com/estimating-costs-for-new-builds-expert-insights), shed light on these complexities. Make sure your project includes contingency buffers and consult with experienced professionals early in the process to navigate these nuances effectively.Are there hidden traps that even experienced builders miss in the planning process? Absolutely. One overlooked aspect is the impact of neighborhood covenants or deed restrictions, which can silently veto your design choices or impose additional costs. Additionally, the misconception that permits are universally consistent can lead to issues; regulations vary significantly by jurisdiction, requiring tailored approaches. A common trap is underestimating soft costs—fees, inspections, and delays—that can inflate your budget unexpectedly. Don’t forget to review local [permit processes](https://constructionedgez.com/navigating-permit-requirements-for-additions-in-2025) thoroughly, as a single overlooked detail can cause project stalemates. Remember, meticulous planning, detailed understanding of local nuances, and proactive communication will help you avoid these common but costly mistakes. Have you ever fallen into this trap? Let me know in the comments.Maintaining your construction tools and equipment is vital for ensuring long-term success and avoiding costly downtime. Personally, I rely on a combination of high-quality digital measuring tools and durable maintenance software to keep my projects on track. For measuring, I swear by laser distance meters like the Leica DISTO series because they provide quick, highly accurate readings—crucial when verifying dimensions on-site. Pairing this with a robust project management app, such as Buildertrend, helps me track maintenance schedules, warranty info, and parts replacements seamlessly. These tools allow me to schedule routine checks and receive alerts for maintenance, preventing small issues from becoming major failures.
Are there hidden traps that even experienced builders miss in the planning process? Absolutely. One overlooked aspect is the impact of neighborhood covenants or deed restrictions, which can silently veto your design choices or impose additional costs. Additionally, the misconception that permits are universally consistent can lead to issues; regulations vary significantly by jurisdiction, requiring tailored approaches. A common trap is underestimating soft costs—fees, inspections, and delays—that can inflate your budget unexpectedly. Don’t forget to review local [permit processes](https://constructionedgez.com/navigating-permit-requirements-for-additions-in-2025) thoroughly, as a single overlooked detail can cause project stalemates. Remember, meticulous planning, detailed understanding of local nuances, and proactive communication will help you avoid these common but costly mistakes. Have you ever fallen into this trap? Let me know in the comments.Maintaining your construction tools and equipment is vital for ensuring long-term success and avoiding costly downtime. Personally, I rely on a combination of high-quality digital measuring tools and durable maintenance software to keep my projects on track. For measuring, I swear by laser distance meters like the Leica DISTO series because they provide quick, highly accurate readings—crucial when verifying dimensions on-site. Pairing this with a robust project management app, such as Buildertrend, helps me track maintenance schedules, warranty info, and parts replacements seamlessly. These tools allow me to schedule routine checks and receive alerts for maintenance, preventing small issues from becoming major failures.
Looking ahead, I believe the integration of IoT (Internet of Things) sensors into construction equipment will revolutionize maintenance practices. Imagine machines that notify you automatically when a part needs servicing—cutting down on downtime even further.
How do I maintain my tools over time?
Regular maintenance begins with follow-up inspections after each use. For power tools, I clean the motor vents, check for worn belts, and lubricate moving parts as recommended by the manufacturer. Using a detailed maintenance log can help you schedule inspections before problems arise, saving both time and money. Always keep spare parts—like filters, belts, and bits—and replace them proactively. For software, ensure updates are installed regularly to benefit from security patches and feature improvements. Establishing these routines protects your investments and ensures your tools remain reliable throughout your project timeline.
Having reliable equipment also means investing in the right hardware that stands the test of time. I particularly suggest using heavy-duty safety latches on ladders and secure fasteners on scaffolding, as these prevent accidents and ensure compliance with safety standards. For example, hardware that meets ANSI and ASTM standards provides extra peace of mind.
Continuous monitoring and scheduled upkeep are your best allies. I allocate a dedicated weekly time slot for tool checks, which has drastically cut down on unexpected breakdowns. Remember, a well-maintained tool keeps your project moving and reduces the risk of delays. For more detailed strategies on managing your equipment, check out [this comprehensive guide](https://constructionedgez.com/efficiently-managing-additions-from-planning-to-execution).
To get started, pick one of your most-used tools and implement a simple maintenance routine today—like cleaning or lubricant application. Your future self will thank you when that tool works flawlessly when you need it most.
Lessons Only Experience Can Teach
One of the hardest truths I learned was how easily overlooked details—like the exact window sill height or proper hardware—can delay or derail your entire project. I once believed that simply installing a window was enough; only later did I realize that compliance hinges on subtle specifications, which, if missed, lead to costly rework. Another insight was how local variations in regulations can turn a straightforward task into a maze, making thorough research before starting essential. This journey taught me that patience, attention to detail, and ongoing education are your best tools in navigating permits and code requirements, ultimately saving you time and money.
Additionally, I discovered that engaging early with a knowledgeable inspector or building official provides invaluable clarity. Their insights can highlight potential pitfalls specific to your jurisdiction, helping you adapt your plans proactively. Also, exceeding minimum code standards—for instance, opting for slightly larger windows—can future-proof your project, avoiding inspections failures down the line. And finally, maintaining meticulous records of measurements, hardware specs, and communications creates a safety net when questions arise during inspection.
Tools and Resources That Keep My Projects on Track
For precise measurements, I rely on laser distance meters like the Leica DISTO series—quick, accurate, and indispensable when verifying existing openings. When planning estimates, cost-effective estimating techniques have been game-changers, ensuring I budget appropriately and avoid surprises. The permitting guide from Construction Edgez offers comprehensive, jurisdiction-specific advice that demystified the approval process. Lastly, home addition construction guides provide step-by-step procedures for proper installation and compliance, giving me confidence throughout each stage.
Fuel Your Confidence and Take That First Step
Embarking on a new build, permit, estimating, or addition project can seem daunting, but the key is to start with a solid foundation of knowledge and tools. Remember, each small step—careful measurements, thorough research, and quality materials—builds toward a successful outcome. Trust in your ability to adapt, learn, and improve as you go. The future of your home improvement journey is within reach, and taking action today sets you apart from the pitfalls of assumptions and ignorance. So, gear up, plan meticulously, and embrace the challenge—your upgraded space awaits!