The Grading Plan Mistake That Causes Basement Seepage
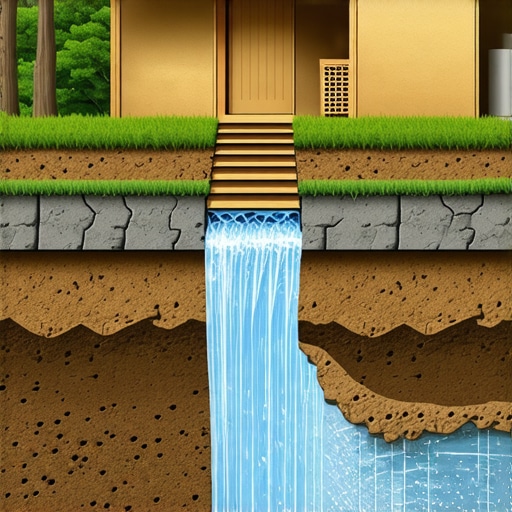
It was a chilly spring evening when I finally stood in my basement, water pooling along the foundation walls. Despite months of planning and hiring what I thought was a reputable contractor, I found myself facing a soggy nightmare. The real culprit? A simple, overlooked mistake on the grading plan that I wish I had caught earlier. That rush to cut costs and speed up the project led me to ignore some critical details about how the land slopes away from the foundation. Now, every heavy rain makes me dread potential flooding, and I can’t help but wonder—could this have been avoided?
Getting Real About Grading and Foundation Safety
Every homeowner dreams of a smooth build, but without proper attention to land grading, your basement could be sitting on a ticking water bomb. The grading plan determines how water flows away from your home. A slight misstep here can turn heavy rains into flooding, mold, and even structural damage. Early on, I learned that the mistake many make is assuming that planning the layout is enough, but the devil is in the details. Proper grading isn’t just about aesthetics; it’s crucial for long-term basement health.
Is Overlooking the Land Slope Actually Worrying Enough?
When I first reviewed my project’s grading plan, I thought I had a good handle on how water would run off the property. But I missed the subtleties—a gentle slope that seemed adequate at first glance wasn’t enough to direct water away during heavy storms. I wish I had paid more attention to the specifics rather than relying solely on general guidelines. According to the Building Science Corporation, even a 2% slope away from the foundation can significantly reduce water infiltration (source: https://constructionedgez.com/the-grading-mistake-that-leads-to-basement-flooding). Making sure the slope is appropriate isn’t just a minor detail; it’s the cornerstone of dry basements.
So, today, I’m here to share how understanding and correctly implementing your grading plan can save your basement—and your sanity. Let’s explore what I wish I knew and how you can avoid this common mistake. Have you faced water issues after your build? If so, keep reading. We’re about to turn this around.
Start with Precise Topographical Surveys
Before pouring the first foundation, hire a licensed surveyor to create an accurate topographical map of your property. I remember the moment I received my survey results; it revealed subtle undulations that the eye missed, which could divert water toward my basement wall. Having this data is like having a blueprint for optimal land shaping—crucial for effective grading.
Design a Sloped Grading Plan
Create a grading plan that slopes away from your foundation at a minimum of 2%, equivalent to 2 inches of drop per 10 feet. I worked with a civil engineer who emphasized this slope to ensure proper drainage. Using a level and a measuring tape, I marked out the slope during initial land preparation, making adjustments based on the plan. Remember, a consistent slope prevents water pooling against your foundation.
Analogous Technique for Better Understanding
Think of your yard as a bathtub drain; the water must flow smoothly away. If the bottom isn’t sloped correctly, water stagnates and leaks in—just like a basin overflowing. Developing this mental model helped me visualize the importance of precise grading and avoid shortcuts.
Implement Proper Soil and Fill Material
Use well-draining fill soils and avoid compacted clay near the foundation. I initially used subpar fill, which led to water ‘wicking’ toward my basement. After replacement with proper gravel and sandy soils, surface water runoff improved significantly, reducing pressure on my basement walls.
Ensure Proper Installation of Drainage Systems
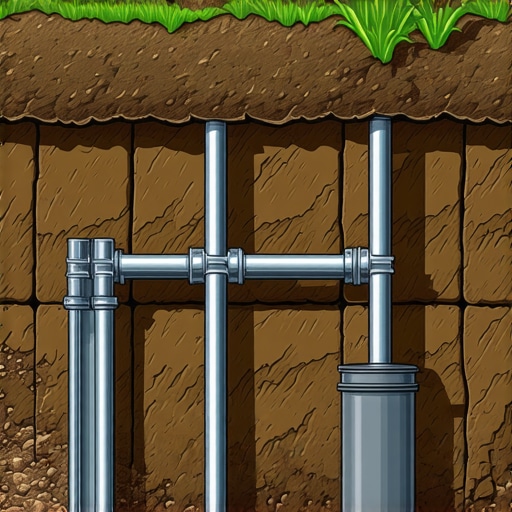
Install an effective drainage pipe system (perforated pipe with gravel), or French drain, along the foundation perimeter. I had a local contractor set it up; however, I oversaw the placement to ensure it didn’t sit too deep—water should flow freely. Regular maintenance, like flushing debris, kept this system working optimally, safeguarding my basement from unexpected floods.
Verify and Adjust During Construction
Use a transit level or laser level during land grading to confirm slopes continuously. I learned this tip after my first inspection; by double-checking, I caught a slight flat spot that could have become a flood trap. Incorporating these tools into your process guarantees your plan translates accurately from paper to ground.
Get Permits and Consult Professionals
Always secure the necessary permits before grading work. Some regions require inspections to verify compliance. I found that working with certified engineers and getting inspections aligned with local regulations (see permit requirements) not only prevented fines but also clarified important technical aspects I overlooked.
Applying these steps transformed my approach from guesswork to a science. Proper grading isn’t a single task but an ongoing process of measurement, adjustment, and verification—key to keeping your basement dry and structurally sound.
While many homeowners focus on the big-picture aspects of renovations, the nuanced details often trip them up, leading to costly delays or structural issues. One prevalent misconception is that permits and estimates are straightforward processes, but in reality, they involve complex nuances that can catch even experienced builders off guard. For instance, a common myth is that mere approval of a permit guarantees your project is comprehensive; however, many permits expire or are issued based on incomplete plans, requiring diligent follow-up to avoid fines or rework.
What Advanced Mistakes Do Even Seasoned Homeowners Overlook?
One subtle trap is underestimating the importance of detailed scope definitions in estimates. Contractors might present a seemingly comprehensive bid, but without scrutinizing the scope, hidden costs can surface later—such as additional labor hours for overlooked complications, or underestimated material costs due to outdated pricing data. An insightful study by the National Association of Home Builders highlights that up to 30% of project overruns are directly linked to scope miscalculations and poor estimating practices (source: https://constructionedgez.com/how-to-accurately-estimate-costs-for-home-improvements).
Similarly, in the permitting phase, many homeowners misjudge the significance of site-specific codes, especially for additions that impact setbacks, easements, or shared property lines. A minor oversight here can trigger costly permit revisions or even project halts.
Another nuance is the assumption that all permits are linked to a single application. In complex projects, multiple permits—building, electrical, plumbing—are often needed. Missing any one of these due to a lack of planning can lead to code violations, fines, or delays. For example, failing to secure a separate electrical permit for new wiring can cause inspection failures and necessitate rework.
**Don’t be blindsided by these hidden nuances**—a proactive approach is essential. This means conducting meticulous reviews of scope with your contractor, verifying codes with local authorities, and ensuring estimates incorporate contingency allowances. For precise strategies, check out our resource on new build estimation strategies and consult with professionals experienced in navigating local permitting intricacies.
Have you ever fallen into this trap? Let me know in the comments. Being aware of these nuanced pitfalls can save your project from avoidable setbacks and hidden expenses.Maintaining your construction projects over the long term requires the right combination of tools, technology, and reliable methods. As someone who has navigated numerous builds and renovations, I can attest that the right equipment not only streamlines workflow but also ensures durability and compliance, saving you time and money in the long run. In this post, I’ll share the specific tools I rely on daily and how they contribute to sustained project success.
Precision Laser Levels for Accurate Alignment
One of my non-negotiables is the use of a high-quality rotary laser level. I personally prefer the Spectra Precision HL700 because of its robustness and clarity over long distances, especially when verifying land grading or ceiling height consistency during framing. This tool provides horizontal and vertical lines that are visible even in bright outdoor conditions, eliminating guesswork. Regular calibration ensures ongoing accuracy, which is critical for maintaining structural integrity over time.
Reliable Estimation Software to Keep Budgets on Track
Estimating costs accurately is a pillar of lasting project management. I recommend Buildertrend because of its integration capabilities—linking budgets directly with scheduling and purchase orders. Personal experience shows that using such software helps prevent scope creep and unforeseen expenses. Moreover, it archives project data, making it easy to review and refine estimates for future builds. Staying diligent with estimates is essential, as highlighted by the expert tips on estimation.
Moisture Meter for Long-Term Property Health
Moisture intrusion can undermine a build’s integrity long after completion. I utilize the
Digital Permit Management for Smooth Compliance
Managing permits can be overwhelming, but tools like Viewpoint or digital permit tracking systems simplify the process. They provide real-time updates on permit statuses, inspection scheduling, and document management. Efficient permit tracking reduces delays caused by missed deadlines or incomplete paperwork, which can be costly and frustrating.
Maintenance Tips: Keep Tools and Systems Running
Proper maintenance extends the lifespan of these tools. Regular calibration of lasers, software updates, and proper storage prevent early wear and errors. For example, I’ve found that scheduling quarterly calibration checks for my laser level keeps measurement precision sharp, especially before critical land grading tasks. Likewise, backing up estimation data and software configurations avoids data loss that can set a project back.
Looking Ahead: The Future of Construction Tools
Technological advancements like drone surveys and AI-driven estimation are poised to revolutionize project management. These innovations promise faster accuracy and predictive maintenance capabilities, reducing risks and costs over the long haul. Staying updated with new tools and integrating them into your workflow is crucial for maintaining a competitive edge.
How do I keep my construction tools and systems in top shape over time?
Developing a routine maintenance schedule is key. For example, setting quarterly calibration checks for precision tools, regularly updating software, and inspecting equipment after each use ensures everything functions correctly. This proactive approach minimizes downtime and unexpected failures, helping you sustain high-quality results in your projects. For more on effective project tracking, consider exploring estimating strategies that integrate seamlessly with maintenance routines. Starting with one advanced tip—like implementing a digital permit management system—can significantly elevate your project performance.
What I Wish I Had Known About Proper Grading Early On
One of the most impactful lessons was realizing that a simple overlook in the slope of the land can lead to flooding nightmares. I learned that even minor gradients, if not calculated precisely, can funnel water right against your foundation. Understanding that good grading is an ongoing process—not just a one-time task—saved me from future headaches. It’s essential to view grading as an active element of your construction, requiring vigilant measurement and adjustments throughout the build.
Resources That Elevated My Approach to Land Safety
My go-to tools include a high-quality rotary laser level, like the Spectra Precision HL700, which provides unparalleled accuracy during land surveys. I also rely on detailed topographical surveys from licensed professionals, which reveal subtle land features that could undermine your drainage plan. For educating myself further, this resource on estimation strategies offers invaluable insights into aligning project plans with real-world ground conditions. Combining these tools ensures that your grading foundation is as sound as possible.
Embracing the Journey Toward Better Land Management
Taking ownership of the grading process can seem daunting at first, but the payoff is enormous: a dry basement, structural stability, and peace of mind. Remember, mastering land grading isn’t about perfection but about precision and ongoing vigilance. As I reflect on my experience, I realize that prioritizing proper drainage planning early on truly transforms your project, saving you from costly revisions later. If you’re just starting, seize the opportunity to learn and adapt—your future self will thank you. What steps are you taking today to ensure your land slopes correctly for a secure, dry basement? Share your approach below and let’s grow together.