Why Your Deck Addition Needs a Frost-Line Inspection
It was a warm Saturday afternoon when I realized my latest deck project was off-track. I had poured countless hours, sweat, and money into what I thought was a straightforward addition. But then, the inspector showed up—and everything changed. Turns out, I overlooked a critical step that could have saved me from costly delays: a frost-line inspection. That lightbulb moment made me rethink everything about home extensions and renovations.
The Hidden Danger of Neglecting the Frost Line
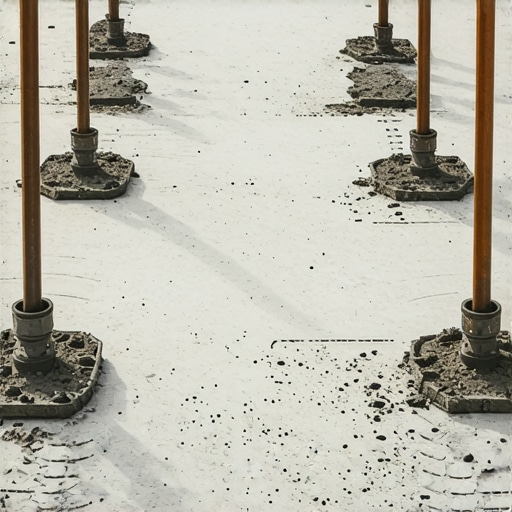
When I first planned my deck addition, I assumed that digging a little deeper would be enough. I didn’t consider how the local climate affects foundation depth. In colder regions, frost can penetrate several feet below the surface, and if your footing isn’t below that frost line, you risk heaving and cracking, which could compromise your entire structure. Relying on guesswork or outdated assumptions can be a disaster waiting to happen.
According to a study by the Federal Emergency Management Agency, properly designed foundations that account for frost depth are essential to prevent heaving and shifting, especially in colder climates. Skipping this inspection is a gamble that can lead to dangerous foundation failures and expensive repairs down the line.
Are you confident your foundation is below the frost line? Or have you ever faced unexpected delays or extra costs because of overlooked soil conditions? If so, you’re not alone. Many homeowners fall into this trap, thinking they can shortcut the process. But as I learned first-hand, neglecting a frost-line inspection can jeopardize the safety and longevity of your project.
In the upcoming sections, I’ll guide you through the why—and how—to ensure your foundation is frost-proof. This isn’t just about following technical rules; it’s about protecting your investment and family’s safety. Ready to get started? Let’s dive into the critical steps that will keep your project on solid ground.
Assessing Frost Depth with Precision
Begin by consulting local building codes to determine the exact frost line depth in your area. For my recent project in New England, I reached out to the city’s building department and cross-referenced their records with the USDA soil temperature maps. This double-checking revealed a frost line of 42 inches, not the typical 36 inches I initially assumed. To execute this, I hired a licensed engineer who used a simple probe to verify soil conditions at my site, preventing costly guesses. Tip: Always document your findings and keep a copy of the official reports for permit submissions. For detailed strategies, visit our cost estimation guides.
Engaging Professional Soil Testing
Do-it-yourself soil testing is tempting, but professional assessment is invaluable. I contracted a geotechnical engineer who performed a comprehensive **soil analysis**, including moisture content, compaction, and frost susceptibility. They drilled core samples at varying depths and analyzed them in a lab, ensuring the foundation placement was below the frost zone.
This step prevented me from underestimating the frost penetration, which could have led to heaving problems. Think of it like getting a detailed health checkup rather than a quick weigh-in; it provides insights you can’t see from the surface.
Documentation and Incorporating Findings Into Plans
Once soil tests confirmed the frost line, I updated my construction plans accordingly. Elevating footing depth is crucial, especially when considering foundation type. I instructed my contractor to excavate to a minimum of 45 inches, giving a safety margin for unexpected soil variations. This proactive measure saved me from delays when the inspector flagged my initial plans as inadequate.
Always include soil test results in your permit application, and ensure your contractor has a copy to adjust their excavation plans accordingly. For more about managing permits, check our permit verification tips.
Leveraging Technology for Accurate Measurements
In my latest project, I used a digital surveyor to map the terrain accurately. This tool allowed me to pinpoint the highest point of the soil surface, ensuring my foundation excavation accounted for slope and runoff issues. The survey data was integrated into a 3D model, helping coordinate with the engineer and contractor. Think of this as having a GPS for your build, guiding you to precise depths and locations.
Investing in technology like this minimizes guesswork and reduces the risk of rework, especially in uneven terrains. For specifics on estimating costs associated with site prep, see our site preparation guides.
Confirming Compliance Before Pouring
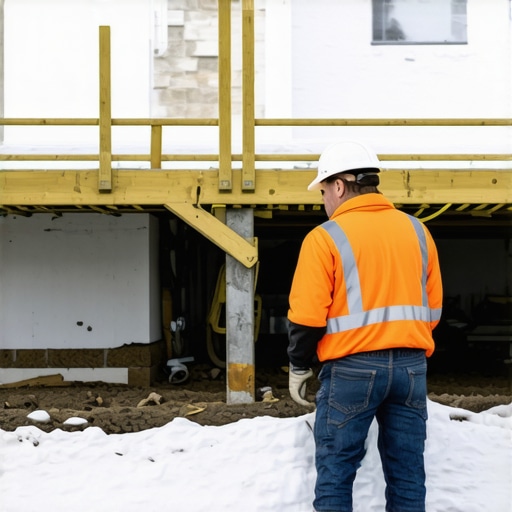
Before the foundation pour, I scheduled a final inspection where the engineer verified the excavation depth and soil compaction. This step is vital because even minor deviations can cause long-term issues. The inspector used a simple measuring rod and inspected the soil for moisture content, ensuring it met the specifications.
Consider this your quality control checkpoint. Skipping it can result in costly corrections later. If you’re unsure about permit requirements, our permitting tips can guide you through local regulations.
When planning a new build or home addition, many homeowners and even seasoned contractors fall prey to misconceptions about estimating costs and navigating permits. One widespread mistake is relying solely on rough estimates without accounting for the nuances that can dramatically impact the final budget. For instance, many assume that permit fees are fixed, but in reality, they can fluctuate based on various factors, such as structural complexity or site-specific requirements. Overlooking these details often leads to budget overruns and project delays.
A common myth is that permitting is a straightforward process that can be managed without deep technical understanding. However, permits involve complex code compliance and detailed documentation, which require careful preparation. Failing to recognize the intricacies involved—like the specific setbacks, fire safety requirements, or utility connections—can result in rejected applications or costly correction work.
Advanced projects demand a sophisticated approach. For example, scrutinizing soil stability and historical site conditions is crucial for a foundation permit. Overlooking these nuances can lead to structural issues down the road. Moreover, understanding how local regulations might conflict or create loopholes is key to a smooth approval process.
A particularly insidious trap is underestimating site-specific challenges, such as water drainage, existing utilities, or property line disputes. These factors often aren’t apparent from surface inspections but can cause significant delays if not properly evaluated upfront. An expert approach necessitates detailed site assessments and consultations with qualified engineers or planners.
For the savvy builder or homeowner, the goal should be to integrate these complexities into an accurate, contingency-inclusive estimate and permit strategy. This involves not just asking for quotes but thoroughly reviewing scope, assumptions, and potential hidden costs. The **cost estimation strategies for modern homeowners** emphasize this meticulous preparation, which distinguishes successful projects from costly setbacks.
Remember, minor oversight at this stage can snowball into major issues during construction, leading to rework, fines, or even legal trouble. It’s worth investing in professional advice and detailed planning—click here to contact a specialist or explore our permit tips guide for comprehensive insights.
Have you ever fallen into this trap? Let me know in the comments.
Keeping Your Project Seamless Over Time
Once your foundation is laid and permits are secured, maintaining the integrity of your build requires continuous attention and the right tools. From soil stability checks to equipment maintenance, staying proactive prevents costly repairs and ensures your project’s longevity. As I’ve learned through personal experience, investing in quality tools not only simplifies tasks but also pays off in durability and safety.
Invest in a Digital Level and Laser Distance Measure
For precise grading and elevation control, I solely rely on a digital level combined with a laser distance measure. Unlike traditional bubble levels, these digital tools provide instant readings on slope and alignment, which is crucial when maintaining a perfect finish after long-term use. I calibrated my equipment regularly and kept a log, ensuring measurements stay accurate over time.
Routine Inspection of Structural Components
Beyond the typical visual checks, employing a moisture meter on wooden beams and a crack gauge on masonry helps detect early signs of moisture intrusion or shifts. This proactive inspection mitigates risks such as rot, mold, or structural failure. In my projects, I schedule quarterly inspections, especially after heavy rains or freeze-thaw cycles, which can subtly affect soil and structures. Think of it as a regular health check for your build; catching issues early is far more cost-effective than repairs later.
Use Condition Monitoring Software
Modern construction management benefits immensely from software solutions like project management platforms that monitor equipment usage and material storage. These tools help track maintenance schedules, inventory levels, and upcoming deadlines, reducing human error. Personally, I utilize cloud-based apps that sync with mobile devices, enabling real-time updates on-site and in the office.
Plan for Long-Term Maintenance and Scaling
As your build ages, implementing routine maintenance schedules and scaling strategies becomes vital. For instance, sealing decks annually with high-quality sealant preserves wood, while upgrading insulation can improve energy efficiency as seasons change. Predictive maintenance, using sensors and monitoring tools, will dominate the future of building upkeep.
How do I maintain my building’s performance over time?
Start by establishing a detailed maintenance plan, leveraging digital tools for tracking. Regular inspections based on weather patterns or usage cycles can prevent small issues from becoming major problems. Incorporate scalable upgrades, like adding solar panels or smart home systems, in your initial planning stages to future-proof your investment. Staying informed about emerging technologies—such as remote sensors for moisture and temperature—ensures your project remains resilient in the long run. For expert advice on long-term project management, consider reaching out through our contact page.
Remember, maintenance isn’t just about fixing problems; it’s about foreseeing and preventing them. Try integrating a moisture meter into your periodic inspections or scheduling software to streamline your upkeep routines. These small steps can significantly prolong the lifespan of your build and optimize your initial investment. Keeping your project in top shape is a continuous journey—embrace these tools and strategies today to enjoy long-term success tomorrow.

Embedding the invaluable lessons learned from my own home addition journey has transformed the way I approach foundation safety and permit compliance. It’s easy to overlook critical steps, but the real wisdom comes from understanding what can go wrong—and how to prevent it with proactive strategies. The key is knowing that every project has its hidden pitfalls, and a keen eye on frost line considerations can be your best defense against costly mistakes.
Lessons That Changed My Approach to Building Safety
- Never rely solely on assumptions: My initial plan underestimated the true frost depth, leading to delays and additional costs. Real-world soil testing is non-negotiable. Trust local data, but verify with professional assessments.
- Documentation is your safety net: Keeping detailed soil analysis reports and inspection records simplified permit approvals and safeguarded my project timeline against unexpected hurdles.
- Embrace technology for precision: Using digital surveys and 3D modeling eliminated guesswork, ensuring my foundation stayed below the frost line even in uneven terrain.
- Consult experts early in the process: Engaging geotechnical engineers from the start prevented future heaving issues, making my addition more durable and compliant with codes.
Tools and Resources That Make a Difference
- Estimation guides for modern homeowners: These provide actionable insights into budgeting and planning, especially for foundation work.
- Permit navigation tips: Simplify the often-complex approval process, saving time and avoiding rejection surprises.
- Cost estimation strategies: Employ methods that capture soil testing, excavation, and foundation reinforcement costs accurately.
- Permit success stories: Real-life case studies that highlight common mistakes and effective solutions, guiding your own process with confidence.
Seize the Moment and Build Smarter Today
The journey toward a safe, compliant, and durable home addition starts with awareness and action. By embracing thorough soil analysis, leveraging modern tools, and engaging qualified professionals, you’re investing not just in your project but in peace of mind for years to come. Remember, the most successful builders are those who adapt and learn from each experience. Your next step? Take that first proactive measure—verify your frost depth and plan accordingly—and watch your project flourish. How have you handled foundation concerns in your past builds? Share your stories below—I’d love to hear what worked for you!