The Fire Egress Rule That Most Basement Remodels Fail
I vividly remember the day I realized my basement renovation was doomed from the start. We had poured months into planning, permits were approved, and I was eager to finally see my dream space come alive. But during the final inspection, the inspector raised a simple yet devastating point: my egress window didn’t meet the fire safety code. The frustration hit hard—after all the effort, my project was halted, and costly reworks loomed.
Navigating the Basement Egress Challenge
Every homeowner or remodeler who dives into basement renovations faces this crucial safety requirement: the fire egress rule. It’s a vital safety feature designed to give occupants a way out during emergencies, especially in bedrooms or living areas below ground level. Yet, strangely enough, it’s also one of the most overlooked standards in basement remodels. Many projects stumble because they assume that a quick window cutout will suffice or that existing openings are ‘close enough.’ I’ve seen countless plans falter on this very point, leading to delays, increased costs, and the need for last-minute redesigns.
The goal today is to shed light on this often-missed rule and help you avoid the same pitfalls I—and so many others—have faced. We’ll explore what makes a compliant egress window, how to plan for it from the outset, and where to find expert tips to streamline your permit process.
Is the Fire Egress Rule Overhyped or Critical? This Was My Wake-Up Call
Back when I first started my basement project, I underestimated the importance of proper egress planning. I thought I had enough window space, and honestly, I was impatient to complete the work quickly. Early on, I made the mistake of not consulting detailed codes or speaking with knowledgeable professionals. That oversimplification cost me dearly at inspection time. I learned the hard way that building codes are not just bureaucratic hurdles—they’re safety nets. According to the National Fire Protection Association, proper emergency exits can significantly reduce fatalities during fires or other emergencies, underscoring their importance.
If you’re considering a basement remodel or addition, I urge you to ask yourself: Have I properly accounted for fire safety regulations, especially egress requirements? Do I know what the code mandates for window size, height, and accessibility? If any doubts creep in, it’s worth investing time upfront—because last-minute fixes are costly and frustrating.
To get ahead, I recommend reviewing the detailed standards and practical tips on permit approvals. For instance, understanding how to correctly size your egress windows can save you from costly rework. You might also want to explore our guide on [permitting tips for seamless home additions](https://constructionedgez.com/permit-approval-tips-for-seamless-home-additions), which covers critical safety features in detail.
Now, with the basics understood, it’s time to dig into how you can ensure your project meets all fire safety standards without surprises at inspection.
Measure Twice, Cut Once: Accurate Window Sizing
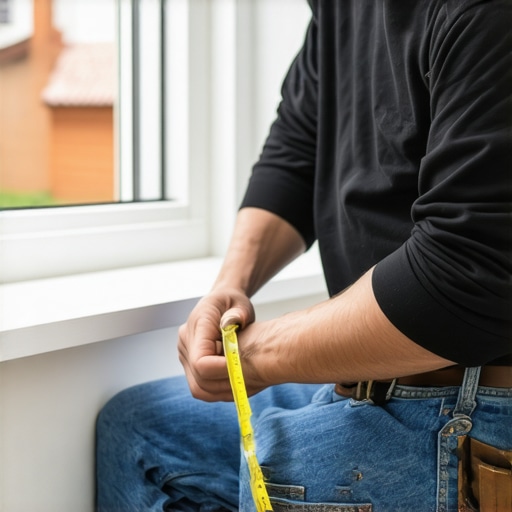
My first attempt at installing an egress window ended with a costly redo. I didn’t double-check the code’s specific size requirements—only relied on my rough estimate. To avoid repeating this mistake, get the precise dimensions mandated by local building codes. Typically, egress windows need a minimum opening of 5.7 square feet, with a minimum height of 24 inches and width of 20 inches. Use a tape measure and cross-reference with your jurisdiction’s standards to mark the opening accurately, ensuring it meets fire safety standards from the outset. For detailed guidance, review estimating costs for new builds, which covers window sizing essentials.
Plan the Frame and Sill Placement Carefully
Once you have the right measurements, start planning the frame placement so the window is accessible without stairs or obstructions. The sill height from finished floor usually shouldn’t exceed 44 inches, making escape easier during emergencies. I once misjudged the sill height, which led to a lengthy permit review. By precisely mapping the window’s position on paper and marking it on the wall before cutting, you ensure it aligns with code requirements and accessibility. Remember, minor misalignments can cause extensive delays. Consult how to accurately estimate costs for home improvements to integrate these steps smoothly into your planning process.
Ensure Easy Operation for Emergency Escape
The window shouldn’t just meet size requirements but also be operable without tools. Test the opening mechanism early—if it’s stiff or jammed, it might fail inspection. I learned this the hard way when my initially installed window couldn’t open fully because I overlooked the hardware accessibility. A simple test with a broom handle or similar object during installation can reveal issues beforehand. Additionally, use the clear opening to plan for unobstructed egress path and avoid placing heavy furniture or fixed fixtures in front of the window. For more on efficient planning, see permits for new builds.
Coordinate with Professionals Early
Engaging a licensed contractor or code consultant early in the process can save headaches. They will verify your measurements, window specifications, and adherence to safety standards. I faced a reject during final inspection because I later discovered my framing didn’t meet the required clearances. A quick consultation with an expert could have prevented that. Establish communication with professionals familiar with local regulations by visiting our contact page. Their insights can help you avoid common pitfalls, streamline the permit process, and ensure your project passes inspection without surprises.
Document and Photograph Your Work
Finally, maintain detailed records of your planning stages, measurements, and installation photos. These can serve as evidence during inspections, demonstrating compliance with code requirements. During my project, a well-documented preparation made it easier to address inspector questions and expedite approval. Use a digital camera or smartphone to record before and after shots, and keep a written log of measurements and adjustments. This proactive approach can prevent delays and additional inspections. For comprehensive permit strategies, consider reviewing navigating permit requirements for additions.
 When it comes to estimating projects for new builds or home additions, many homeowners and even seasoned contractors fall prey to misconceptions that can significantly impact the outcome. One widespread myth is that historical cost data from past projects serves as a perfect blueprint for future estimates. While previous figures offer a starting point, they often overlook current market fluctuations, inflation, and regional price variations, leading to underestimations or overestimations. Relying solely on outdated data can cause budget shortfalls or inflated bids that scare off clients. For accurate planning, it’s essential to incorporate up-to-date, localized data, which you can find by exploring estimating strategies for home additions in 2025.
Many assume that permitting costs are straightforward and predictable, but this couldn’t be further from the truth. A common mistake is underestimating the time and complexity involved in the permit approval process. Some professionals think rushing the paperwork or submitting minimal documentation will expedite approval, but in reality, comprehensive and precise applications are more likely to glide through inspections. Being proactive by reviewing permit approval tips for seamless home additions can help you identify potential hurdles early and build realistic timeframes into your budget.
Advanced estimators understand the importance of understanding the permitting labyrinth, including regional variances and evolving code requirements. For example, recent changes in environmental or zoning laws can introduce unanticipated costs or delays. Failing to review these nuances might lead to project standstills—something no one wants.
**What about the trap of underestimating site conditions?** Many overlook critical factors like soil stability, site accessibility, or existing infrastructure, which directly influence foundation and utility costs. This oversight often results in substantial unexpected expenses. Conducting thorough site assessments or consulting with specialists during the estimate stage is vital. For comprehensive guidance, see understanding permit processes for successful home additions.
Another widespread misconception is that contractor quotes are all-encompassing. In truth, many estimates exclude hidden costs such as debris removal, contingency funds, or miscellaneous permits. These unseen charges can inflate your total budget by 10-20% if not accounted for upfront. To avoid surprises, review detailed estimates and ask your contractor to itemize costs, referencing the principle of transparent pricing.
Finally, let’s address the common ‘set-and-forget’ mentality—many assume that once an estimate is agreed upon, the project will proceed smoothly without further adjustments. However, project scope, market conditions, or unforeseen site issues can necessitate revisions. Regularly updating your estimates with real-time data and maintaining open communication with your team will help keep your project within budget.
*Have you ever fallen into this trap?* Let me know in the comments how you managed or avoided these estimating pitfalls. Remember, a meticulous approach and understanding the hidden nuances can save you time, money, and headaches down the line.Maintaining your home renovation systems over time is crucial to ensure longevity, safety, and continued performance. From specialized software to durable hardware, I rely on precise tools and strategic methods that have proven effective through my years of hands-on experience.
One tool I consistently recommend is a digital moisture meter. These devices allow me to monitor humidity levels in framing and insulation areas, helping prevent mold growth and structural damage before it becomes costly. Personally, I use the Extech MO297, which offers accurate readings and data logging, enabling proactive maintenance rather than reactive repairs.
For project management, I swear by construction-specific software like Buildertrend or CoConstruct. These platforms streamline communication, schedule tracking, and document management. I’ve found that maintaining organized digital records reduces errors, keeps permits moving smoothly, and simplifies long-term project oversight.
Another essential tool is a high-quality laser level. Accurate alignment is vital, especially when dealing with load-bearing walls or complex framing. My preferred model is the Bosch GSL2 Professional, valued for its durability and precision. Using it consistently has helped me avoid costly misalignments that could compromise safety or incur rework.
In terms of standard maintenance practices, I prioritize establishing routine inspections—at least quarterly during active renovations. Checking hardware integrity, sealing, and insulation performance ensures systems function optimally for years. Regularly updating software and firmware of digital tools also protects against cybersecurity threats and bugs.
Looking ahead, the integration of IoT (Internet of Things) sensors offers exciting possibilities. Smart moisture, temperature, and structural integrity sensors can provide continuous data streams, alerting homeowners and contractors to issues before they escalate. While the technology is still evolving, early adopters will gain significant peace of mind and cost savings.
**How do I maintain my renovation tools and systems over time?** Simple routines make all the difference. Schedule regular calibration of measurement tools, clean electronic devices after each use, and keep manuals accessible for troubleshooting. Developing a maintenance checklist tailored to your specific tools can prevent unexpected failures.
Combining reliable hardware, advanced software, and proactive maintenance not only extends the lifespan of your project systems but also enhances safety and efficiency. For example, I highly recommend trying a digital moisture meter combined with IoT sensors for comprehensive oversight, enabling you to catch potential issues early and save money long-term.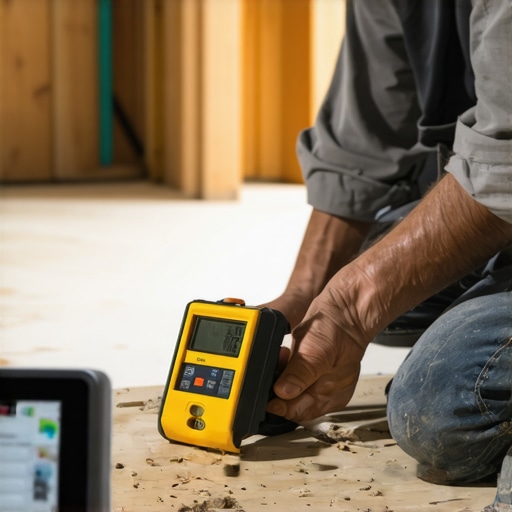
For more insights into advanced project management tools, visit our guide on estimating strategies for home additions. Stay ahead by investing in the right equipment and embracing smart maintenance routines — your future self will thank you.
Why Overconfidence Nearly Cost My Project Everything
One of the toughest lessons I learned was the importance of respecting building codes on every detail. I once assumed that a window size and placement I thought was adequate would pass inspection, only to be surprised by a rejection that halted the project. This taught me to never underestimate the power of thorough code research and professional guidance, especially when it comes to safety features like egress windows. Trusting my instincts over verified standards almost led to costly delays and rework.
What I Realized About the Hidden Details in Permitting
Permits aren’t just bureaucratic hurdles; they are safeguards ensuring safety and adherence to regional standards. My experience revealed that even minor oversights—like misjudging sill height or hardware operability—can derail approvals. Taking the time to understand the permit nuances and working closely with professionals early in the process can dramatically streamline approvals. These steps are investments that protect your timeline and budget from unexpected surprises later on.
The Power of Proper Planning and Double-Checking
Leaving room for errors in measurements or assumptions can be a costly mistake. I learned to measure twice and plan every step with precision, cross-referencing code requirements like the 5.7 sqft minimum opening or the sill height limit. Early testing of hardware and ensuring unobstructed escape paths can save hours during inspections. My advice: commit to detail-oriented planning from the start to avoid last-minute scrambling and rework.
Personal Reflections That Shaped My Approach
Sharing this story isn’t just about avoiding mistakes; it’s about embracing the value of patience, research, and collaboration. Building safety features like egress windows isn’t a place to cut corners. By balancing assertiveness with professional advice, I created a safer, smoother renovation experience. I hope my experience encourages you to prioritize safety standards and trust the process — it’s ultimately worth the effort.
Resources That Helped Me Stay Ahead of the Curve
To navigate permitting and code compliance effectively, I leaned on trusted sources such as permitting tips for seamless home additions. Their step-by-step guidance helped me anticipate requirements and prepare correctly. I also relied on detailed code references and professional consultations to ensure compliance. Tools like accurate measuring devices and project management software also played a critical role in my success.
Take Control and Build Confidence
Every project comes with its unique challenges, but the key is proactive planning and respect for safety standards. Don’t shy away from expert advice or detailed research; these are your best allies. Remember, the extra effort upfront pays dividends of safety, efficiency, and peace of mind. Now it’s your turn—are you ready to dive into your project with newfound confidence and precision? Your home’s safety and your peace of mind depend on it.