The Setback Rule for Accessory Structures That Neighbors Often Dispute
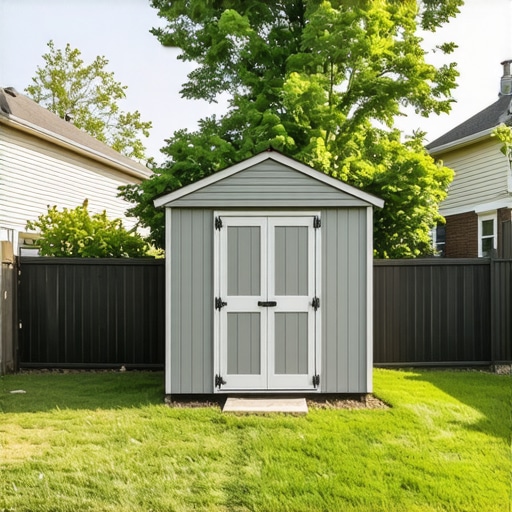
It was a chilly Saturday afternoon when I realized I had overlooked a crucial detail in my backyard expansion plans. I had been so eager to build that new shed that I skipped over the setback rules—those pesky local zoning regulations designed to prevent neighbors from feeling like they’re living on top of each other. The next thing I knew, my project was stalled, and tensions with my neighbor were climbing. That moment was a lightbulb for me: understanding the setback rule isn’t just about avoiding fines; it’s about preserving harmony and confidence in your home improvements.
Why the Setback Rule Can Make or Break Your Home Addition
Every homeowner ventures into the world of permits and regulations sooner or later. But accessory structures—like sheds, garages, or tiny guest houses—are often the source of neighborly disputes. The setback rule is a key regulation that dictates how close structures can be positioned relative to property lines. Ignoring it can lead to delays, fines, or even full project shutdowns.
Having had my share of missteps, I can tell you that early misjudgments about these setback requirements almost derailed my entire project. Trust me, there’s a lot more to these rules than a quick glance in the zoning code. Missing out on the details can cost you not just money, but valuable time and peace of mind. For a thorough understanding of the permit process and how to handle setbacks, I recommend reviewing this helpful guide on understanding permit processes.
Facing Doubts: Is This Rule Really That Critical?
Initially, I thought, “It’s just a shed, how strict can the rules be?” But after a permit denial and a strained conversation with my neighbor, I realized that not respecting setbacks could compromise the project and our relationship. Early on, I made the mistake of assuming the rules were flexible, which was a costly misconception. Learning from that, I discovered that proper planning and understanding local setback requirements are essential, not just for legal compliance but for neighborhood peace.
If you’ve ever wondered whether these codes are worth the effort or if you can bend them without consequences, you’re not alone. Many homeowners underestimate the importance of the setback rule until it’s too late. But the truth is, knowing and complying with these regulations makes the process smoother and helps avoid costly disputes. Want to know more about common pitfalls and how to avoid them? Check out this article on permit approval tips.
Gather Accurate Site Data and Prepare Your Documents
Start by performing a thorough survey of your property. Use a laser measure or hire a professional to mark the exact property boundaries, setbacks, and existing structures. This precise data prevents surprises later on, especially when dealing with setback constraints like the setback rules for backyard ADUs. I once skipped this step and faced a costly redesign after the survey revealed my planned shed violated setbacks, causing a project delay.
Understand Local Regulations and Permitting Requirements
Review your local zoning codes and building regulations carefully. Visit the city or county planning office, or check their online portal. Keep in mind that regulations vary significantly depending on your location. For example, a simple garden shed might have a 3-foot setback requirement, while a guesthouse could need more. Use online resources like navigating permit requirements guides to familiarize yourself with specific rules. I spent extra time cross-referencing regulations, which avoided permit rejection when I submitted my plans.
Create Detailed Construction Plans and Accurate Estimates
Develop comprehensive blueprints, including dimensions, materials, and structural details. Simultaneously, prepare an itemized budget. Don’t underestimate costs; consider permits, materials, labor, and contingencies. Use the step-by-step estimating guide to ensure you capture all expenses. I once overestimated my budget but found that a precise estimate helped me negotiate better deals with suppliers, saving thousands over the project.
Complete and Submit Your Permit Application Correctly
Fill out all required forms accurately. Attach all necessary documents: site plans, engineering drawings, and survey data. Pay close attention to specific details like correct setbacks, fire codes, and utility clearances. Missing or incorrect information can cause delays—similar to my experience when I overlooked a detail about the roof pitch, leading to a permit rejection. To minimize errors, review permit approval tips that highlight common pitfalls.
Plan for Permitting and Inspection Timelines
Apply early and track your permit status diligently. Permit approval can take from a few weeks up to a couple of months, depending on your locality. Use online portals or contact officials directly to confirm your application’s progress. During this phase, prepare for inspections by ensuring your plans comply fully with regulations. I learned that proactive communication with inspectors often helped me address minor issues before they caused delays.
Prepare for Unexpected Obstacles or Revisions
No plan is perfect. Expect to receive comments or requests for modifications. Address concerns promptly—this might mean revising drawings or submitting additional documentation. Like when I had to resubmit my plans after an inspector pointed out a missing fire egress detail, which delayed my build by a few weeks. Maintaining a flexible approach and understanding the process reduces frustration and keeps your project moving forward.
Many homeowners believe that permit applications are straightforward and that cost estimates are just about materials, but in reality, there are deeper nuances that can trip up even seasoned DIY enthusiasts. One widespread myth is that estimating for new builds or additions is simple arithmetic—multiplying square footage by a standard cost per square foot. However, this approach often overlooks critical factors like soil conditions, utility connections, and local code requirements, which can significantly inflate your budget. For instance, failing to account for soil stabilization in hillside lots can lead to unexpected foundation costs, as highlighted in expert analyses on estimating costs for new builds. Another common misconception is that permits are just a bureaucratic hurdle rather than an essential safety protocol. Homeowners who skip or rush the permit process risk delays, fines, and even having to tear out work that doesn’t meet code standards—an expensive and frustrating mistake. I’ve seen projects unnecessarily halted because plans were submitted without thorough review, emphasizing the importance of understanding permit requirements in advance. Turning to the permitting process itself, many assume that it’s a matter of submitting documents and waiting. Yet, the real challenge lies in understanding the detailed nuances of local ordinances and how they influence your project’s scope and timeline. For example, overlooking setback variations for specific zoning districts can invalidate your entire plan, causing costly revisions or rejection. To avoid this, consult authoritative resources like permits for new builds to get an insider’s perspective. Advanced homeowners often overlook the importance of precise site data. A subtle but critical mistake is relying on rough property boundary estimates rather than professional surveys—this can cause severe setbacks if your planned structures infringe on easements or violate local setback requirements. It’s tempting to think a quick measurement suffices, but investing in accurate site data from the outset is a smart move. Moreover, within the permit submission, details like utility access points and soil conditions must be meticulously documented. Misjudging these aspects can lead to revisions or outright rejection, delaying your project and adding unforeseen expenses. The key is to treat the permit process as a layered negotiation, where understanding the hidden rules saves you time and money. Before you start breaking ground, ask yourself: have I thoroughly researched local nuances that could impact my build or addition? Remember, there’s no substitute for careful planning and expert consultation. Don’t let misconceptions or overlooked details turn your dream project into a costly nightmare. Have you ever fallen into this trap? Let me know in the comments.
Keep It Working: Essential Maintenance and Tools for Lasting Results
Once you’ve navigated the permit maze and finalized your plans, the journey doesn’t end. Ensuring your newly added spaces and structures remain functional requires consistent maintenance and the right set of tools. Personally, I rely on specific equipment and software that streamline these tasks and help me catch issues early, saving time and money in the long run.
Regular Inspection: Your First Line of Defense
Monthly visual inspections are a must to identify early signs of wear or damage. I use a digital inspection camera (like the FLIR one) to examine hard-to-reach areas, such as behind siding or within the attic. This device provides thermal imagery that reveals moisture leaks or insulation issues before they escalate. Incorporating such tools into routine check-ups helps maintain structural integrity and prevents costly repairs down the line.
Leveraging Software for Project Management
Managing multiple phases—from permitting to construction—demands a robust project management tool. I swear by ConstructionEdge’s platform because it consolidates schedules, permits, and document storage in one place. This virtual hub ensures I stay on top of deadlines, inspections, and revisions, especially when coordinating with contractors or inspectors. As trends point toward integrated digital workflows, adopting such software can future-proof your home improvement projects.
Adopt Predictive Maintenance Techniques
Forecasting potential issues allows proactive intervention. Using moisture meters and soil testing kits, I monitor foundational stability and prevent problems associated with soil drainage or water infiltration. Regular data logging with these tools enables me to notice deviations from baseline readings, indicating the need for repairs before damage occurs. Such practices extend the longevity of your structures and save substantial repair costs.
How do I maintain home additions over time?
Consistent upkeep hinges on understanding the specific materials and local conditions. For example, in humid climates, using dehumidifiers and mold-resistant coatings can prevent deterioration. Also, staying informed about evolving building codes, like new energy efficiency standards, ensures your space remains compliant and efficient. To keep your project in top shape, regularly consult trusted resources and consider professional inspections periodically.
Looking ahead, automation and remote monitoring are set to revolutionize maintenance. Smart sensors for moisture, structural shifts, or utility usage could alert homeowners instantly to issues, drastically reducing response times. Embracing such innovations now will give you an edge in managing long-term building health and safety.
Don’t forget, many small adjustments can lead to big savings. For instance, adopting a routine using digital tools to schedule inspections and maintenance tasks—similar to how expert estimates emphasize detailed planning—can prevent surprises down the line. I recommend trying a maintenance tracker app combined with your existing equipment and software to streamline your upkeep process and preserve your investment.
Remember, maintenance is an ongoing process. As your project matures, stay vigilant, utilize the right tools, and adapt to new technologies. Your efforts today will ensure your home addition remains a valuable, safe space for years to come.
Lessons Only Experience Can Teach About Property Setbacks and Permitting
- One of the hardest lessons I learned was that even a small oversight in setback measurements can cause major delays. Taking the time to verify property lines with a professional survey dramatically reduced surprises later on.
- I used to believe that the permit process was just a bureaucratic hurdle, but I realized it’s a safeguard for my family’s safety and the neighborhood’s harmony. Respecting these rules upfront saved me from costly rework and strained relations.
- My biggest insight came from understanding that local regulations are often more flexible than they seem—if you know where to look and how to communicate effectively with officials. This approach can turn a potential rejection into a smooth approval.
Tools and Resources That Made My Home Expansion Easier
- ConstructionEdge’s permit guide: This comprehensive resource helped me decipher the often confusing permit requirements. Its insights into local variances and common pitfalls saved my project weeks of potential delays.
- Digital surveying tools: Using a laser measure and mobile apps to mark property boundaries ensured my plans stayed within legal setbacks, preventing costly redesigns.
- Project management software: Platforms like ConstructionEdge’s management platform kept me organized across all phases—permits, drawings, and inspections—so nothing fell through the cracks.
Step Into Action and Build Confidently
“Embarking on your home addition journey can feel daunting, but armed with the right knowledge and tools, you can turn challenges into opportunities for a smoother build. Remember, understanding permit rules and setbacks isn’t just about compliance—it’s about creating a harmony between your vision and neighborhood peace. Keep learning, stay organized, and don’t shy away from seeking expert advice—your dream space is within reach.”
What’s been your biggest hurdle in planning a home addition? Share your experience below—let’s learn from each other’s journeys!