How to Pass a Rough-In Inspection on the First Try
It was a moment of sheer panic. I stood in my half-finished basement, blueprint in hand, heart pounding. Suddenly, the inspector appeared, clipboard in tow, eyes sharp as a hawk. I had spent weeks preparing, double-checking every wire, pipe, and brace, but that sinking feeling told me I was about to face the dreaded rejection. Sound familiar? If your heart races at the thought of that upcoming rough-in inspection, you’re not alone. I learned the hard way—through countless trips to the permit office and more than a few costly re-inspections—that passing on the first try isn’t about luck; it’s about preparation, understanding the process, and knowing exactly what inspectors look for. Today, I want to share the insider tips that can turn your stressful first attempt into a smooth success.
Why a Smooth Rough-In Inspection Matters More Than You Think
Getting your rough-in inspection right the first time can save you from delays, extra costs, and frustration. When permits are involved, especially for additions or new builds, each inspection is a checkpoint that ensures your project complies with safety standards and local codes. Fail that, and your job could be halted altogether, leaving you stranded and facing hefty re-inspection fees. According to a recent study by the National Association of Home Builders, delays due to permit non-compliance can extend project timelines by up to 30%, pushing costs well beyond initial estimates. That’s a lot of stress and money on the line.
But here’s the catch—most amateurs and even some experienced homeowners overlook crucial details, making small mistakes that lead to rejection. An early mistake I made? Forgetting to verify the load-bearing capacity of walls before framing—a simple oversight that nearly knocked out my entire project’s permit. Luckily, I caught it in time, but it was a wake-up call. If you want to dodge those pitfalls, knowing what inspectors focus on during the rough-in phase is essential. Want to learn the exact steps to make sure your project meets the mark? Stay tuned. We’re about to get into the nitty-gritty of preparing for a flawless inspection.
Will This Process Really Make a Difference?
Absolutely. I’ve seen folks assume that if they follow the plans, everything will be just fine. But inspectors have a keen eye for the details, and even small deviations can cause delays. Over the years, I’ve consolidated what works—and what doesn’t. For example, ensuring all electrical wiring is properly secured, correctly labeled, and accessible is a common golden rule for passing inspections. Failing to do so is one of the top reasons projects get shut down mid-inspection.
If you’re wondering whether it’s worth the effort, remember this: the cost of re-inspection fees and project delays can quickly add up, often costing thousands. To prevent that, I recommend reviewing [permit approval tips](https://constructionedgez.com/permit-approval-tips-for-seamless-home-additions) and understanding specific requirements for your local jurisdiction. My own experience has shown that thorough preparation and proactive checks can cut inspection time in half—and save your project.
Now that you’re aware of the importance, let’s dive into the practical steps that will help you ace your rough-in inspection on the very first go. Ready to get started?
Double-Check Your Plans and Permits
Start with a comprehensive review of your project’s blueprints, permits, and local code requirements. I once found a missing fire-resistance detail on my blueprint just days before inspection, which could have led to rejection. Cross-reference your plans with the latest editions of local building codes, and ensure your permit paperwork is complete and up-to-date. Understanding permit processes can help you identify essential documents needed for a smooth inspection.
Prepare Your Site for Inspection Day
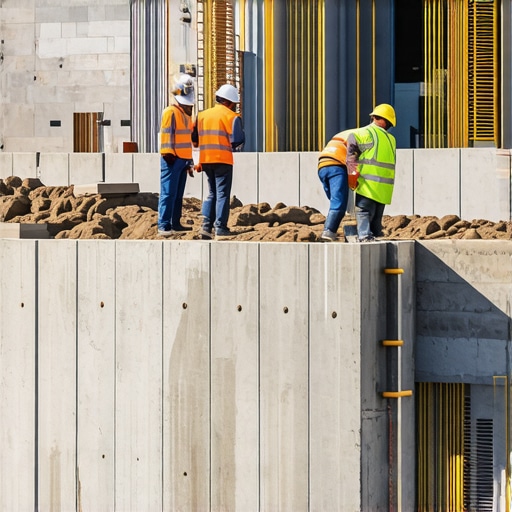
Clear the work area thoroughly. Inspectors need unobstructed access to all work zones and documentation. Like preparing for a job interview, presentation matters; a clean site indicates professionalism and readiness. Confirm that all materials, such as electrical panels, plumbing stacks, and load-bearing walls, are accessible and labeled correctly. This proactive step minimizes surprises and demonstrates your compliance with the plans.
Verify Key Structural and Safety Elements
Focus on load-bearing walls, proper wiring, grounding, and plumbing integrity. For example, I caught an overlooked grounding wire that wasn’t properly secured, which could have failed the electrical inspection. Use a checklist aligned with your local requirements or refer to permit approval tips to ensure everything is covered. Create a simple spreadsheet or notes to mark off each item as you inspect.
Conduct a Mock Inspection
Physically walk through your site with a detailed checklist. Pretend you are the inspector: look for code violations or discrepancies from your plans. I once discovered a staircase railing that was slightly off in height during this self-review, avoiding a potential re-inspection. Document any deficiencies and fix them promptly, then re-verify.
Engage a Trusted Third Party
When possible, hire or consult with a licensed inspector or experienced contractor. They can spot issues you might miss. During my first major project, a contractor’s quick review caught a plumbing stack misalignment that I hadn’t noticed. Remember, extra eyes can save you time and headaches; consider consulting estimating guides to understand potential pitfalls beforehand.
On Inspection Day, Be Professional and Organized
Arrive early with all required documents in hand. Present your work confidently, and answer questions clearly. If issues arise, acknowledge them calmly and demonstrate how you plan to fix them promptly. A professional attitude goes a long way toward gaining trust and approval from inspectors.
Follow Up Promptly
If the inspector flags any issues, address them immediately. Keep records of repairs and resubmission deadlines. Once corrected, schedule a re-inspection without delay. Staying proactive ensures your project remains on track and reduces additional costs or delays.
Many homeowners and DIY enthusiasts believe that once plans are approved, estimates are accurate, and permits are filed correctly, the hard part is over. However, the real challenge often lies beneath the surface. For instance, a common myth is that permits are just paperwork—when in reality, they involve complex compliance nuances that, if overlooked, can cause significant delays. One critical mistake is assuming that all permits are interchangeable across jurisdictions; each locality has unique requirements, and failing to customize your application can lead to rejection or costly rework.
How do I identify the sophisticated errors that even experienced builders overlook?
Expert insights reveal that small discrepancies in load-bearing calculations or misinterpretation of zoning overlays can cause permit issues that aren’t immediately obvious. According to a study by the National Institute of Building Sciences, nearly 60% of permit delays are due to overlooked technical details rather than bureaucratic backlog. This underscores the importance of detailed checklists and cross-referencing all documentation meticulously. A prevalent trap is relying purely on software estimates or generic guidelines without tailoring them to your project’s specific environmental conditions, such as soil stability or local energy codes. Accurate estimating requires combining trusted tools with expert judgment. Overestimating—often to cushion uncertainty—can inflate your budget unnecessarily, while underestimating can trigger permit rejection or code violations. Striking this balance demands understanding the hidden complexities of local ordinances and detailed site assessments. Don’t forget that early-stage miscalculations in footing depth or load calculations can cascade into future permit rejections or structural problems. Having experienced the frustration myself, I advise double-checking load-bearing capacities and consulting loadproof techniques before proceeding. Remember, permit success isn’t just about following steps but about anticipating the subtle nuances that can trip you up.  The key takeaway is that every project hides potential pitfalls that aren’t immediately visible. Recognizing these requires a combination of technical expertise, awareness of local rules, and meticulous planning. Are you aware of the hidden nuances in your project? Have you ever fallen into this trap? Let me know in the comments and share your experiences.
Keep Your Projects Running Smoothly with the Right Tools and Maintenance
Maintaining your construction projects over time is crucial to ensuring their longevity and safety. From regular inspections to using advanced equipment, I recommend investing in specific tools that make ongoing maintenance more manageable. For example, a digital moisture meter is invaluable for detecting hidden water issues before they escalate, saving you costly repairs down the line. I personally use the [Extech MO290](https://www.extech.com/products/mo290) due to its reliability and ease of use, which helps me monitor moisture levels in wood and drywall during renovations.
Another essential tool is a high-quality laser level. Unlike traditional bubble levels, laser levels provide precise alignment over large distances, which is vital for maintaining structural integrity over time. I prefer the [Bosch GLL 3-80](https://www.boschtools.com/us/en/boschtools-ocs/gll-3-80-265821-p/) because of its accuracy and durability, ensuring my work stays aligned even months after the initial project completion.
Software plays a significant role in long-term project management. I rely on construction management platforms like Buildertrend, which offers features for scheduling maintenance, documenting inspections, and tracking repairs. This centralized approach allows me to stay organized and proactive about future needs, aligning with the trend toward digital integration in construction. Looking ahead, I predict that these platforms will incorporate AI-driven predictive analytics, helping homeowners and contractors foresee potential issues before they occur, thereby extending the lifespan of the structure.
How do I maintain my project over time?
Regular inspections are the backbone of effective maintenance. Schedule seasonal checks for cracks, leaks, and electrical safety. Implementing a routine using a checklist derived from local building codes, such as those found in permit requirements guidelines, ensures nothing gets overlooked. Additionally, establishing a maintenance log using digital tools helps track repairs and enhances resale value. Remember, proactive maintenance isn’t just about fixing problems; it’s about preventing them and preserving your investment for decades to come.
Consider setting up a dedicated storage space for maintenance tools and replacement parts, which streamlines the process of addressing issues promptly. For example, keeping spare plumbing fittings and electrical connectors organized reduces downtime and minimizes project disruption. Investing in scalable solutions, like modular scaffolding systems, allows you to adapt quickly for future expansions or modifications, vital for projects that may grow over time.
Looking ahead, I believe that the integration of smart sensors and IoT devices will revolutionize maintenance practices. These technologies will enable real-time monitoring of structural health, moisture levels, and energy efficiency, providing early warnings before any damage becomes serious. For now, adopting a disciplined maintenance routine using the right tools is your best bet to keep your projects functional and safe for the long haul. If you’re delving into new builds or additions, make sure to leverage these tools right from the start to embed longevity into your planning. Want to elevate your maintenance game? Start by trialing a digital moisture meter today and see the difference it makes in detecting issues before they become critical.
Lessons That Turn Permits Into Smooth Sailing
One of my biggest realizations was that most permit rejections stem from overlooked details—like missing load calculations or misinterpreted zoning rules. The lightbulb moment? Paying attention to the tiniest specifics can save weeks of delays and thousands in rework costs. Trust me, getting intimately familiar with local codes before starting isn’t just helpful; it’s essential. I once skipped this step and faced a costly hold-up because I didn’t realize a setback requirement had changed. Now, I always double-check permit requirements early on—saving time and frustration. Another lesson learned is that some mistakes seem insignificant but are actually major red flags for inspectors, such as poorly labeled wiring or inaccessible junction boxes. These small oversights can cause a project to fail inspection, delaying your progress considerably. The key? Detailed checklists and proactive site reviews ensure you’re ready on inspection day and help you avoid those last-minute scrambles. And lastly, engaging experienced professionals for critical reviews provided insights I couldn’t see myself, proving that an extra set of expert eyes can be the difference between failure and success—especially when navigating complex or unique project features.