How to Identify Understated Material Quantities in a Framing Bid
It was a chilly morning when I looked over an estimate for a small home addition, only to realize that crucial framing materials had been significantly underestimated. My stomach sank. I knew that such overlooked details could quietly derail the entire project budget. That moment was my lightbulb—an eye-opening realization that even seasoned estimators can easily miss understated quantities. If you’ve ever been caught off-guard by a low-ball bid that didn’t quite add up, you’re not alone. Today, I’ll share a proven approach I developed for uncovering these hidden pitfalls, ensuring your estimates are as accurate as possible.
Why Underestimating Material Quantities Is a Common Pitfall
In my experience, one of the sneakiest errors in framing bids is underestimating material needs, especially for materials like lumber and sheathing. When estimating projects, it’s tempting to rely on quick calculations or previous projects as benchmarks. But that shortcut can backfire — a misjudgment that ramps up costs unexpectedly and erodes profit margins. According to industry research, errors in material estimation can cause project costs to balloon by 10-15% or more, often without clear indication during initial budgeting.
One early mistake I made was trusting the initial supplier quotes without cross-checking the quantities. I didn’t realize that small miscalculations in plank lengths or pile counts could cascade, leading to significant shortages or waste. Over time, I learned that a detailed scrutiny of framing bids—specifically focusing on how material quantities are calculated—makes a world of difference.
Is it actually worth the extra effort? Absolutely. Precise quantification of materials not only prevents budget surprises but also speeds up procurement, keeps your project on schedule, and boosts your credibility with clients. If you’re still relying on rough estimates, you might be undercutting your own success. Let’s explore how to spot these understated quantities early on, so you can improve your estimating game.
Is Improving Material Estimation Really Necessary in a Competitive Market?
Many skeptics argue that tight bids come down to price and speed rather than meticulous quantification. But experience shows that careful estimation is a game-changer—saving money and avoiding delays. My advice is to double-check every number, especially when it comes to framing material quantities, which are often the biggest source of estimation errors. Need a step-by-step plan? You can find detailed strategies on [Construction Edgez](https://constructionedgez.com/estimating-home-additions-a-step-by-step-guide-for-2025).
To make your estimations more reliable, you need to look beyond just the numbers. It’s about understanding how your bid was constructed and verifying that the quantities align with real-world needs. Now, I’ll walk you through practical ways to identify understated material quantities—so stay tuned!
Break Down the Blueprint and Visualize Material Flow
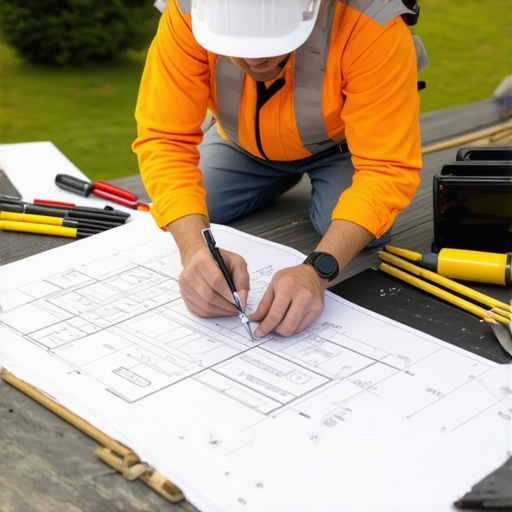
Start by thoroughly reviewing the project’s blueprints, and then create a scaled sketch to visualize material distribution across each section. I recall a project where I sketchout each framing segment onto grid paper, which revealed actual material runs that weren’t obvious from the initial plans. This step helps identify gaps or overestimations early, saving time and money.
Cross-Verify Quantities with Historical Data
Use past projects as benchmarks, but don’t rely solely on memory. For each material, compare the current bid quantities with your previous estimates. For instance, I once noticed a bid for framing lumber that was 20% lower than my five-year average, prompting a second calculation that uncovered a missing 50 linear feet of studs. Always cross-check numbers—cross-verification acts as a second set of eyes, catching overoptimistic counts.
Leverage Material Takeoff Software and Tech Tools
Invest in digital takeoff tools or estimation software, which can import blueprints and generate detailed material lists. I adopted a basic version for my projects, and it dramatically improved accuracy by highlighting discrepancies between supplier quantities and actual project needs. Integrate these tools into your workflow for consistent, reliable estimates and reduce human error.
Inspect Material Markings and Cutting Lengths
Physically examine material sizes and markings on delivery. I learned this the hard way when a shipment of plywood sheets was mislabeled; relying on the label alone led to ordering too much or too little. Cross-check each batch against your material specifications and plan your cuts accordingly. This inspection step proves invaluable, especially when dealing with complex or custom materials.
Communicate with Suppliers and Review Quotes
Engage your suppliers early—request detailed quotes that specify quantities and waste factors. I once worked with a lumber company that included a 10% waste margin in their quote, which was higher than necessary for my project. Clarify these margins upfront and compare quotes from multiple vendors. Clear communication minimizes surprises during procurement and ensures your estimates are grounded in real-world supply conditions.
Analyze Past Cost Variances to Improve Accuracy
Review previous project variances between estimated and actual material costs. I keep a detailed log; during a recent project, I noticed a pattern of underestimating fasteners by about 30%. Incorporating this insight, I adjusted my current bid to include a buffer for similar fasteners. Regular analysis sharpens your estimation skills over time and helps prevent repeated underestimates.
Close-up of detailed material takeoff with blueprints and drawn annotations demonstrating precise quantity calculations.
Many homeowners and even some contractors believe that navigating permits and estimating new builds is straightforward, but in my experience, there’s a significant nuance most overlook: the tendency to underestimate the complexity and hidden costs involved. This oversimplification often leads to costly mistakes and project delays. Contrary to popular belief, permits aren’t just a bureaucratic hurdle—they are a vital part of ensuring your project complies with safety standards and local regulations, which can prevent costly legal issues down the line. Skipping or rushing the permit process might seem tempting to save time and money initially, but this shortcut can backfire, leading to fines, work stoppages, or expensive rework. For instance, a common myth is that permits are optional for small projects—nothing could be further from the truth, as permit requirements vary by locality and project scope. To truly grasp this, it’s essential to understand the permit approval process thoroughly. You can learn more about streamlining this process in [Understanding Permit Processes for Successful Home Additions](https://constructionedgez.com/understanding-permit-processes-for-successful-home-additions).In the world of construction and remodeling, staying organized and using the right tools can make the difference between a smooth project and a costly delay. Over the years, I’ve found that leveraging specific equipment and software solutions not only enhances accuracy but also significantly reduces errors that can otherwise go unnoticed. As the industry moves toward digital integration, embracing these tools will become even more critical for long-term success.
Firstly, I depend heavily on digital takeoff software like Bluebeam Revu. This program allows me to import blueprints directly and create detailed takeoffs with pinpoint accuracy. Unlike manual measurement methods, Bluebeam offers layer management, real-time collaboration, and automated calculations that minimize human error. I personally use the markup tools to annotate and cross-verify material quantities, especially for complex framing plans. This approach ensures that every inch of material is accounted for, saving costs and preventing shortages.
Secondly, investing in a high-quality laser measuring device, such as the Leica Lance series, has been transformative. These devices enable rapid measurements on-site, especially in hard-to-reach areas or irregularly shaped spaces. The precision they provide helps in refining estimates and ensures that your plans translate accurately from paper to reality. I recommend always cross-checking manual measurements with laser data periodically—I’ve caught discrepancies this way that could have otherwise skewed the entire project budget.
Another crucial tool is project management software like Procore or Buildertrend. These platforms excel in tracking project timelines, change orders, and permit statuses. Regularly updating and reviewing this data helps me catch potential delays well before they impact the schedule. For example, by monitoring permit statuses through these platforms, I can proactively address any hold-ups, ensuring continuous workflow.
Finally, maintaining a well-organized physical toolkit cannot be overstated. My essentials include a cordless drill, a multi-tool, and a durable set of measuring tapes with clear markings. Keeping these on hand means I can handle minor on-site adjustments quickly, preventing small issues from escalating into major delays.
Looking ahead, I believe the integration of AI-driven project analytics will revolutionize how we maintain efficiency. These systems will analyze historical data to predict potential bottlenecks and suggest preventative actions. For now, however, mastering current digital tools and establishing disciplined workflows remains indispensable.
### How do I maintain these tools over time?
Regular calibration, software updates, and continuous training are vital. For instance, laser devices need annual calibration to ensure measurement accuracy, while software updates fix bugs and add features that enhance usability. Training my team on new features ensures everyone is up-to-date, reducing user errors. I also schedule routine equipment checks to catch and fix issues early—this proactive approach extends the lifespan of my tools and keeps my projects on track.
To implement a practical tip today, try integrating a laser measuring device into your site visits. The immediate benefit of accurate, quick measurements will streamline your estimating process and help prevent costly rework. For more comprehensive strategies, explore [Estimating Costs for Home Improvements](https://constructionedgez.com/estimating-costs-for-new-builds-expert-insights) to refine your workflow further.
Lessons That Changed How I Approach Permits and Costing
One of the most eye-opening lessons I learned was that no estimate is ever truly complete without considering the permit process. Skipping or underestimating permit-related work was a trap I fell into early on—leading to delays and unexpected costs. The hard truth is, permits are often misunderstood as mere paperwork, but they’re the backbone of legal, safe, and efficient construction.
Another lesson came from realizing that collaborative communication with suppliers and regulators can reveal hidden hurdles before they become costly surprises. I once discovered that a permit requirement for soil testing was glossed over in my initial bid, causing a weeks-long delay. Building relationships and clarifying expectations early have since become non-negotiables for me.
The most invaluable insight, however, has been adopting a mindset of continuous refinement—analyzing past projects to spot estimation blind spots, whether it’s underestimating fasteners or overestimating permit lead times. That reflective practice has saved me thousands and elevated my credibility with clients.
My Go-To Arsenal for Accurate Building Estimates
For anyone serious about perfecting their estimating craft, I recommend tools that combine precision and ease of use. Bluebeam Revu is my trusted go-to for digital blueprint takeoffs—its layered markup features catch discrepancies I’d never see with paper plans. Investing in a quality laser measuring device, like Leica’s series, has significantly improved on-site measurement reliability—no more second-guessing distances or heights.
Project management platforms such as Procore or Buildertrend keep my team aligned and deadlines in check, especially when managing permits and change orders. Lastly, detailed logs and previous project reviews serve as an internal feedback loop, giving me the edge in preventing recurring underestimates and misallocations.
Ultimately, I believe that embracing these tools isn’t just about efficiency; it’s about cultivating a mindset of mastery—where accuracy, foresight, and proactive communication define every project’s success. For more in-depth strategies, check out the step-by-step guide for estimations in 2025 and stay ahead in your home addition or new build ventures.
Seize the Moment: Make Your Next Build the Best Yet
The journey toward flawless estimates and smooth permit approvals demands dedication, but the rewards—confidence, savings, and peace of mind—are worth every effort. Remember, each project is a chance to apply what you’ve learned, refine your skills, and push your standards higher. Don’t let the complexity of permit and estimation processes hold you back—embrace them with curiosity and resolve.
What’s the one part of estimating or permit process you find most challenging? Share below—I’d love to hear your experiences and tips to conquer these hurdles together.