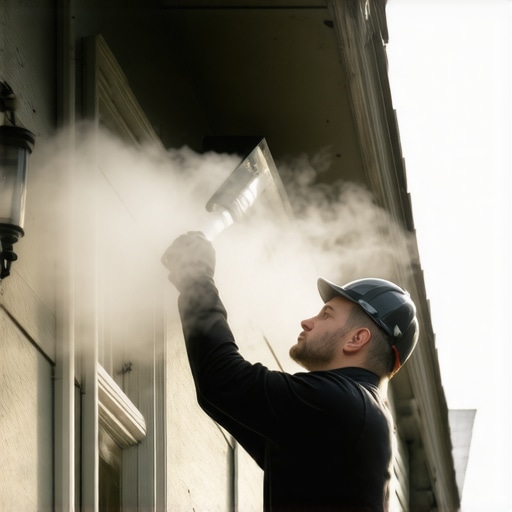
Why Every Bay Area Moisture Control Plan Should Start with a Dryer Vent Inspection
Why Every Bay Area Moisture Control Plan Should Start with a Dryer Vent Inspection
As a homeowner in the San Francisco Bay Area, you are likely no stranger to the persistent battle against dampness. Whether you are dealing with the heavy fog of the Sunset District or the humid microclimates of the East Bay, bay area moisture control is a constant concern. Many homeowners invest thousands of dollars into French drains, sump pumps, and high-end dehumidifiers, only to find that their crawl spaces remain damp and their energy bills stay high. In my years as a licensed insulation contractor and the founder of Construction Edgez, I have seen a recurring theme: the most sophisticated moisture control plans often fail because they overlook the simplest, most destructive culprit – the dryer vent.
When we talk about dryer vent cleaning services, people often think about fire prevention. While that is critical, the impact of a faulty dryer vent on your home’s structural integrity and moisture levels is equally devastating. A single disconnected or clogged vent can pump gallons of water vapor directly into your crawl space or attic every week. If you are looking for an attic insulation quote or considering the cost to install insulation in attic spaces, you must first ensure your ventilation is handled correctly. Without a proper dryer vent inspection, even the highest-quality attic insulation will eventually fail, succumbing to mold and rot.
The Bay Area Moisture Crisis: More Than Just Fog
The Bay Area presents a unique challenge for residential moisture management. Our proximity to the Pacific Ocean and the San Francisco Bay creates a high-humidity environment that is exacerbated by significant temperature fluctuations between day and night. This coastal air carries moisture that naturally migrates into the coolest parts of your home: the crawl space and the attic. When this ambient moisture meets a source of internal humidity – like a leaking dryer vent – it creates a recipe for disaster.
I often meet clients who complain of “bouncy floors” or notice their expensive hardwood flooring beginning to “cup” or warp. These are classic symptoms of sub-floor moisture imbalance. When the humidity in a crawl space remains consistently high, the wooden floor joists and sub-flooring absorb that moisture, causing the wood to expand and lose its structural rigidity. In many cases, homeowners assume they need a massive drainage overhaul. While professional moisture-control inspections in the Bay Area typically run between $3,000 and $5,000, jumping straight to a $15,000 encapsulation project without checking the dryer vent is a tactical error.
Effective bay area moisture control requires a holistic view of how air and water move through the building envelope. If your dryer is venting into your crawl space, it is essentially acting as a high-powered humidifier, forcing warm, moist air into a confined area where it has nowhere to go but up into your living space. This not only ruins your comfort but also drastically increases the cost of attic insulation installation over time, as moisture-laden air rises and condenses in your attic, destroying the R-value of your insulation.
How a Faulty Dryer Vent Sabotages Your Crawl Space
To understand why a dryer vent inspection is the critical first step, we have to look at the physics of laundry. A standard load of wet laundry contains approximately one gallon of water. When your dryer runs, that water is converted into hot vapor. In a properly functioning system, this vapor is carried through a smooth-walled duct and exhausted completely outside the home’s envelope. However, in many older Bay Area homes, these vents are made of flexible foil, are improperly taped, or have become disconnected over time.
If that vent is disconnected, you are effectively dumping several gallons of water a week directly under your home. This creates a tropical microclimate. In this environment, crawl space insulation acts like a sponge. Fiberglass batts will absorb the moisture, become heavy, and eventually pull away from the floor joists. Once the insulation is saturated, it loses its ability to resist heat flow, leading to those skyrocketing energy bills homeowners dread.
Furthermore, many homeowners are surprised to learn that the average cost of insulation in attic and crawl space areas can be significantly impacted by these moisture issues. If we find that a dryer vent has been leaking for years, the scope of work shifts from a simple “top-off” to a full-scale remediation. Professional encapsulation can cost between $8,000 and $15,000, but that investment is entirely wasted if a leaking dryer vent continues to pump moisture inside the new seal. This is why I always insist that dryer vent cleaning services and a full duct integrity check be part of any moisture-control strategy.
Signs Your Dryer Vent is Compromising Your Home’s Foundation
How do you know if your dryer vent is the source of your moisture woes? There are several “red flags” that we look for during our inspections. The most obvious is the presence of lint. If you see lint accumulating on your crawl space floor or clinging to your floor joists, your vent is leaking. Lint is not just a fire hazard; it is a moisture magnet that provides the perfect organic food source for mold and mildew.
Another major sign is an increase in pest activity. Moisture is the primary attractant for wood-destroying organisms. If you find yourself searching for pest control in vallejo ca or calling exterminators vallejo because of subterranean termites or carpenter ants, you likely have a moisture problem. These pests thrive in damp wood. A leaking dryer vent provides the consistent humidity they need to establish a colony. When we provide an attic insulation quote, we often have to account for the fact that your attic insulation quote probably ignores pest cleanup costs, which can be substantial if a moisture leak has invited rodents or insects into the space.
Common Symptoms of Dryer-Induced Moisture:
- Condensation or “sweating” on the underside of floor joists.
- Musty odors that persist even after cleaning the living areas.
- Visible mold growth on the paper backing of fiberglass insulation.
- Dryer cycles taking longer than 45 minutes to dry a standard load.
- Excessive humidity in the laundry room or adjacent hallways.
The Financial Breakdown: Attic Insulation and Moisture Control Costs
When planning a home performance upgrade, understanding the cost to install insulation in attic or crawl space areas is vital. Many factors influence the final price, but moisture is the biggest variable. If your attic is dry and the existing insulation is just old, the cost to replace attic insulation might be on the lower end of the spectrum. However, if moisture from a faulty vent has caused mold growth, the price increases due to the need for specialized attic cleaning services and mold remediation.
Generally, the average cost of insulation in attic projects in the Bay Area ranges from $2,500 to $6,000, depending on the square footage and the type of material used (such as blown-in cellulose or fiberglass). If you are asking how much to insulate attic spaces correctly, you must include the cost of air sealing. Air sealing involves closing the gaps around light fixtures, plumbing stacks, and – crucially – venting penetrations. Without air sealing, moisture-laden air from your home will bypass your insulation, leading to condensation on the roof deck.
I always recommend that homeowners learn how to accurately estimate costs for home improvements before signing a contract. A cheap quote often means the contractor is skipping the vital step of checking the dryer and bath fan exhaust systems. If you receive an attic insulation quote that seems too good to be true, it likely is. You can read more about why your attic insulation quote should break down cleaning versus material costs to ensure you aren’t paying for new insulation to be placed over old, moldy debris.
Why a “Standard” Attic Insulation Quote Often Misses the Mark
The insulation industry is unfortunately filled with “blow-and-go” contractors. These are companies that will give you a low cost to replace attic insulation by simply blowing new fiberglass over your existing material. They rarely go into the tight corners of the crawl space or the edges of the attic to inspect the dryer ductwork. This is a massive disservice to the homeowner.
As a specialist in bay area moisture control, I know that the attic insulation services we provide are only as good as the preparation work. If we don’t fix a disconnected dryer vent, the new insulation will be ruined within two seasons. Furthermore, many contractors fail to use the correct materials for venting. Dryer vents should never be made of plastic or thin foil; they must be rigid metal or semi-rigid metal to meet modern building codes and ensure fire safety. When we calculate how much does it cost to replace attic insulation, we include the cost of bringing these vents up to code because it is the only way to guarantee a dry, healthy home.
Be wary of the labor shortcuts that artificially lower your attic insulation quote. A proper installation includes verifying that every exhaust fan and the dryer vent terminate outside the building, not just into the soffit or under the insulation. If these vents terminate inside the attic, they will cause the roof sheathing to rot, leading to a much more expensive roof replacement down the line.
Beyond the Vent: Comprehensive Crawl Space and Attic Care
While the dryer vent is a primary focus, a complete bay area moisture control plan must address other potential water entries. This includes the installation of a high-quality vapor barrier (at least 6-mil or 10-mil polyethylene) to stop ground moisture from rising. In areas with high water tables, we may recommend a sump pump or a “WaterGuard” system, which is often more effective than traditional interior French drains for managing hydrostatic pressure.
For the attic, attic cleaning services are the foundation of air quality. If your home has had a history of moisture issues, the old insulation is likely harboring mold spores and dust mites. Removing this old material, sanitizing the space, and then performing professional attic insulation installation is the only way to reset your home’s health. If you are involved in a larger renovation, it is also important to understand the permit processes for new building projects in your specific Bay Area municipality, as many cities now require specific R-values and ventilation standards for attic upgrades.
Finally, for those building new additions or repairing structural damage, it is critical to verify the moisture content of framing lumber before drywall is installed. If you seal up a wall or floor that has been saturated by a leaking dryer vent, you are trapping that moisture inside the structure, which will inevitably lead to dry rot and mold growth behind your walls.
Conclusion: Your Roadmap to a Dry Home
Achieving permanent bay area moisture control doesn’t always require the most expensive solution, but it does require the smartest one. By starting with a professional dryer vent inspection and dryer vent cleaning services, you address the single largest source of internal moisture in most homes. This simple step protects your investment in crawl space insulation and ensures that your attic insulation cost remains a one-time expense rather than a recurring nightmare.
If you are tired of musty smells, damp floors, and high energy bills, it’s time for a professional evaluation. Don’t settle for a generic attic insulation quote. Contact a specialist who understands the unique relationship between ventilation, insulation, and moisture in the Bay Area. At Construction Edgez, we provide comprehensive attic insulation services and moisture audits that look at the whole house, starting with the “low-hanging fruit” like your dryer vent. Contact us today to secure your home’s future and ensure your crawl space stays as dry as the California summer.