Why Your Deck Post Depth Might Be Illegal in Your Climate Zone
I’ll never forget the moment I discovered my deck posts were potentially outside legal standards. It was a sunny Saturday, and I was nervously inspecting my new backyard project, only to realize that the depth of my deck posts might be illegal in my climate zone. That realization hit me like a cold splash of water—bad enough to threaten approval, but even worse if it caused structural issues down the line.
Why Your Deck Post Depth Is More Than Just a Number
It’s easy to think of post depth as a minor detail, something you can fudge or overlook. But in reality, it’s a critical factor that’s tightly regulated—especially when you consider the environmental stresses specific to your region. For example, in colder climates, deeper posts are necessary to prevent frost heave from cracking the foundation—something I learned the hard way early in my DIY journey. The construction codes vary by climate zone, and ignoring them can lead to costly delays, fines, and even safety hazards. According to the National Institute of Standards and Technology, proper footing depths can prevent structural failure during extreme weather conditions.
In my case, I had initially gone with code-minimum depths I saw online, thinking, “This should suffice.” Okay, maybe it would in a temperate zone, but my climate has harsh winters. I soon faced the problem of my deck sinking or moving during freeze-thaw cycles—a mistake I’ve seen many homeowners make because they underestimated local code requirements or didn’t do enough research before starting.
What We Will Cover Today
Today, I promise to help you crack the code—literally—by understanding exactly how deep your deck posts should go in your climate zone. I’ll share what mistakes I made early on, how to verify local requirements, and how to make sure your project passes inspection without risking legal issues. Whether you’re contemplating a new build or adding a deck, knowing the ins-and-outs of post depth can save you time, money, and headaches down the road.
Determine Your Local Building Codes
Start by consulting your local building department or zoning office to find specific requirements for deck post depth in your area. Many jurisdictions have online resources or permit guides detailing these standards. When I was planning my deck, I called my city hall, and the clerk provided me with the exact depth specifications; this saved me from costly mistakes later. Never assume code requirements are universal—regional variations are significant.
Assess Environmental Stress Factors
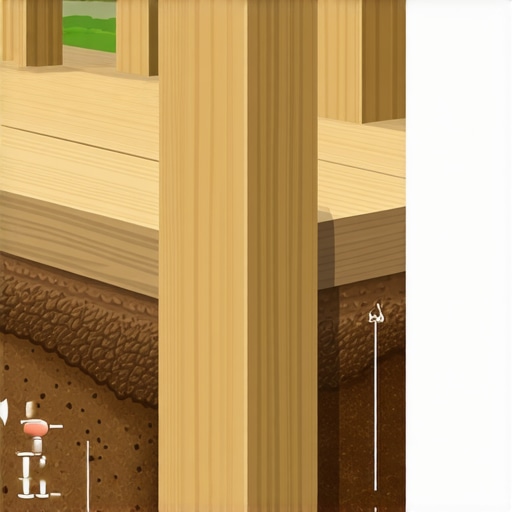
Next, evaluate environmental factors that influence post depth, such as frost line, soil type, and climate severity. For example, in my cold climate zone, the frost line extended to 36 inches, meaning I needed to set my posts below this depth to prevent frost heave. Use online tools or soil tests to identify these critical thresholds. This step ensures your foundation will withstand local weather patterns, avoiding structural instability.
Calculate Accurate Post Depths
Combine your local code’s minimum depth with environmental considerations. For instance, if code mandates 24 inches but the frost line reaches 36 inches, set posts at a minimum of 36 inches. Remember, it’s safer to go slightly deeper for added stability. In my case, I opted for 40 inches to account for potential soil shifting, which proved to be a wise choice when I noticed minor soil settlement over a few seasons.
Use a Robust Estimating Method
Apply proper estimating techniques to avoid under- or over-spending. I used the methods outlined in this step-by-step guide to determine material quantities and costs, which helped me budget effectively. Accurate estimates also prevent surprises during the project and ensure you allocate enough time and resources for digging and setting posts.
Gather the Necessary Tools and Materials
Ensure you have a post-hole digger, measuring tape, level, concrete, and gravel. For example, I rented a power auger to speed up the process, which made drilling precise and manageable, especially in tough soil. Using quality materials and proper tools guarantees the stability and longevity of your deck, avoiding costly repairs in the future.
Follow Proper Installation Procedures
Dip your post bottoms in water-resistant treatment or use pressure-treated wood. Dig holes to the calculated depth, adding gravel at the bottom for drainage. Place the posts, check for plumb using your level, and backfill with concrete. In my deck build, I poured quick-setting concrete around the posts, then used batter boards to ensure perfect vertical alignment. Proper installation techniques are crucial — skip them at your peril.
Verify Compliance and Get Inspections
Before finishing, schedule an inspection to confirm your post depths meet code and environmental standards. I submitted my plans with detailed measurements to my local inspector, who approved the work without delays, thanks to thorough documentation. Compliance not only ensures safety but also prevents legal issues during future property sales or renovations.
Many homeowners and even seasoned builders believe that permits and accurate estimating are straightforward tasks, but in my experience, there’s a surprising level of nuance that often gets overlooked. One common myth is that once you’ve submitted your permit application or put together an estimate, the process is largely out of your hands. However, this oversimplification can lead to costly mistakes. For example, many assume that permit fees are fixed, but studies show that fees can vary significantly based on project complexity and local regulations—calling for a detailed review of your jurisdiction’s permit processes. Additionally, contractors often underestimate the time and costs associated with permit approvals, which can delay your project and blow your budget. A less obvious nuance is that permits are not just bureaucratic hurdles; they serve as inspections checkpoints that ensure safety and compliance, especially when you factor in regional building code variations. A frequent mistake is relying solely on online cost calculators or superficial inspections to estimate project expenses. Instead, integrating a comprehensive cost analysis using expert estimation techniques can reveal hidden costs, such as unexpected soil conditions or material shortages. Advanced homeowners ask: How do regional climate and soil types influence permit requirements and project budgeting? The answer often lies in investigating local environmental factors that impact structural standards, which are rarely discussed in generic guides. For instance, a study published in the Journal of Construction Engineering emphasizes the importance of considering regional climate data for both permit requirements and estimating. Ignoring these nuances can result in non-compliance or structural failures. Remember, detailed planning and understanding the regional specifics of permits and estimates are critical to avoiding delays and cost overruns. For tailored insights, consult your local building department, and revisit your estimates with a fine-tooth comb. Do you think you’ve fallen into this trap before? Share your experience below! Keep learning how to navigate these complexities at our privacy policy page.
Tools That Make a Difference in Long-Term Maintenance
When it comes to maintaining your home or addition over time, having the right tools can save you significant effort and cost. I rely on a high-quality laser level to ensure structural elements stay aligned through seasonal shifts, especially for decks and fences. Unlike traditional bubble levels, laser levels project a precise horizontal or vertical line across large distances, making ongoing assessments quick and accurate. Personally, I use the DeWalt Cross Line Laser because of its durability and ease of use in outdoor conditions. For measuring soil movement or settling, I employ a digital inclinometer, which provides real-time readings and helps in early detection of foundation issues before they become costly repairs.
Beyond physical tools, software solutions now play a crucial role in ongoing project management. I recommend construction estimating software that allows you to track expenses and maintenance schedules. These digital tools help identify potential problems early and organize repair routines efficiently, ensuring your investment remains sound over decades.
Why Staying Ahead with Proper Tools Is Crucial
Foregoing regular checks or relying on outdated methods can lead to unexpected failures. For example, using a moisture meter to periodically monitor wood components in decks can reveal hidden rot before it compromises safety. I prefer the Tramex Moisture Meter because it provides non-destructive readings, is easy to operate, and offers detailed data that can be logged over time.
Additionally, I advise employing a dielectric impedance tester to verify electrical grounding integrity. Ensuring systems stay functional prevents safety hazards and prolongs the lifespan of your electrical infrastructure. A well-maintained electrical system is critical for any addition or renovation, especially with evolving energy codes and smart-home setups.
Look Towards the Future of Home Maintenance
The field is rapidly moving towards integrated digital monitoring that combines IoT sensors with AI analytics to predict structural issues before they manifest visibly. Think of smart sensors embedded in foundational elements, continuously relaying data to your phone or home management system. Already, some homeowners utilize these tools for real-time moisture, movement, and load monitoring, vastly reducing maintenance surprises.
How do I keep my additions functioning smoothly without guesswork?
Adopting advanced diagnostic tools like laser levels, moisture meters, and digital sensors is a proven strategy. These tools not only help you perform periodic checks but also empower you to catch issues early, saving money and stress in the long run. Remember, the right equipment combined with regular inspection routines can extend the life of your build far beyond initial expectations. For a deep dive into maintenance planning, check out this comprehensive guide.
If you’re ready to upgrade your maintenance routine, start by investing in a quality moisture meter or laser level tailored for exterior use. Installing these tools now can make your future self thank you for the proactive care. Want tailored advice or specific equipment suggestions? Reach out via our contact page.
Over my years of navigating home additions and new builds, I’ve uncovered lessons that no quick guide or online forum can teach. These insider insights transformed how I approached permit processes and cost estimation, saving me time, money, and frustration.
The Hidden Pitfalls That Caught Me Off Guard
One of the most surprising lessons was that permits are more than just bureaucratic hurdles—they’re safety checkpoints that can trip up even the most prepared if overlooked. Missing a signature or misunderstanding a regional code can delay your project by weeks. I learned to communicate proactively with local authorities, which often uncovered nuances beyond what’s printed in standard codes, preventing costly rework.
My Proven Strategies for Accurate Estimates
Initially, I relied solely on online calculators, only to find discrepancies when sourcing materials and labor. Now, I incorporate regional soil data and climate considerations into my estimates, leveraging expert guides on cost-effective estimating techniques. This approach ensures budget reliability and highlights potential hidden costs early on.
Why Collaboration with Local Experts Matters
I discovered that building relationships with regional permit officers and seasoned contractors provides invaluable insights into regional standards and common pitfalls. Their firsthand experience often uncovers logistical challenges and code quirks that generic resources overlook, keeping my projects compliant and smooth from start to finish.
Gear Up for Long-Term Success with Smart Tools
Investing in reliable post-hole diggers, laser levels, and moisture meters has become second nature. These tools not only streamline initial construction but also empower me to conduct ongoing inspections that catch issues like soil movement or wood rot early—saving thousands over the years. I trust brands like DeWalt and Tramex for their durability and precision, which are essential for long-term peace of mind.
What Would You Do Differently?
The most valuable lesson I can share is to stay proactive—regular inspections, open communication, and thorough research are your best allies. If I had known earlier how regional environmental factors influence permit requirements and project costs, I could have avoided many setbacks. Now, I continuously refine my approach, sharing my knowledge through community forums and resources to help others avoid my pitfalls.
Ensuring your home additions or new builds are compliant and budget-conscious is a journey of continuous learning. Embrace the nuances, leverage expert advice, and invest in quality tools—you’ll thank yourself down the road.
Have you ever encountered unexpected permit delays or estimate surprises? Share your experiences below—your stories could save someone else’s project from costly mistakes!
For more insights on customizing your home projects smoothly, visit our privacy policy.
,