Why Your Garage Conversion Failed the Natural Light Audit
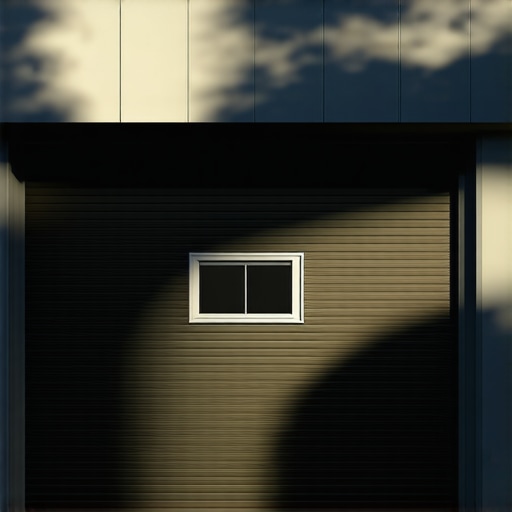
I vividly remember the day I finally decided to convert my garage into a cozy home office. I was excited, eager to make the space work perfectly, but after pushing through the permitting process and installing new windows, I was blindsided—my natural light audit failed miserably. The room felt dim, awkward, and in some ways, downright depressing. It was a gut punch, a reminder that even with all the plans and permits in place, something was off.
The Light That Didn’t Shine
If you’ve ever faced a similar disappointment—your beautiful conversion not passing the natural light standards—you’re not alone. This isn’t just about aesthetics; it’s about complying with local building codes that prioritize daylight access for health, safety, and even property values. My early misstep was underestimating how critical window placement and shading could be to the success of the project. I thought I could just install a few skylights and call it a day. Turns out, I needed a more thorough understanding of how natural light behaves and how to guide it into my space effectively.
Is Waiting for the Perfect Sunlight Actually Worth the Hype?
You might doubt whether these audits are that significant or just bureaucratic hurdles. Believe me, I did. But ignoring the details can lead to costly delays and even having to redo parts of the conversion. The key is understanding the specific mistakes that cause natural light failures. Early on, I made a mistake that cost me time and money—failing to account for neighboring trees and structures that block sunlight, which is common. To avoid that trap, I recommend doing a site sunlight analysis early in your planning phase. For more detailed guidance, check out this resource.
Understanding these nuances can seem overwhelming at first glance, but with the right approach, you can turn this challenge into an opportunity for smarter design. In the next section, I’ll walk you through practical strategies to ensure your space shines as intended, passing the natural light audit with flying colors. Ready to shed some light on your project? Let’s dive in.
Secure Your Permits Without Headaches
Begin by consulting local building codes early—don’t wait until your designs are finalized. Schedule a site visit with a permit specialist to identify potential hurdles and clarify requirements. When I faced my own project, I contacted the local permit office within the first week, which revealed that my initial plans lacked the necessary fire-resistance calculations. To navigate these waters, review guidance at this resource and prepare thorough documentation.
Prepare Accurate Plans
Create detailed drawings aligned with code expectations, emphasizing aspects like egress paths and fire barriers. I learned that missing critical details, such as proper window sizes for emergency escapes, could cause rejection and delays. Collaborate with a licensed architect or engineer to ensure plan compliance. Remember, detailed submitting reduces revision cycles, speeding up approval.
Estimate Costs with Precision
Start with a clear scope: define what the addition entails from foundation to finishing. Use current market prices for materials and labor, adjusted for your area. I once underestimated my foundation costs because I didn’t account for soil testing fees. To refine your estimate, leverage resources like this comprehensive guide and cross-reference contractor quotes.
Break down the project into phases—site prep, foundation, framing, utilities, interior finish—and assign costs to each. This breakdown helps identify where overspending might occur and enables informed negotiations. When I independently verified my framing quote against typical rates from this resource, I spotted a line item that doubled what I expected, saving me thousands.
Itemize and Validate Quotes
Request detailed bids from multiple contractors and review each line for overinflated items. For example, avoid vague descriptions like “site work”—demand specifics such as trenching, grading, and drainage. During my review, I caught a contractor overcharging on debris removal because they included unnecessary hauling. This practice is common; learning to spot it is essential for staying within budget.
Handle Permit Submissions Strategically
Align your estimates with permit application requirements, ensuring all documents are complete and accurate. Submit plans along with cost estimates, and consider registering with online permit portals if available. I successfully expedited my review process by submitting a peer-reviewed plan, as recommended at this link.
Maintain open communication with the permitting agency; respond promptly to requests for additional information. Incorporate these practices consistently to avoid costly rejections or compliance issues that could halt your project midstream. With a methodical approach, you transform complex permit and estimating tasks into manageable steps, keeping your home addition on track and within budget.Many homeowners and even some contractors believe that estimating costs and navigating permits for new builds are straightforward tasks, but this underestimates the complexity and hidden pitfalls involved. A common myth is that initial estimates—especially ballpark or rough figures—are sufficient for early planning, which can lead to serious budgeting errors because unforeseen nuances often surface as the project progresses. For example, inadequate soil testing or overlooking local zoning nuances can cause significant delays and unexpected expenses.
Why Do So Many Get Trapped by Overconfidence in Initial Estimates?
In my experience, the biggest mistake is relying on superficial assessments rather than detailed analysis. Studies show that projects with comprehensive pre-planning and detailed cost breakdowns are 30% less likely to encounter budgeting crises (source: Construction Economics Journal). Overconfidence can create a false sense of security, especially when estimators forget that certain factors, like soil stability or historical zoning restrictions, are difficult to quantify upfront but dramatically influence outcomes. A specific trap I fell into early on was neglecting to account for hidden site conditions such as underground utilities or soil contamination, which can double or triple foundation costs if not identified beforehand. To avoid this, I recommend reviewing the process of estimating costs with a nuanced approach that includes contingency planning and rigorous site assessments. Moreover, contractors often omit the complexities of permit approvals—such as variances or additional inspections—assuming they’re quick hurdles. But these can become lengthy, costly delays if not properly accounted for in the initial estimate. Get familiar with the local permit environment by consulting resources like this guide to understand the real timeline and document requirements involved. Additionally, many underestimate how permit conditions vary significantly based on project specifics, such as setback rules or historic preservation statutes, which are less visible during initial planning. This is why proactive communication with authorities and thorough preliminary investigations are key. Lastly, a widespread misconception is that permit approvals are purely bureaucratic. In reality, they are often the gateway to identifying design issues early, preventing costly revisions later. Having this mindset can shift your project from reactive to strategic, saving money and time. Remember, detailed and accurate planning isn’t just about getting approvals—it’s about safeguarding your investment from avoidable surprises. Have you ever fallen into this trap? Let me know in the comments.
Maintaining the momentum of your construction project requires more than just good intentions; it hinges on employing reliable tools and establishing disciplined routines. As someone who’s navigated complex permits and tight budgets, I’ve found that specific equipment and software can be game-changers in ensuring your project stays on schedule and within scope.
Use Digital Project Management Platforms to Stay Organized
For my work, I rely heavily on platforms like Buildertrend because it consolidates communication, change orders, and scheduling into a single interface. It allows me to assign tasks, set deadlines, and track progress visually. I personally review updates daily, which helps me catch issues before they escalate. These platforms are evolving rapidly, with future versions expected to incorporate AI-driven predictions for delays or cost overruns. Adopting such a tool early in your build can streamline your oversight.
Leverage Apps for Site Inspections
On site, I recommend using PlanGrid for capturing detailed inspection photos and annotations. It syncs seamlessly with project plans, so I can compare actual work against drawings instantly. This minimizes miscommunications and reduces rework. For maintaining long-term quality, I make it a habit to document every phase visually, creating a comprehensive record that can assist if disputes arise or permits require periodic audits.
Integrate Estimating Software for Accurate Budgeting
When preparing for additions or estimating costs, I use STACK. Its database of current market prices for materials and labor, combined with its ability to generate detailed takeoffs, helps me prevent budget creep. Regularly updating my estimates with real-time data ensures I don’t get caught off guard by price swings or overlooked line items. As the construction industry trends toward digitization, embracing such software is vital for scaling operations efficiently.
How do I maintain these tools over time?
Consistent training and routine updates are critical. I schedule monthly reviews to explore new features or software updates, ensuring my team maximizes the tools’ capabilities. Also, creating a shared digital folder with all project documents helps maintain clarity. As the market shifts, staying current with emerging solutions like 3D modeling software (e.g., SketchUp or Revit) will become more essential for early visualization and problem-solving. Investing time in mastering these tools today will save immense headaches during later project phases. For a more comprehensive approach, explore my recommended strategies in this detailed guide. Don’t hesitate to experiment with one new tool this month—your project’s efficiency depends on it.
What I Wish I Did Differently in My Home Addition Journey
One of the most valuable lessons I learned was the importance of early sunlight analysis—waiting until after permits were approved to assess natural light was a mistake that cost me time and money. If I had prioritized understanding how neighboring structures and trees impacted daylight, I could have adjusted my design proactively, saving myself headaches down the line.
How Overconfidence in Initial Estimates Can Derail Your Project
Initially, I believed rough estimates were enough, but I underestimated hidden costs like soil testing and permit fees. A detailed, line-by-line review of contractor quotes and site assessments revealed discrepancies that could have sabotaged my budget. Now, I know thorough analysis and contingency planning are essential to stay on track.
My Secret Weapon for Permit Success
Building relationships with local permit officials early on made a huge difference. By consulting resources like this guide, I learned how proactive communication and well-prepared plans accelerate approvals. Don’t wait until the last minute to understand permit nuances—start conversations early.
Tools That Turn Chaos into Control
Utilizing platforms like Buildertrend and apps such as PlanGrid helped me keep every phase organized, from scheduling inspections to documenting work progress. These tools not only saved me from missed deadlines but created a clear record that proved invaluable during disputes. Embracing digital solutions is no longer optional—it’s the difference between chaos and control.
Your Next Step Begins Now
Armed with these insights, you can approach your new build, estimating, or permit process with confidence. Remember, the key is proactive planning combined with the right tools. Every project is an opportunity to learn and improve—don’t let overlooked details or assumptions hold you back.
What’s the biggest challenge you’ve faced in estimating costs or navigating permits? Share your experience below—I’d love to hear your story and discuss strategies to overcome it!
Finally, exploring resources like this guide can provide deeper insights to help you succeed in your home improvement journey.